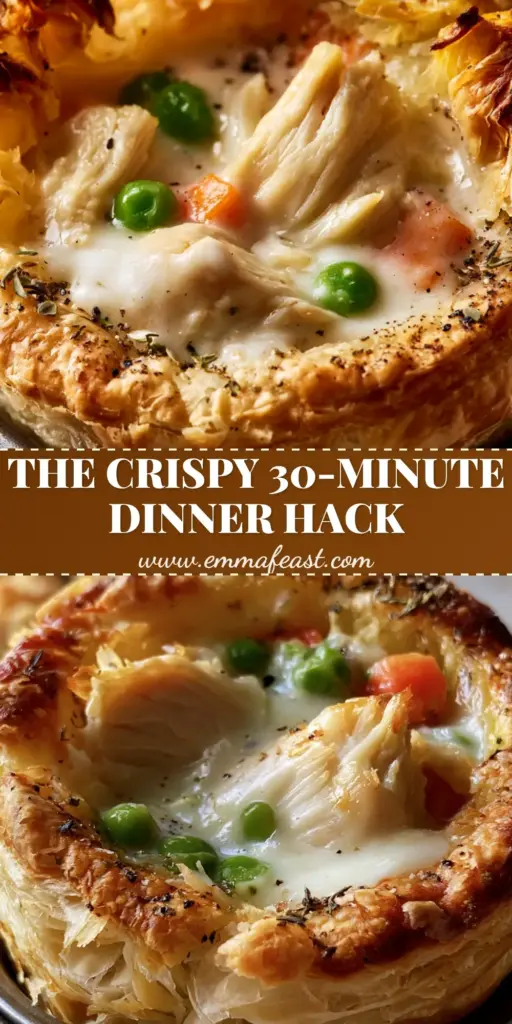
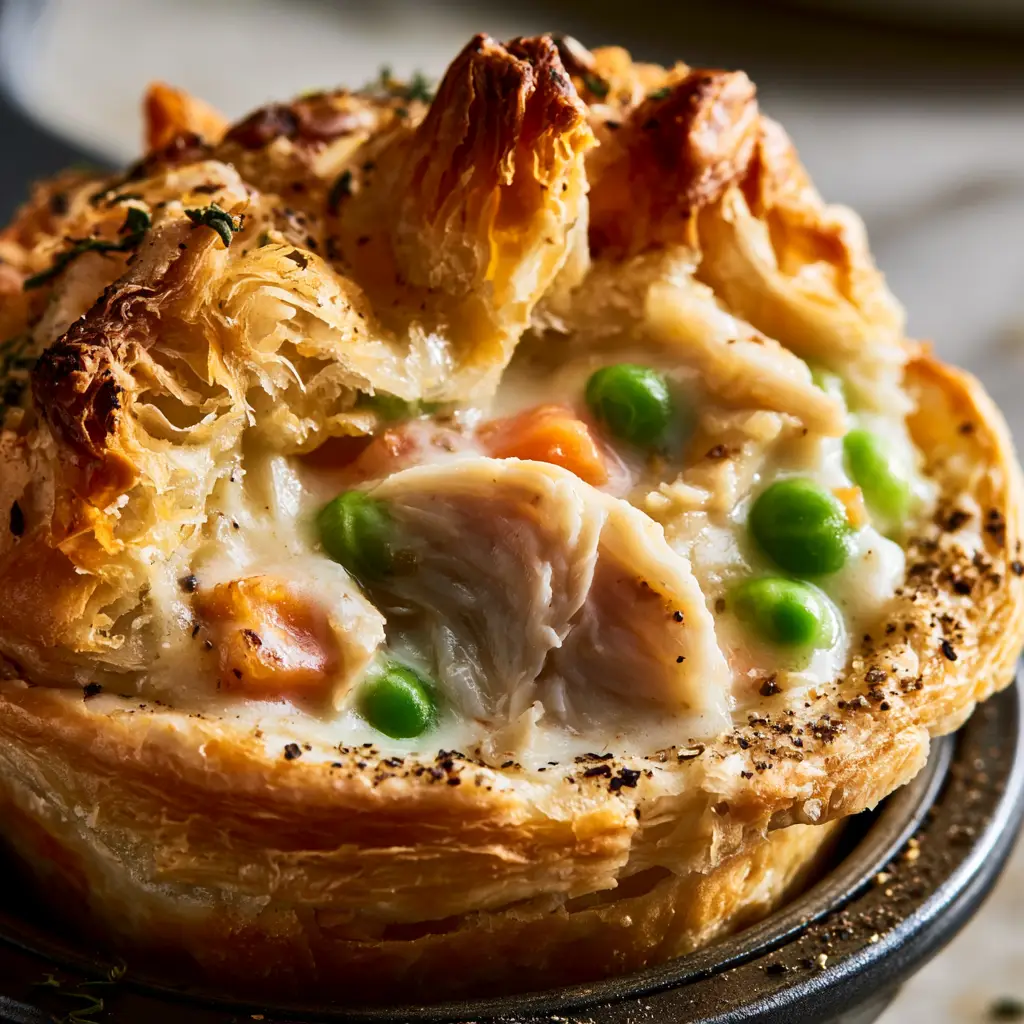
There is something inherently comforting about a personal-sized savory pie, and these mini chicken pot pies are the absolute pinnacle of cozy home cooking. Imagine a handheld vessel made of multi-layered golden puff pastry that shatters with every bite, revealing a steaming, velvety center of shredded chicken and garden-fresh vegetables.
Designed for the enthusiastic home cook who values both efficiency and gourmet texture, this recipe focuses on the “360-degree golden crunch” that only a dark non-stick muffin tin and high-quality pastry can provide. Whether you are looking for a sophisticated appetizer or a fun family meal, these pies deliver the ultimate sensory experience.
From the visible shards of crisp dough and airy pockets to the thick, heavy cream sauce that coats every morsel of rotisserie chicken, this recipe is a masterclass in textural contrast. Let’s dive into how you can achieve that professional, smartphone-photo-worthy finish in your own kitchen.
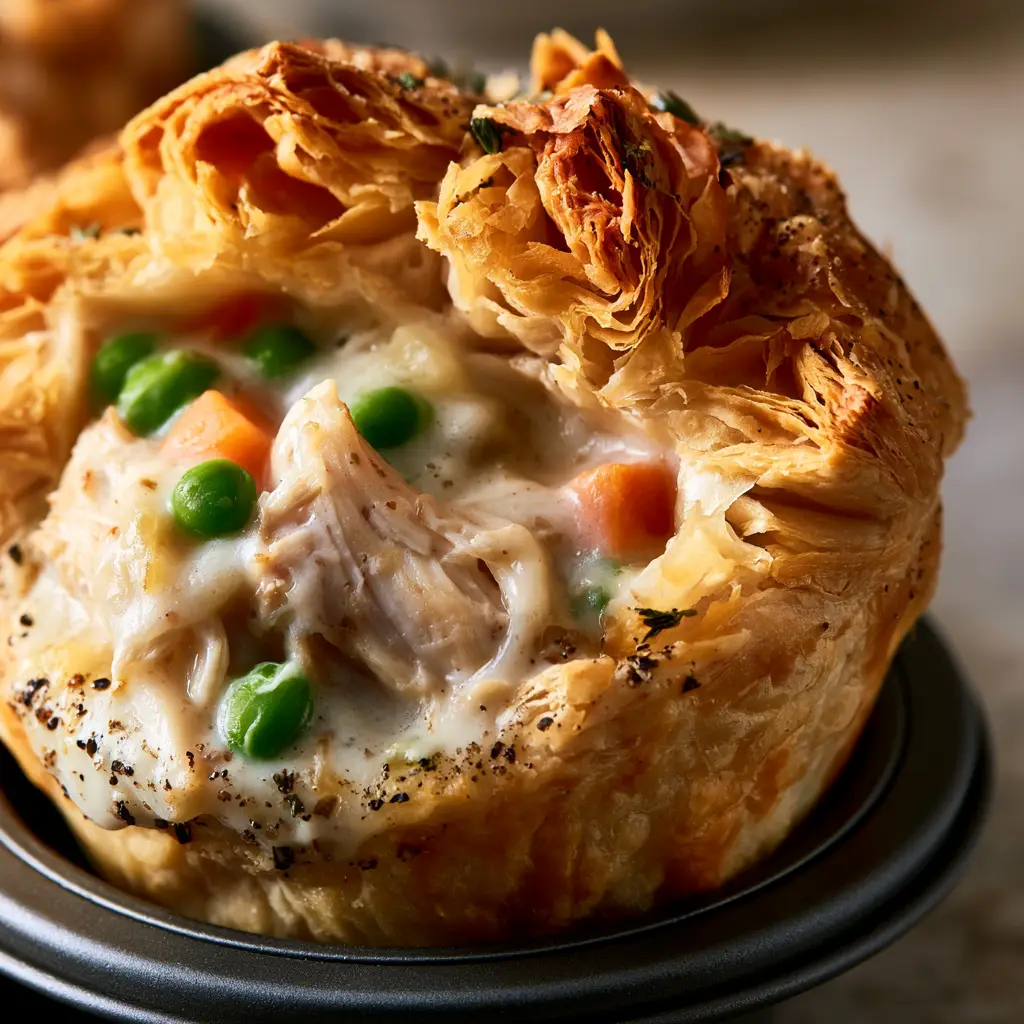
The Secret to the Ultimate Flaky Mini Savory Pies
- Extreme Flakiness: By utilizing chilled puff pastry and high-heat baking, we create distinct air pockets and visible shards of crisp dough.
- Velvety Sauce Base: A foundational roux enriched with heavy cream ensures the filling is thick and luxurious, never runny.
- Rotisserie Shortcut: Using pre-cooked shredded chicken allows the flavors to meld quickly while ensuring the meat remains tender and succulent.
- Perfect Portions: The use of a dark muffin tin creates a deep golden-brown crust on all sides of the pie, not just the top.
Essential Components for Your Gourmet Mini Chicken Pot Pies
To achieve the specific visual and flavor profile described in our blueprint, every ingredient must serve a culinary purpose. Here is what you will need to gather for these mini chicken pot pies.
The Pastry and Protein
Puff Pastry Sheets: You will need 2 sheets (approximately 450g) of high-quality frozen puff pastry, thawed but kept very cold. This provides the multi-layered golden architecture required for that signature crunch.
Shredded Rotisserie Chicken: 2 cups (300g) of chicken provide the hearty, savory bulk of the filling. Using rotisserie chicken is a pro-tip for easy chicken dinner ideas because it carries deep, slow-roasted flavor.
The Velvety Vegetable Filling
Steamed Green Peas: 1/2 cup (75g) of garden-green peas add a pop of color and sweetness. We steam them briefly first to ensure they stay vibrant and don’t turn mushy during the bake.
Diced Tender Carrots: 1/2 cup (75g) of small-diced carrots provide a soft, earthy sweetness. Ensure the cubes are small (about 1/4 inch) to match the scale of the mini pies.
Heavy Cream: 1/2 cup (120ml) of thick heavy cream is the secret to the “velvety white” appearance seen in the visual blueprint. It creates a rich mouthfeel that milk simply cannot replicate.
Aromatics and Invisible Foundations
Unsalted Butter: 2 tbsp (30g) is used to sauté the aromatics and build the roux. This adds a foundational richness to the sauce.
All-Purpose Flour: 2 tbsp (20g) acts as the thickening agent when combined with butter. This ensures your sauce doesn’t soak into the pastry and make it soggy.
Chicken Stock: 1 cup (240ml) of high-quality stock thins the roux into a savory gravy before the cream is added.
Dried Thyme Leaves: 1 tsp (1g) provides that classic herbal note. You will see a light dusting of this on the final pastry rim for visual and aromatic appeal.
Cracked Black Pepper and Flaky Sea Salt: These are essential for seasoning. The cracked pepper adds a sharp bite, while the sea salt flakes provide a final crystalline crunch on the golden crust.
Professional Tools for a Golden Crust
Achieving the “Ultra-close up macro photography” look requires the right equipment. The most important tool is a dark non-stick muffin tin. The dark metal absorbs more heat, which is what gives the puff pastry its 360-degree deep golden-brown color.
You will also need a 3.5-inch (9cm) circular cookie cutter to create the pastry bases and a slightly smaller cutter for the tops. A silicone pastry brush is vital for applying the egg wash that creates the glossy, lacquered finish on the pastry shards.
Step-by-Step Evolution of the Perfect Mini Chicken Pot Pies
Follow these instructions carefully to ensure your mini chicken pot pies have the structural integrity to be lifted out of the tin without breaking, just like in our visual prompt.
Preparing the Thick Cream Filling
In a medium saucepan over medium heat, melt the butter until it begins to foam. Whisk in the flour and cook for 1-2 minutes until it smells slightly nutty but remains pale; this is your roux base.
Slowly pour in the chicken stock while whisking constantly to prevent lumps. Once the mixture thickens and bubbles, stir in the heavy cream, dried thyme, and cracked black pepper. The sauce should be thick enough to coat the back of a spoon—this is the “velvety white cream sauce” we are looking for.
Fold in the shredded rotisserie chicken, steamed peas, and diced carrots. Taste and add salt as needed. Remove from heat and let the mixture cool significantly before filling the pastry; hot filling will melt the butter in the puff pastry layers, ruining the flake.
Architecting the Puff Pastry Shells
Roll out your chilled puff pastry on a lightly floured stone countertop. Use your 3.5-inch cutter to stamp out 12 circles. Gently press these into the cups of your dark non-stick muffin tin, ensuring the pastry reaches slightly above the rim.
If you enjoy creative crusts, you might find inspiration in our mini taco cups recipe for different ways to mold dough into tins. For these pot pies, we want a traditional “nest” shape.
Assembly and the Golden Bake
Spoon the cooled chicken mixture into each pastry-lined cup, filling them nearly to the top. To achieve the “slightly open” look from the prompt, you can either leave the tops off or place a smaller circle of pastry on top, leaving the edges unsealed.
Brush the exposed pastry edges with a simple egg wash (1 egg beaten with 1 tbsp water). Sprinkle a light dusting of dried thyme and extra cracked black pepper over the rims. This creates the visible seasoning seen in the macro photography.
Bake at 400°F (200°C) for 18-22 minutes. You are looking for a specific sensory cue: the pastry should be audibly crisp when tapped, and you should see visible “shards” of dough pulling away from the main crust, indicating perfect lamination.
Expert Tips for Success
- Keep it Cold: If the puff pastry gets too warm, the butter layers will merge. If this happens, pop the tray in the freezer for 10 minutes before baking to restore the “air pockets.”
- Soggy Bottom Prevention: Using a dark metal tin is the first step. The second is ensuring your filling is thick and cooled before assembly.
- The Rotisserie Factor: Don’t overlook the skin! If you finely chop some of the roasted chicken skin and mix it into the filling, you add an extra layer of umami.
- Steam Control: If you use a full top crust, cut a small “X” in the center to let steam escape, which prevents the “velvety sauce” from exploding out the sides.
Storage, Reheating, and Freezing
These mini chicken pot pies are best enjoyed fresh from the oven to experience the maximum crunch. However, you can store leftovers in an airtight container in the refrigerator for up to 3 days.
To reheat, avoid the microwave as it will make the puff pastry rubbery. Instead, place them back in a 350°F (175°C) oven for 8-10 minutes until the pastry crisps back up. These also freeze beautifully! Flash freeze them on a tray before transferring to a bag; bake from frozen, adding 5-7 minutes to the total time.
What to Serve With This Savory Treat
Since these pies are rich and creamy, they pair beautifully with a light, acidic side salad. If you are planning a full “comfort food” spread, consider adding some crispy chicken tenders for the kids or a side of chicken and broccoli for some extra greens.
For those who love a bit of heat with their savory pastry, a drizzle of hot honey—similar to what we use in our hot honey chicken—can provide a stunning sweet-and-spicy contrast to the heavy cream sauce.
Frequently Asked Questions
Absolutely! Assemble them in the muffin tin, then freeze the whole tin. Once solid, pop them out into a freezer bag. Bake from frozen, adding about 5-10 minutes to the original bake time.
Yes, you can use standard pie dough, but you will lose the multi-layered air pockets and ‘shards’ of crisp dough characteristic of puff pastry. We recommend puff pastry for the best textural contrast.
We recommend steaming the carrots and peas until just tender before adding them to the sauce. Because the bake time is short, raw vegetables may remain too crunchy inside the pie.
Two secrets: First, use a dark-colored non-stick muffin tin to absorb more heat. Second, ensure your chicken and cream filling is completely cooled before placing it into the raw pastry.
To maintain the flakiness, reheat them in an oven or air fryer at 350°F (175°C) for 8-10 minutes. Avoid the microwave, as it makes the pastry soft and rubbery.
The Ultimate Mini Chicken Pot Pies Recipe
Mini Chicken Pot Pies with Flaky Puff Pastry and Heavy Cream Sauce
Ingredients
Equipment
Method
- Melt butter in a saucepan over medium heat. Whisk in flour and cook for 1-2 minutes without browning.
- Slowly whisk in chicken stock, then heavy cream. Simmer until thick and velvety.
- Stir in shredded chicken, steamed peas, carrots, thyme, and pepper. Cool completely.
- Cut 12 circles from the puff pastry and press into a dark muffin tin.
- Spoon filling into shells. Brush edges with egg wash and dust with extra thyme and sea salt.
- Bake at 400°F (200°C) for 18-22 minutes until golden brown with visible shards of crisp dough.
Notes
Tip 2. Use a dark metal muffin tin for the best 360-degree golden crunch.
Join the Emma Feast Community!
We hope these mini chicken pot pies become a staple in your revolving door of easy chicken dinner ideas. The combination of a 360-degree golden crunch and a velvety center is truly unbeatable. If you make this recipe, please leave a comment below and let us know how your pastry turned out!
Don’t forget to take a photo and share it with us by tagging @emma_feast_official. For more visual inspiration and to save this recipe for later, follow us on Pinterest.