There is a specific, audible crunch that defines the perfect crispy malibu chicken, a sound that promises a succulent interior protected by a fortress of golden-brown panko. This recipe isn’t just a meal; it is a masterclass in textural contrast, featuring a jagged, ultra-crispy exterior that yields to the salty depth of smoked ham and the gooey, bubbly richness of melted Swiss cheese.
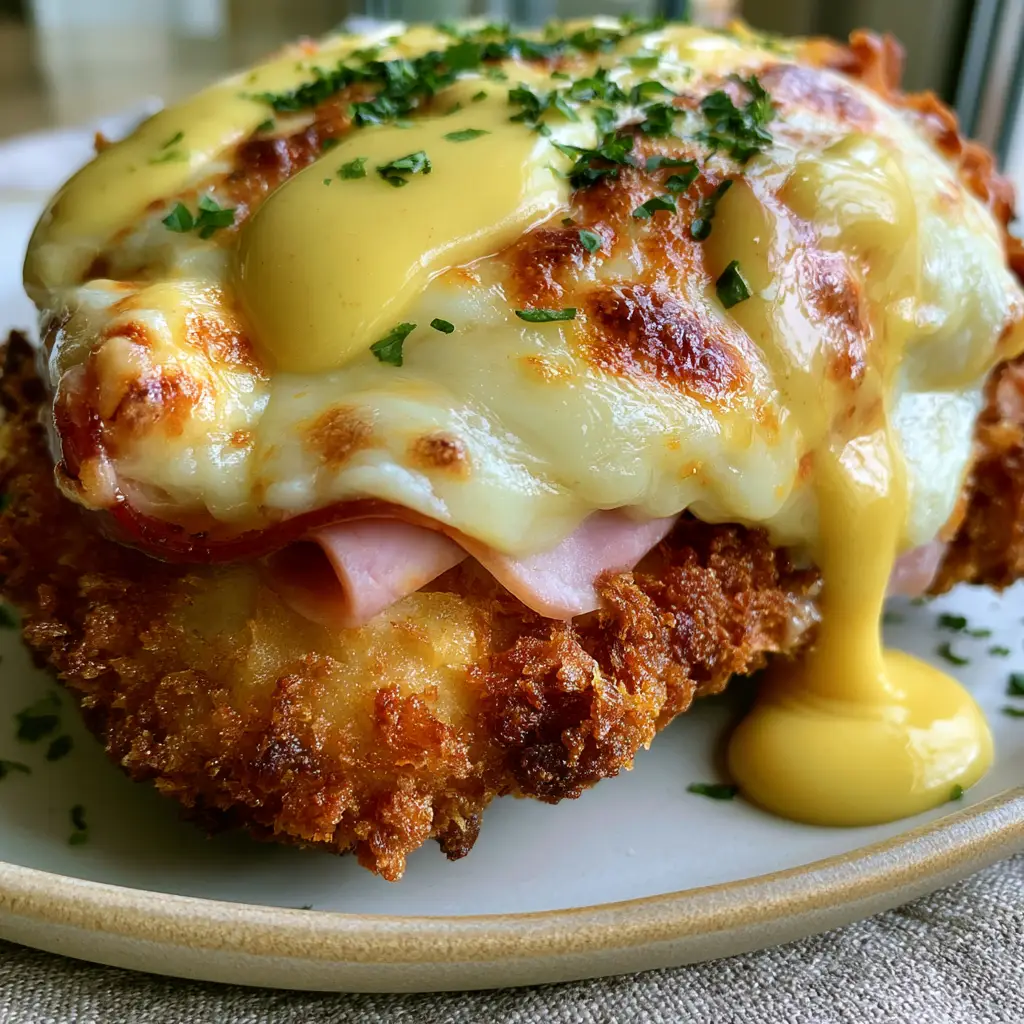
Inspired by the iconic restaurant favorite but elevated for the discerning home cook, this version focuses on the forensic details that make a dish legendary. We are looking for those specific toasted golden spots on the cheese and a honey mustard sauce thick enough to coat a spoon yet fluid enough to pool artistically on an artisanal ceramic plate.
Whether you are preparing a weeknight dinner or looking to impress guests with a professional-grade entrée, this crispy malibu chicken delivers a multi-sensory experience. From the soft, diffused side-lighting of your dining room to the first bite of that toasted panko, every element has been engineered for maximum culinary impact.
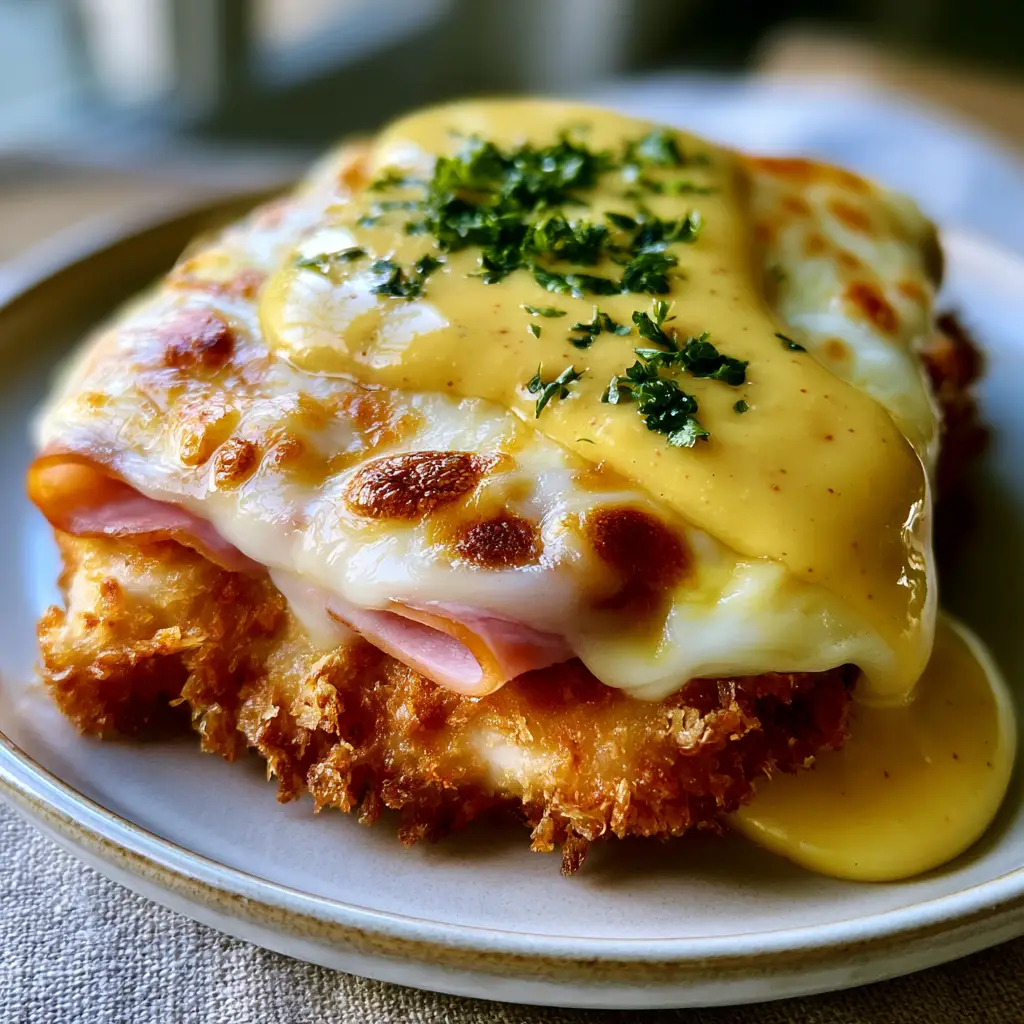
The Anatomy of the Perfect Golden-Brown Panko Crust
- Jagged Panko Texture: Unlike standard breadcrumbs, panko flakes are larger and airier, creating those essential “jagged” peaks that catch the light and the sauce.
- Smoked Ham Layers: Using a thin, folded slice of high-quality smoked ham adds a savory, salty punch that cuts through the richness of the dairy.
- Toasted Swiss Bubbles: We achieve visible golden spots by finishing the chicken under a high broiler, ensuring the cheese has a soft, gooey pull at the edges.
- Creamy Honey Mustard: A thick, vibrant yellow sauce provides the necessary acidity and sweetness to balance the fried elements.
- Fresh Parsley Finish: A light dusting of finely chopped flat-leaf parsley adds a final pop of color and a burst of herbaceous freshness.
The Essential Components for Restaurant-Quality Results
To achieve the specific visual and structural integrity described in our culinary blueprint, each ingredient must serve a scientific purpose. We don’t just bread the chicken; we build a foundation of flavor.
Chicken Breasts: 2 large (approx. 1 lb / 450g) boneless, skinless chicken breasts. You want thick breasts that can be halved or pounded to an even 1/2-inch thickness for uniform cooking and a moist interior.
All-Purpose Flour: 1/2 cup (65g) for the initial dredge. This “invisible” ingredient is critical as it absorbs surface moisture, allowing the egg wash to adhere perfectly to the meat.
Large Eggs: 2 large eggs, beaten. The egg proteins act as the glue, binding the jagged panko flakes to the flour-dusted chicken surface.
Panko Breadcrumbs: 1.5 cups (90g) of Japanese-style panko. These are the secret to that ultra-crispy, golden-brown coating that stays crunchy even under the weight of melted cheese.
Smoked Ham: 4 thin slices (approx. 2 oz / 60g) of quality smoked deli ham. Folding the ham creates vertical height and pockets for the cheese to settle into.
Swiss Cheese: 4 thick slices (approx. 4 oz / 115g) of Swiss. Swiss is chosen for its specific melting point and its ability to develop those beautiful toasted brown bubbles under heat.
High-Heat Oil: 1/4 cup (60ml) of neutral oil (like avocado or vegetable oil). A shallow fry is necessary to achieve the deep golden-brown color without burning the breadcrumbs.
Honey Mustard Sauce: A blend of 1/4 cup (60g) Dijon mustard, 2 tbsp (30ml) honey, and 2 tbsp (30g) mayonnaise. The mayo provides the “creamy yellow” appearance and thick consistency seen in the visual prompt.
Fresh Parsley: 1 tbsp (4g) finely chopped fresh flat-leaf parsley. This is our primary garnish, providing a sharp visual contrast against the warm tones of the chicken.
Professional Culinary Tools for Precision
Achieving a handheld smartphone photo-worthy result requires the right gear. A heavy-bottomed stainless steel or cast-iron skillet is non-negotiable for even heat distribution during the searing process.
You will also need a wire cooling rack set over a baking sheet. This allows air to circulate under the chicken, preventing the bottom from becoming soggy while the Swiss cheese melts. Finally, a kitchen torch or a reliable oven broiler is essential for creating the toasted spots on the cheese surface.
If you enjoy the process of crafting complex poultry dishes, you might also find success with our savory black pepper chicken or for a slower pace, our classic slow cooker chicken methods.
Step-by-Step Execution: From Dredging to Drizzling
Preparing the Chicken Foundation
Start by slicing your chicken breasts horizontally to create four even cutlets. Place them between sheets of plastic wrap and gently pound them to a consistent 1/2-inch thickness. Season both sides generously with sea salt and cracked black pepper, as these foundational seasonings enhance the natural savory notes of the poultry.
Set up a three-station breading line: one bowl with flour, one with the beaten eggs, and one with the panko. Dredge each cutlet in flour, shake off the excess, dip into the egg wash, and finally press firmly into the panko. Ensure every nook and cranny is covered in those jagged flakes for maximum crunch.
Achieving the Ultra-Crispy Golden Sear
Heat your oil in the skillet over medium-high heat until it shimmers. Carefully lay the chicken in the pan, moving away from you to avoid splashes. Sear for 3-4 minutes per side until the panko reaches a deep, vibrant golden-brown hue.
Listen for the sizzle; if the pan is too quiet, the breading will absorb oil and become greasy. If it smokes, the panko will burn before the chicken is cooked through. Once seared, transfer the cutlets to your wire rack on the baking sheet.
The Assembly: Ham, Swiss, and the Perfect Melt
Fold one slice of smoked ham neatly on top of each crispy chicken breast. Layer a thick slice of Swiss cheese over the ham, allowing the edges to hang slightly. Place the baking sheet under a preheated broiler for 2-3 minutes.
Watch closely through the oven window. You are looking for the cheese to transition from solid to a gooey, flowing state, eventually developing those characteristic toasted golden spots. This is the “Visual Recipe Blueprint” coming to life in your own kitchen.
Expert Tips for the Ultimate Malibu Chicken
- The Temperature Key: Ensure your chicken is at room temperature for 15 minutes before cooking. This prevents the “cold core” issue where the breading burns before the meat is safe to eat.
- Panko Adhesion: After breading, let the chicken rest on a plate for 5 minutes before frying. This helps the “glue” set, ensuring the breading doesn’t fall off in the pan.
- The Sauce Drizzle: To achieve the “artistic drizzle” seen in the photos, put your honey mustard in a small piping bag or a plastic bag with the corner snipped off.
- Avoid Overcrowding: Fry the chicken in batches if necessary. Overcrowding the pan drops the oil temperature, leading to soggy panko rather than the jagged, crispy texture we desire.
What to Serve with Crispy Malibu Chicken
This dish is rich and decadent, so it pairs beautifully with sides that offer a bit of acidity or lightness. A crisp green salad or roasted asparagus are excellent choices. If you are looking for a more indulgent meal, consider serving it alongside our tender melting cabbage for a unique vegetable pairing.
For those who love a cheesy theme throughout their meal, you could even start with stuffed mini peppers as an appetizer. To finish the evening on a bright note, our mini lemon cheesecakes provide the perfect citrusy contrast to the savory Swiss and ham.
Storage, Reheating, and Meal Prep
Crispy malibu chicken is best enjoyed immediately to preserve the crunch of the panko. However, leftovers can be stored in an airtight container in the refrigerator for up to 3 days. To reheat, avoid the microwave at all costs, as it will turn the breading soft and rubbery.
Instead, place the chicken in an air fryer at 350°F (175°C) for 4-5 minutes, or in a toaster oven. This will revitalize the panko’s texture and bring the Swiss cheese back to its gooey state. We do not recommend freezing the fully assembled dish, as the honey mustard and Swiss cheese do not thaw with the original textural integrity.
Frequently Asked Questions
Yes, air fry the breaded chicken at 375°F (190°C) for 12-15 minutes, adding the ham and cheese for the last 2 minutes.
Ensure the chicken is patted dry before dredging in flour, and allow the breaded chicken to rest for 5 minutes before frying to set the ‘glue’.
We recommend a blend of Dijon for sharp flavor and honey for sweetness, tempered with mayo for a professional creamy texture.
Use the oven’s broiler setting and place the chicken on the top rack, watching it closely for 1-3 minutes until golden spots appear.
The thickness comes from the mayonnaise. If it is too thin, whisk in another tablespoon of mayo until the desired creamy consistency is reached.
The Ultimate Crispy Malibu Chicken Recipe Card
Crispy Malibu Chicken with Toasted Swiss and Honey Mustard Sauce
Ingredients
Equipment
Method
- Cut chicken breasts in half horizontally and pound to 1/2-inch thickness. Season with salt and pepper.
- Set up bowls for flour, egg, and panko. Dredge chicken in flour, dip in egg, and press firmly into panko.
- Heat oil in a skillet over medium-high. Fry chicken for 3-4 minutes per side until deep golden-brown.
- Place chicken on a wire rack. Top with folded ham and Swiss cheese. Broil until cheese has toasted golden spots.
- Whisk sauce ingredients together. Drizzle over the chicken and garnish with chopped parsley.
Notes
Ensure the oil is hot enough to create a 'jagged' crust immediately.
Bringing the Malibu Experience Home
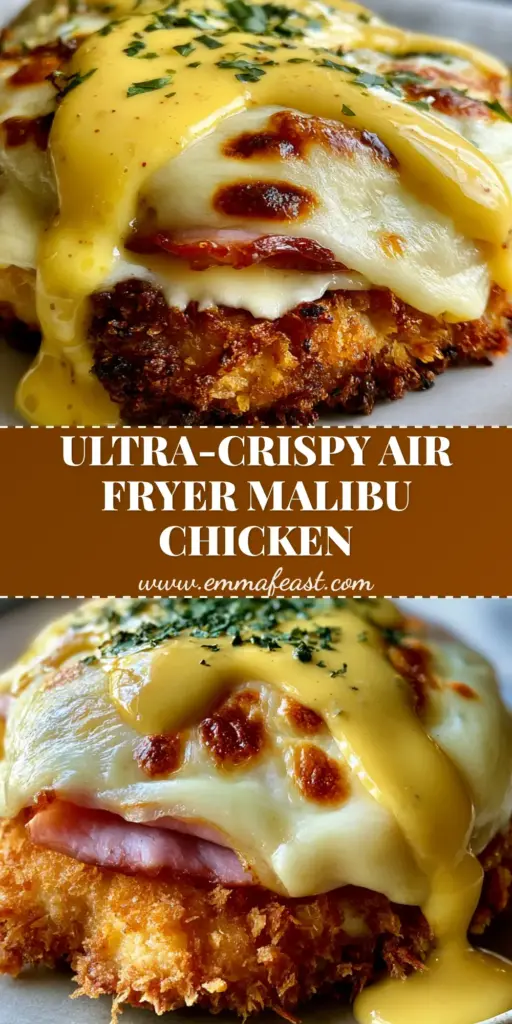
This crispy malibu chicken is a testament to how professional techniques and high-quality ingredients can transform a simple chicken breast into a gourmet experience. The combination of the jagged panko, the salty smoked ham, and the toasted Swiss creates a flavor profile that is both nostalgic and sophisticated. We hope this recipe becomes a staple in your kitchen, providing that perfect crunch every single time.
If you enjoyed this recipe, please leave a comment below and let us know how your toasted Swiss bubbles turned out! Don’t forget to share your creations with us on Pinterest and follow Emma Feast for more culinary inspiration.