The burger bowls movement has officially revolutionized the way we think about comfort food. Imagine every single flavor profile of a world-class cheeseburger—the salty sear of the beef, the sharp tang of cheddar, and the cool crunch of garden-fresh vegetables—all brought together in one vibrant, deconstructed masterpiece. This recipe isn’t just a salad; it is a high-protein, textures-focused experience designed to satisfy your deepest cravings without the weight of a heavy bun.
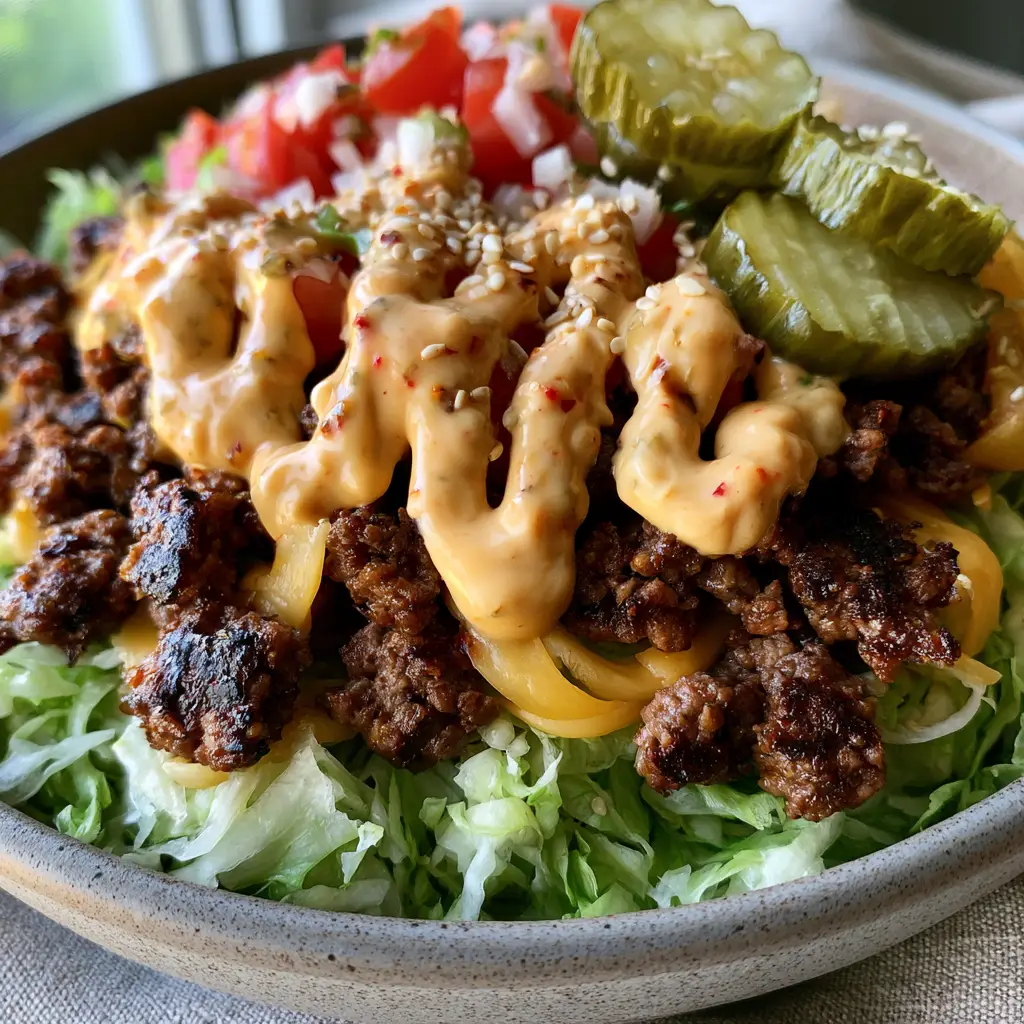
What sets these burger bowls apart is the commitment to visual and sensory contrast. We are moving beyond simple browned meat to achieve those sought-after charred, crispy edges that provide a smoky depth to every bite. When you pair that heat with a thick, glossy zigzag of our signature pale-orange special sauce, you create a culinary bridge between a backyard barbecue and a gourmet bistro. Whether you are looking for high-protein dinners or a fresh twist on family night, this bowl delivers.
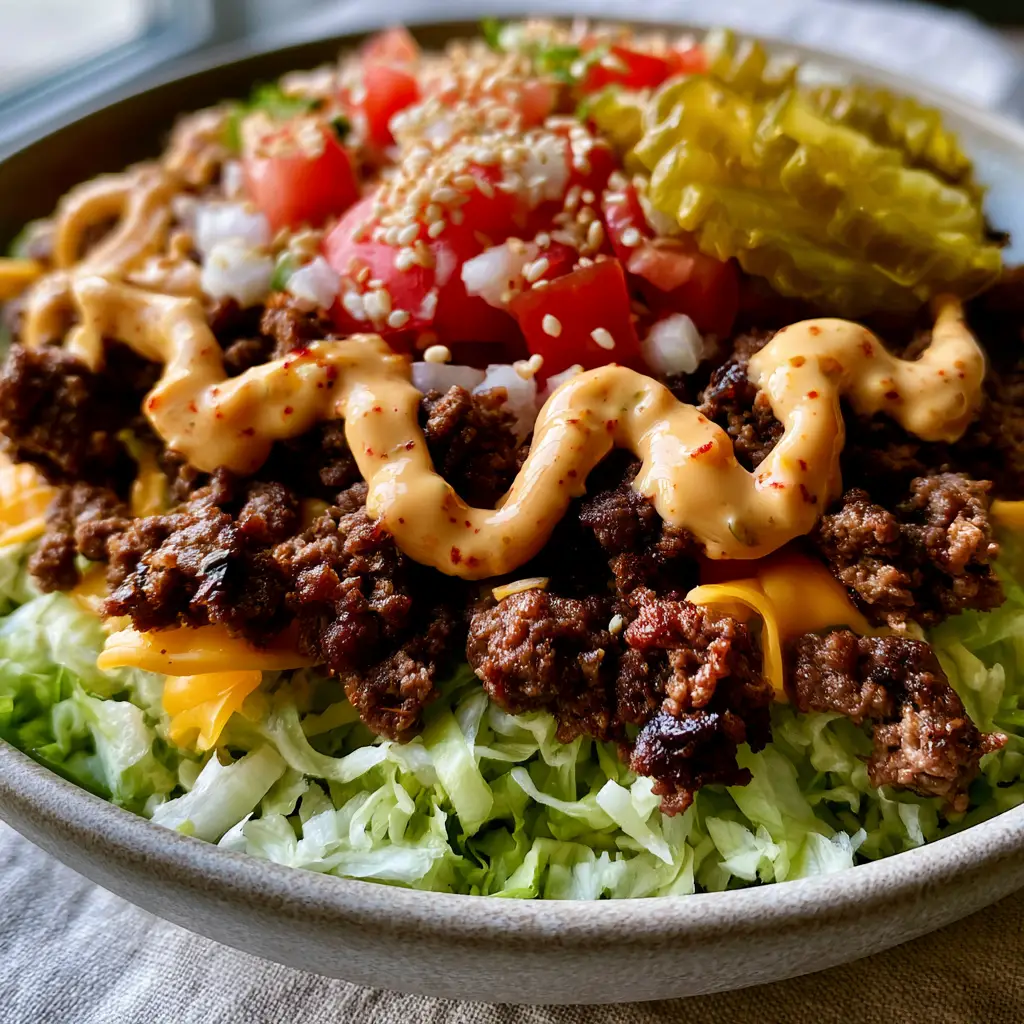
Our visual blueprint for this dish demands precision: a mountain of ultra-crisp iceberg lettuce serving as the foundation for ribbons of melted sharp cheddar and a final dusting of toasted sesame seeds. This is a dish that looks as professional as it tastes, capturing that “unedited” handheld smartphone photo aesthetic that celebrates real, delicious food. Let’s dive into the science of building the perfect bowl.
Why These Deconstructed Burger Bowls Are a Total Game Changer
- The “Maillard” Sear: We use specific high-heat techniques to ensure your ground beef has those distinct seared, crispy edges seen in the best smash burgers.
- Sensory Contrast: You get the thermal shock of hot, juicy beef meeting ice-cold, finely shredded iceberg lettuce for a refreshing yet satisfying mouthfeel.
- The Secret Sauce: A creamy, pale-orange emulsion with visible flecks of paprika and sweet relish that ties the acidic pickles and savory meat together.
- Visual Sophistication: Garnished with bright red Roma tomatoes, minced white onions, and thick crinkle-cut pickles, this bowl is a vibrant explosion of color.
- Customizable Base: While we love the classic beef profile, this method works beautifully if you want to swap in ingredients from our ground-turkey lettuce wraps for a leaner profile.
Essential Components for the Ultimate Burger Bowl
To achieve the exact visual and flavor profile described in our blueprint, every ingredient serves a specific culinary purpose. We don’t just use “lettuce”; we use finely shredded iceberg for its high water content and structural “mountain” effect.
Ground Beef (80/20 Blend): Use 1 lb (454g) of ground chuck. The 20% fat content is foundational for achieving those crispy, charred edges without drying out the meat. If you prefer a different protein, you might enjoy the flavor profile of Korean bulgogi beef bowls, but for this classic version, high-fat beef is king.
Sharp Cheddar Cheese: You will need 1 cup (113g) of freshly shredded sharp cheddar. Pre-shredded cheese is coated in potato starch; shredding your own ensures those “ribbons” drape perfectly over the warm meat as they melt.
Iceberg Lettuce: One large head (approx. 500g). Shredding it as finely as possible creates the maximum surface area for the sauce to cling to, providing that “mountain” look in the ceramic bowl.
The “Secret” Special Sauce: A blend of 1/2 cup (120ml) mayonnaise, 2 tbsp (30ml) yellow mustard, 1 tbsp (15ml) ketchup, and 2 tbsp (30g) sweet pickle relish. The addition of 1 tsp (2g) of smoked paprika provides those visible red flecks and a hint of woodsy heat.
Aromatic & Acidic Garnishes: 2 large Roma tomatoes (diced), 1 small white onion (minced), and 1/2 cup (75g) crinkle-cut dill pickles. These provide the essential acidic lift that cuts through the richness of the beef and cheese.
Toasted White Sesame Seeds: 1 tbsp (9g). Do not skip this; the subtle nuttiness and white-on-orange visual contrast against the sauce are what make the dish pop.
Kitchen Tools for Professional Results
To replicate the macro-texture of the seared beef crumbles, a standard non-stick pan won’t suffice. You need a 12-inch (30cm) cast-iron skillet or a heavy-bottomed stainless steel pan. These materials retain heat efficiently, allowing the beef to sear rather than steam.
You will also need a sharp chef’s knife for the “minced” white onions and “finely shredded” lettuce. Achieving that handheld smartphone photo look requires uniform cuts. A mandoline slicer can be helpful for the lettuce, but a steady hand and a sharp blade are the professional’s choice. Finally, use a squeeze bottle or a small spoon to achieve the “thick glossy zigzag” drizzle of the sauce.
Mastering the Perfect Pan-Sear and Assembly
Step 1: Achieving the Charred Beef Edges
Place your cast-iron skillet over medium-high heat with 1 tbsp (15ml) of high-smoke-point oil (like avocado oil). Once the oil is shimmering and just beginning to smoke, add the ground beef in large chunks rather than breaking it up immediately. Let it sit undisturbed for 3-4 minutes. You are looking for a deep, mahogany crust to form—this is the secret to the “seared edges” in the visual prompt.
Step 2: Seasoning and Shredding the Cheese
Once the bottom is charred, break the meat into smaller crumbles with a stiff spatula. Season with 1 tsp (6g) kosher salt and 1/2 tsp (1g) black pepper. Immediately sprinkle the shredded sharp cheddar over the meat while it is still in the pan. Turn off the heat and cover the pan for 60 seconds; the residual heat will create those beautiful melted cheese ribbons.
Step 3: Creating the “Mountain” of Greens
In a wide, matte-textured shallow ceramic bowl, pile the finely shredded iceberg lettuce. Do not pack it down; keep it light and airy to create height. If you enjoy this bowl-style presentation, you might also like our Chinese pepper steak recipe served over greens.
Step 4: The Final Garnish and Sauce Drizzle
Spoon the warm, cheesy beef over the center of the lettuce. Surround the meat with clusters of diced Roma tomatoes, minced white onions, and a generous pile of crinkle-cut dill pickles. To finish, create a thick, glossy zigzag of the special sauce across the entire bowl, ensuring the paprika flecks are visible. Finish with a final dusting of toasted white sesame seeds.
Chef’s Pro-Tips for Maximum Flavor
- Cold Lettuce, Hot Meat: Always assemble the bowl immediately before serving. The contrast between the cold greens and the hot, charred beef is the hallmark of a professional burger bowl.
- Don’t Over-Stir: When browning the beef, the more you move it, the less it sears. Be patient; let the heat do the work to create that “crispy” texture.
- The Onion Soak: If you find raw white onions too pungent, soak the minced pieces in ice water for 10 minutes, then pat dry. This retains the crunch but removes the harsh sulfurous bite.
- Sauce Viscosity: If your sauce is too thick to drizzle, whisk in 1 tsp (5ml) of pickle juice. It thins the consistency while adding an extra layer of briny flavor.
What to Serve with Burger Bowls
While these bowls are a complete meal on their own, they pair beautifully with other high-texture sides. If you are hosting a gathering, consider adding these to a spread of baby shower food ideas for a crowd-pleasing, gluten-free option. For a more decadent weekend meal, you can serve these as a starter followed by pork medallions with onion gravy.
If you have leftover ingredients, the minced onions and tomatoes are the perfect base for a quick garnish on a chicken club sandwich. For those who love the “bowl” concept but want a different flavor profile, our chicken teriyaki noodles offer a savory, soy-based alternative.
Storage, Reheating, and Meal Prep
The beauty of the burger bowl is its meal-prep potential, provided you store the components correctly. Store the seared beef and melted cheese in an airtight container for up to 4 days. Keep the shredded lettuce, diced tomatoes, and minced onions in separate containers to prevent them from becoming soggy.
When reheating, only heat the beef component. Using a microwave for 45-60 seconds is sufficient, but reheating in a skillet will help maintain those crispy edges. Always add the cold vegetables and sauce *after* reheating the meat to preserve the textural integrity of the dish.
Frequently Asked Questions
Yes! These bowls are naturally low-carb and keto-friendly. Simply ensure your sweet relish in the special sauce is a sugar-free version to keep the net carb count as low as possible.
Absolutely. In fact, making the sauce 24 hours in advance allows the flavors of the paprika, mustard, and relish to meld, resulting in a more complex and balanced flavor profile.
While you can use 90/10 beef, an 80/20 blend is highly recommended to achieve the ‘charred edges’ described in the recipe. The extra fat renders out and allows the meat to fry in its own juices, creating that essential crispy texture.
For that professional ‘glossy zigzag,’ transfer the sauce to a small plastic squeeze bottle or a zip-top bag with a tiny corner cut off. This allows for a consistent, thick stream across the top of the bowl.
Use a very sharp chef’s knife to cut the iceberg lettuce into 1/8-inch ribbons. This fine shredding allows the lettuce to tangle together, creating a ‘mountain’ that supports the heavier beef and garnishes without collapsing.
The Ultimate Burger Bowl Recipe
Burger Bowls with Crispy Seared Beef and Creamy Secret Sauce
Ingredients
Equipment
Method
- In a small bowl, whisk together mayonnaise, mustard, ketchup, relish, and smoked paprika until smooth and glossy with visible flecks.
- Heat avocado oil in a cast-iron skillet over medium-high heat. Add beef in large chunks and let sit undisturbed for 4 minutes until charred edges form.
- Crumble the meat, season with salt and pepper, and top with shredded cheddar. Cover for 60 seconds until cheese forms melted ribbons.
- Divide shredded lettuce into four bowls. Top with the warm beef, diced tomatoes, minced onions, and pickles.
- Drizzle the special sauce in a zigzag pattern and finish with a dusting of toasted sesame seeds.
Notes
Tip 2: Shred your own cheese to avoid the anti-clumping starches found in pre-bagged versions.
Closing and Call to Action
Building the perfect burger bowl is about more than just tossing ingredients in a dish; it’s about the deliberate layering of textures and temperatures to recreate the soul of a classic cheeseburger. From the smoky, charred edges of the beef to the thick, creamy drizzle of the paprika-flecked sauce, every element is designed to delight. We hope this becomes a staple in your kitchen!
If you enjoyed this recipe, please leave a comment below and let us know how your sear turned out! Don’t forget to sign up for our newsletter for more professional culinary guides and share your creations with us on Pinterest. Happy cooking!