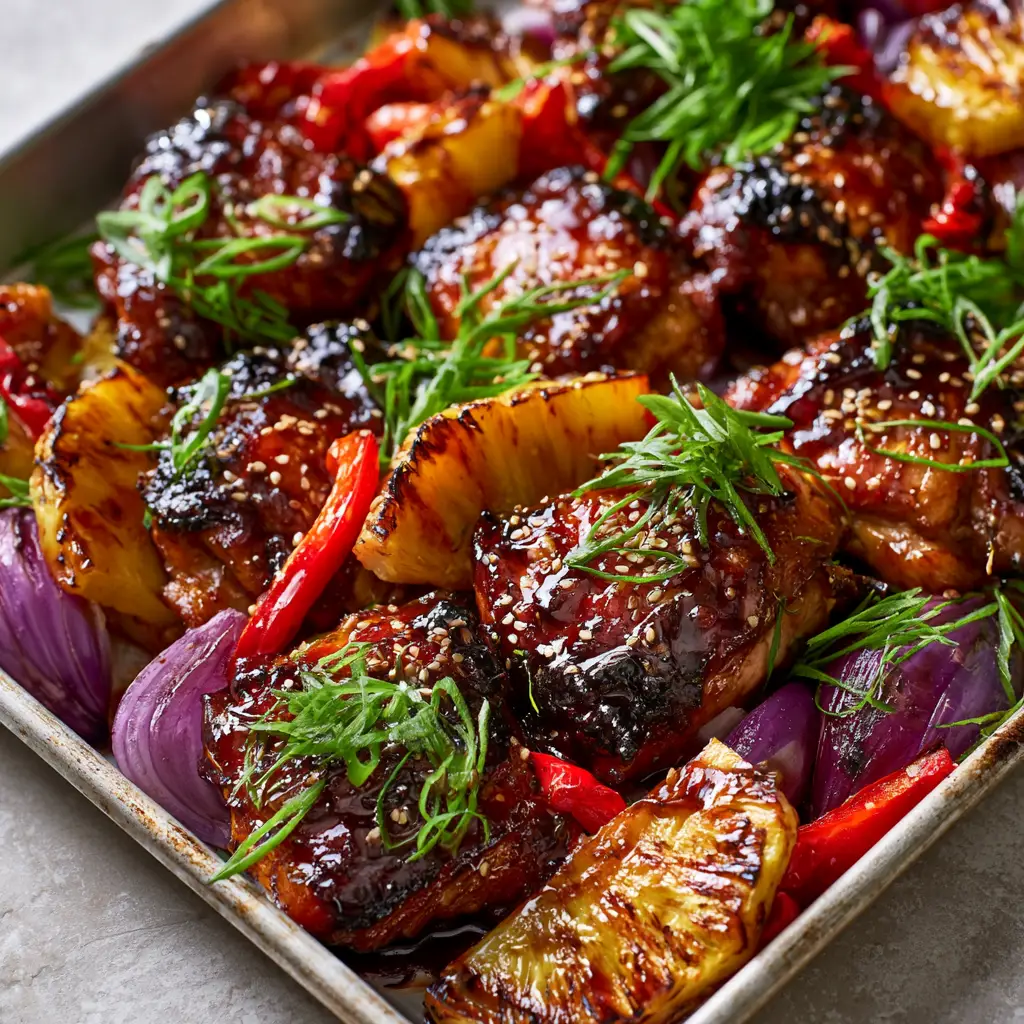
Experience the vibrant, sun-drenched flavors of the islands with this Huli Huli Chicken, a dish that defines the spirit of Hawaiian outdoor cooking. The secret to this recipe lies in the thick, glossy, dark mahogany-colored sticky glaze that coats every inch of the tender poultry.
Originally cooked over open pits where the chicken was turned frequently—”huli” means “turn” in Hawaiian—this version brings that authentic smoky-sweet profile to your home kitchen. We utilize a rustic aluminum sheet pan to achieve those iconic caramelized char marks that look as good as they taste.
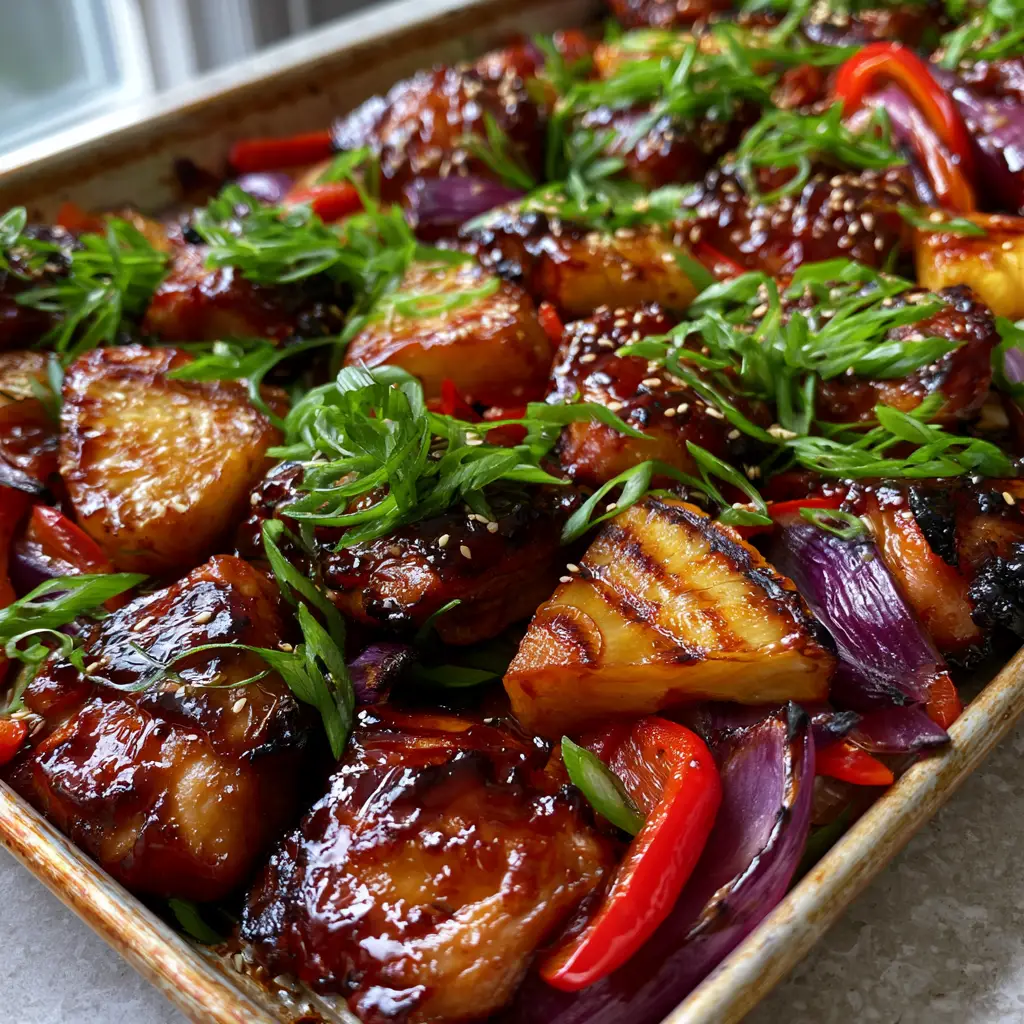
Imagine the aroma of ginger, garlic, and caramelized pineapple wafting through your kitchen as the broiler works its magic. The result is a visually stunning centerpiece featuring vibrant roasted red bell pepper strips, softened purple red onion wedges, and golden-brown pineapple with distinct grill marks.
Why This Hawaiian Glazed Chicken Recipe Works
- Perfect Texture Contrast: The contrast between the succulent juicy chicken thighs and the snap of charred red onion petals creates a professional-level mouthfeel.
- Visual Masterpiece: The deep mahogany sauce against the bright green scallions and toasted white sesame seeds makes this dish a showstopper for entertaining.
- Balanced Flavor Profile: The acidity of the pineapple juice cuts through the richness of the soy and brown sugar, ensuring the glaze isn’t cloyingly sweet.
- Sheet Pan Simplicity: By roasting everything together, the juices from the red peppers and onions mingle with the huli huli sauce, creating an integrated flavor base.
Essential Components for a Mahogany Glaze
To achieve the specific visual result described in our blueprint, every ingredient serves a dual purpose: flavor and aesthetics. We aren’t just making a sauce; we are building a lacquer that clings to the meat.
Chicken Thighs (Bone-in or Boneless): We recommend using thighs because their higher fat content allows them to withstand the high heat required for charring without drying out. These are far more forgiving than breasts when applying a heavy glaze.
Pineapple Juice: This is the acidic backbone of the marinade. The natural enzymes help tenderize the meat, while the sugars provide the foundation for the golden-brown seared edges on the pineapple wedges.
Dark Soy Sauce and Brown Sugar: The dark soy provides that essential mahogany hue, while the brown sugar creates the “sticky” factor. Together, they form a syrup that thickens significantly as it roasts.
Aromatic Minced Garlic and Ginger: Freshly minced garlic bits are visible in the final glaze, adding texture and a pungent counterpoint to the sweet fruit notes. Using fresh ginger is non-negotiable for that authentic island heat.
Vegetable Aromatics: Red bell pepper strips and red onion petals aren’t just for color; they provide a roasted sweetness that balances the salty soy sauce. They should be cut thick enough to maintain their shape under the broiler.
Tools Required for Professional Roasting
To replicate the handheld smartphone photo style, you need the right equipment to manage heat distribution. A rustic aluminum sheet pan is preferred over ceramic because it conducts heat rapidly, helping to sear the bottom of the pineapple wedges.
A heavy-duty pastry brush is essential for “painting” the mahogany sauce onto the chicken. You will also need a sharp chef’s knife to achieve those thin-sliced bright green scallions that provide the final pop of color.
For those who love specialized poultry techniques, you might compare this method to crispy skin methods or even the unique flavor profiles found in a classic vesuvio preparation, though our huli huli focuses more on the sugar-to-acid ratio.
Step-by-Step Instructions for the Perfect Huli Huli
Phase 1: The Mahogany Marinade Reduction
In a medium saucepan, combine 1 cup (240ml) pineapple juice, 1/2 cup (120ml) soy sauce, 1/2 cup (100g) packed brown sugar, 2 tbsp (30g) ketchup, and 1 tbsp (15g) rice vinegar. Whisk in 2 tbsp (12g) freshly grated ginger and 4 cloves of minced garlic.
Bring the mixture to a simmer over medium heat. Let it reduce by one-third until it coats the back of a spoon; this ensures the sauce is thick enough to create that glossy finish in the oven.
Phase 2: Preparing the Sheet Pan Components
Place 2 lbs (900g) of chicken thighs on a large sheet pan. Surround the chicken with 1 large red bell pepper, cut into 1/2-inch (1.25cm) strips, and 1 large red onion, cut into thick petals.
Nestle 1/2 of a fresh pineapple, cut into thick wedges, between the chicken pieces. Drizzle the vegetables and pineapple with 1 tbsp (15ml) of neutral oil and a pinch of salt to encourage caramelization.
Phase 3: The Glazing and Roasting Process
Preheat your oven to 400°F (200°C). Generously brush the chicken with the reduced huli huli sauce. Roast for 20 minutes, then remove the pan and brush again—this is the “huli” step that builds the layers of mahogany color.
Continue roasting for another 10-15 minutes until the chicken reaches an internal temperature of 165°F (74°C). The red bell peppers should be softened and the onion petals should show charred edges.
Phase 4: The Broiler Blast for Char Marks
Turn your broiler to high. Position the oven rack 6 inches (15cm) from the heat source. Watch closely for 2-3 minutes as the sugars in the glaze begin to bubble and blacken in spots, creating those characteristic caramelized char marks.
The pineapple wedges should develop deep golden-brown grill marks during this stage. The sauce will transform into a sticky, dark mahogany lacquer that looks incredible under natural side lighting.
Culinary Secrets for Success
- Don’t Overcrowd the Pan: If the chicken and vegetables are too close together, they will steam rather than roast. Use two pans if necessary to ensure the pineapple gets those seared edges.
- Natural Lighting Tip: If you are taking photos like our reference, place your sheet pan near a window with diffused natural light to highlight the glow of the sauce.
- Room Temperature Meat: Take the chicken out of the fridge 20 minutes before cooking. This ensures even roasting and a better sear.
- Sesame Toasting: Briefly toast your white sesame seeds in a dry pan for 60 seconds before garnishing to unlock their nutty aroma.
Ideal Pairings and Service Suggestions
This Huli Huli Chicken is a complete meal on its own, but it pairs beautifully with steamed jasmine rice to soak up the extra glaze. For a lower-carb option, serve it alongside fresh greens or even over a bed of inspired slaw.
If you’re hosting a larger gathering, consider adding this to a spread of party-friendly snacks. The vibrant colors make it a natural fit for festive occasions. Leftovers are equally delicious when shredded and added to teriyaki style noodles the next day.
Storing and Reheating Your Hawaiian Feast
Store any leftover chicken and vegetables in an airtight container in the refrigerator for up to 4 days. The sauce will thicken further when chilled, so it may appear less glossy until reheated.
To reheat, place the chicken back in a 350°F (175°C) oven for 10 minutes. Avoid the microwave if possible, as it can make the chicken rubbery and the pineapple soggy. A quick flash under the broiler can restore the sticky texture of the glaze.
Frequently Asked Questions
Yes, but be careful not to overcook them. Thighs are preferred because their higher fat content handles the high heat of the mahogany glaze and broiler much better.
While canned works, fresh pineapple wedges hold their shape better and develop superior char marks and caramelized edges under the broiler.
The color comes from the combination of soy sauce and brown sugar reducing. Simmering the sauce before baking ensures the pigments are concentrated and glossy.
Traditionally, it is sweet and savory. The ‘heat’ comes from fresh ginger rather than chili, making it a family-friendly dish that everyone can enjoy.
‘Huli’ means ‘turn.’ Traditionally, the chicken was cooked on a rotisserie or turned over an open flame, being basted with sauce each time it was flipped.
The Ultimate Hawaiian Huli Huli Chicken Recipe
Huli Huli Chicken: The Ultimate Sticky Hawaiian Sheet Pan Feast
Ingredients
Equipment
Method
- Simmer pineapple juice, soy sauce, brown sugar, ginger, and garlic in a saucepan for 10 minutes until thickened into a mahogany syrup.
- Place chicken, pineapple wedges, pepper strips, and onion petals on the sheet pan. Brush chicken generously with the sauce.
- Bake at 400°F (200°C) for 20 minutes.
- Remove from oven, flip chicken (huli), and apply another thick layer of glaze. Roast for 15 more minutes.
- Broil on high for 2-3 minutes until glaze is bubbling and char marks appear on chicken and pineapple.
- Sprinkle with sliced green scallions and toasted sesame seeds before serving.
Notes
Fresh pineapple is superior to canned for achieving those seared edges.
Join the Feast!
We hope this baked version of the island classic brings a bit of tropical sunshine to your dinner table. The combination of the mahogany glaze and charred pineapple is truly addictive. If you enjoyed this recipe, please leave a comment below and share your photos with us!
Don’t forget to follow us and save this recipe to your boards on Pinterest for your next family dinner. Happy cooking!