If you have been searching for the holy grail of low-carb snacking, these Crispy cottage cheese chips are about to change your culinary life. Imagine a snack that delivers the satisfying “shatter” of a potato chip but is powered by the protein-packed profile of cultured dairy.
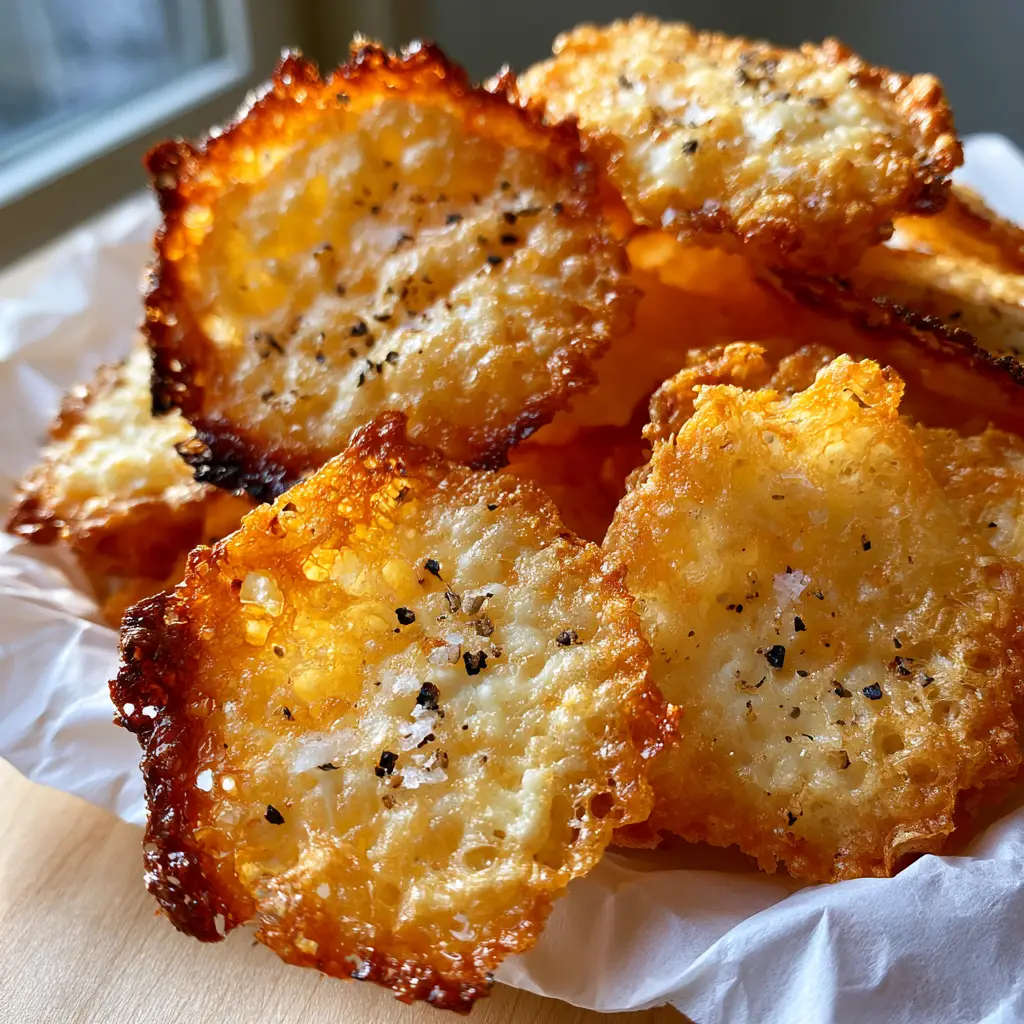
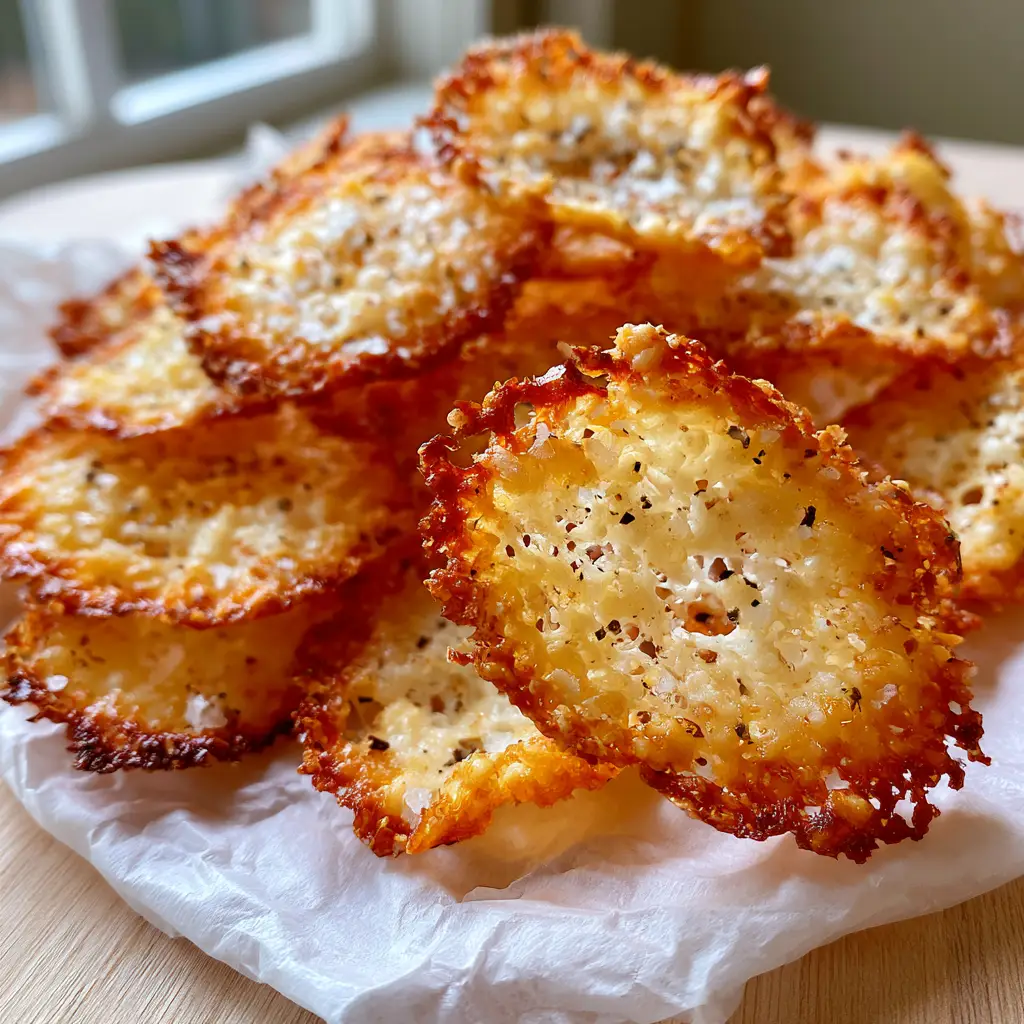
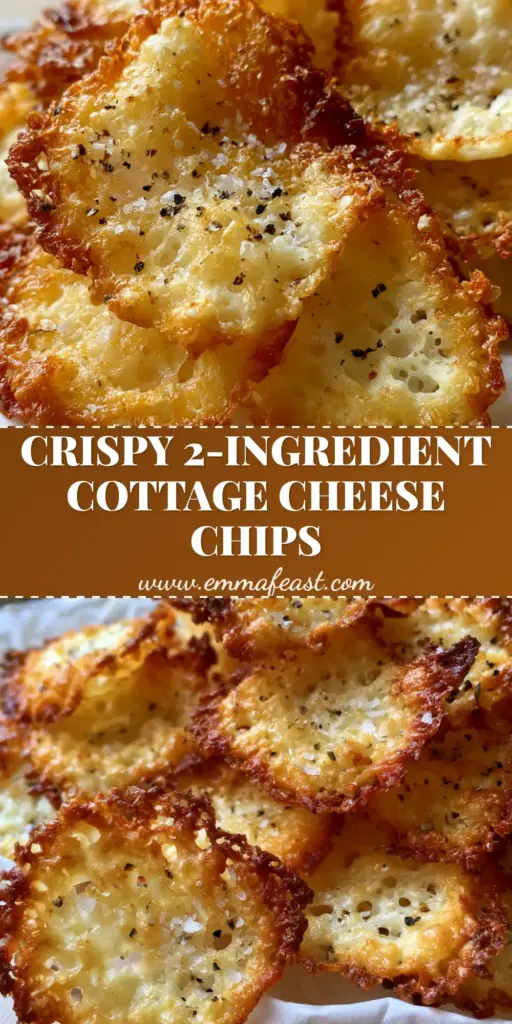
These aren’t your average keto snacks; they are delicate, lacy, and deeply savory rounds that feature a stunning golden-brown caramelized edge and a bubbly, aerated texture. Every bite offers a sophisticated balance of jagged black pepper and crystalline sea salt flakes that dance across the palate.
By leveraging the natural proteins and fats in cottage cheese, we can transform a humble tub of curds into paper-thin, translucent wafers that look like fine art on a crumpled sheet of parchment paper. Let’s dive into the science of the Maillard reaction and the precise techniques required to achieve these micro-craters of crunch.
Why You Will Obsess Over These Golden-Brown Cheese Discs
- Unrivaled Texture: These chips achieve a brittle, paper-thin structure with visible micro-craters that provide a superior crunch compared to traditional cheese tuiles.
- Visually Stunning: With deeply caramelized, darker edges and a translucent center, they are a show-stopping addition to any snack spread or charcuterie board.
- High-Protein Profile: Unlike starch-heavy snacks, these are built on a foundation of high-quality protein, making them perfect for high-protein diets.
- Simple Sophistication: Using only a few foundational ingredients, you can create a snack that rivals high-end bistro appetizers.
The Science of the Lacy Micro-Craters
To achieve that specific “bubbly” and “aerated” look described in our visual blueprint, we must understand moisture evaporation. Cottage cheese is high in water content; as it bakes, this water turns to steam, pushing through the proteins and fats to create tiny vents.
These vents eventually settle into the “micro-craters” seen in the final product. The “oily, crispy peaks” are the result of the milk fats concentrating as the moisture leaves the curds, essentially frying the protein structure in its own lipids.
Choosing a full-fat (4%) cottage cheese is essential for that “deeply caramelized” edge. The sugars (lactose) and fats work together at high temperatures to produce the complex flavors and dark golden hues we crave in a gourmet chip.
Essential Ingredients for Brittle, Savory Rounds
Full-Fat Cottage Cheese (4% Milkfat): 1 cup (225g). The higher fat content is the “invisible” foundational ingredient that ensures the chips don’t just dry out, but actually fry into a brittle, translucent structure.
Freshly Cracked Black Pepper: 1/2 tsp (1g). Use a coarse grind to achieve those “jagged specks” that provide a floral heat and visual contrast against the golden cheese.
Flaky Sea Salt: 1/4 tsp (1.5g). Unlike table salt, sea salt flakes provide a burst of salinity and a delicate crunch that complements the aerated texture of the chip.
Optional Garlic Powder: 1/4 tsp (1g). While not in the primary visual blueprint, a hint of garlic powder enhances the savory depth without changing the “un-edited, authentic lifestyle” look of the final chip.
Professional Gear for Aerated Perfection
To replicate the “ultra-close-up” quality of professional food photography, your equipment must be pristine. A heavy-duty baking sheet is required to ensure even heat distribution, preventing the edges from burning before the centers are translucent.
Quality parchment paper is non-negotiable. Do not use a silicone mat for this specific recipe; parchment paper absorbs a micro-amount of excess moisture, which helps in achieving that “crumpled” look and the brittle, delicate structure of the chips.
A small offset spatula or the back of a spoon is necessary for flattening the cottage cheese into perfect “baked cottage cheese circles.” The thinner you spread the curds, the more “paper-thin and translucent” they will become during the baking process.
The Blueprint: Step-by-Step to Deeply Caramelized Edges
Preparing the Perfect “Lacy” Base
Preheat your oven to 375°F (190°C). This high temperature is vital for the rapid moisture evaporation needed to create the “bubbly aerated texture” we are looking for.
Line a large, flat baking sheet with a fresh piece of parchment paper. If you want the aesthetic of the “crumpled sheet” seen in the photos, lightly crumple the paper then flatten it back out before placing it on the tray.
Portioning and Shaping for Transparency
Place small dollops of cottage cheese—approximately 1 tablespoon (15g) each—onto the parchment paper, leaving at least 2 inches (5cm) of space between them. Use the back of a spoon to spread the curds into thin, even circles about 2.5 inches (6cm) in diameter.
Ensure there are no large “mounds” of cheese; the goal is a single layer of curds. This ensures that as the cheese melts, it forms that “lacy texture” rather than a thick, chewy disc.
Seasoning for Visual and Flavor Impact
Dust each circle with a fine layer of flaky sea salt. Then, grind your black pepper directly over the trays so the “jagged specks” land naturally across the surface of the cheese.
Avoid over-seasoning at this stage. As the moisture evaporates, the flavors will concentrate significantly. What looks like a light dusting now will become a bold flavor profile once the chips are finished.
The Baking Process: Monitoring the Cues
Slide the tray into the center rack of the oven. Bake for 15-20 minutes, but start watching closely at the 12-minute mark. You are looking for the “visual cues” of the Maillard reaction.
First, the cheese will bubble vigorously. Next, the edges will begin to turn a light tan. Finally, the center will look “translucent in areas” and the edges will transition to a “deeply caramelized” golden-brown. This is the moment to remove them.
Expert Tips for Brittle Structure Success
- The Cool-Down Rule: Do not touch the chips immediately after removing them from the oven. They need 3-5 minutes to “set” on the parchment. As they cool, the fats solidify, creating that brittle, delicate structure.
- Blotting Excess Fat: If your chips look too “oily,” you can lightly dab the tops with a paper towel while they are still warm, though the “oily, crispy peaks” are a hallmark of an authentic, high-protein snack.
- Curd Consistency: If your cottage cheese is particularly watery, strain it through a fine-mesh sieve for 5 minutes before portioning. This accelerates the baking time and ensures a crispier result.
- Oven Hot Spots: Rotate your pan halfway through the baking time to ensure all circles reach that “golden-brown” status simultaneously.
Storing Your Brittle Savory Rounds
These Crispy cottage cheese chips are best enjoyed fresh, ideally within an hour of baking to maintain their “shatter” crunch. However, if you have leftovers, store them in an airtight container with a piece of parchment paper between layers.
They will keep at room temperature for up to 2 days, but may lose some of their brittleness. To revive them, simply pop them back into a 300°F (150°C) oven for 2-3 minutes until the “bubbly” appearance returns, then let them cool completely again.
Do not refrigerate these chips, as the moisture in the fridge will turn your “paper-thin” masterpieces into chewy, rubbery discs. Always keep them in a cool, dry pantry environment.
Perfect Pairings for These High-Protein Bites
These chips are versatile enough to stand alone, but they truly shine when paired with other high-quality proteins. Serve them alongside salt and pepper pork for a double-down on savory seasoning, or use them as a crunchy garnish for low-carb burger bowls.
For a sophisticated appetizer tray, pair them with the components of a chicken club sandwich—think avocado slices, roasted turkey, and crisp lettuce. They also make a fantastic gluten-free “cracker” for ground turkey lettuce wraps.
If you’re hosting a gathering, these chips fit perfectly into baby shower food ideas as a modern, healthy alternative to traditional fried appetizers. Their “lacy” and “delicate” appearance adds an elegant touch to any wooden serving board.
Frequently Asked Questions
Yes, they are exceptionally keto-friendly. They consist almost entirely of protein and fat, with very few residual carbs from the lactose in the cheese, making them a perfect low-carb snack.
While it is possible, low-fat cottage cheese lacks the lipids necessary for the ‘oily, crispy peaks’ and deep caramelization. For the best brittle structure, 4% full-fat cottage cheese is highly recommended.
No blending is required! In fact, using the whole curds is what creates the ‘lacy’ and ‘bubbly’ texture with visible micro-craters that makes these chips so visually appealing.
Always use high-quality parchment paper. Do not bake them directly on the metal tray or use foil, as the cheese will bond to the surface. Parchment paper ensures they lift off easily once cooled.
Chewy chips usually result from either spreading the curds too thick or not baking them long enough. Ensure they are paper-thin before baking and wait until the edges are a deep golden-brown before removing them from the oven.
The Definitive Crispy Cottage Cheese Chips Recipe
Crispy cottage cheese chips: The Ultimate High-Protein Crunchy Snack
Ingredients
Equipment
Method
- Preheat your oven to 375°F (190°C) and line a baking sheet with parchment paper.
- Dollop 1 tbsp of cottage cheese onto the tray and spread into a thin 2.5-inch circle.
- Sprinkle with jagged black pepper and sea salt flakes.
- Bake for 15-20 minutes until the edges are deeply caramelized and centers are translucent.
- Let rest on the tray for 5 minutes to achieve a brittle, shattering structure.
Notes
Avoid silicone mats as parchment paper yields a crispier result.
Closing & Call to Action
The beauty of these Crispy cottage cheese chips lies in their simplicity and the incredible transformation of textures. From wet curds to brittle, “golden-brown” treasures, this recipe proves that healthy eating never has to be boring.
Whether you’re serving these at a party or enjoying them as a solo high-protein snack, they are sure to satisfy your deepest cravings for crunch. If you enjoyed this recipe, please leave a comment below and tell us how yours turned out!
Don’t forget to follow us on Pinterest for more culinary inspiration and high-RPM recipes. Save this to your “Healthy Snacks” board by clicking the Pin below!