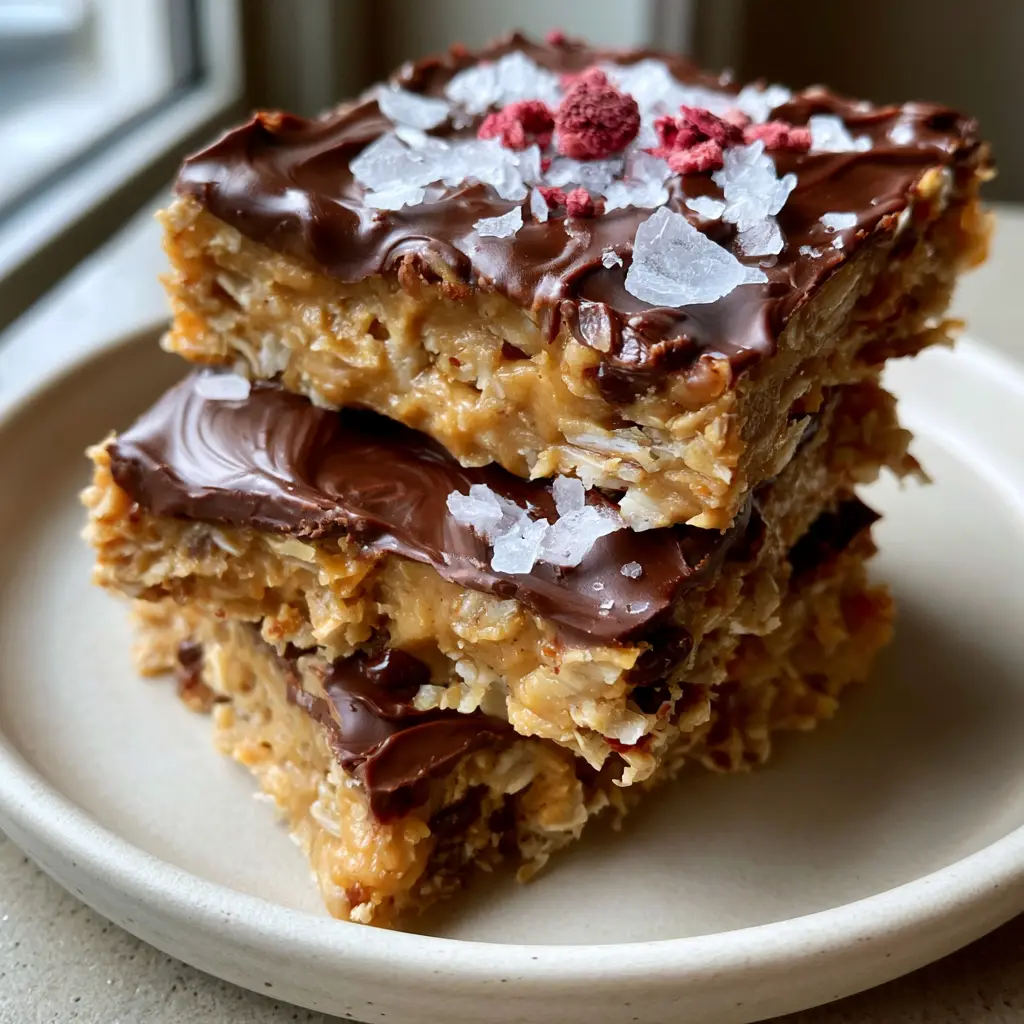
When it comes to mastering homemade snack recipes, the secret lies in the architecture of texture. Imagine a base so dense and chewy that it satisfies your hunger instantly, topped with a layer of dark chocolate so glossy it reflects the soft morning light. These thick, square energy bars aren’t just food; they are a sensory experience designed for those who appreciate the finer details of culinary craft.
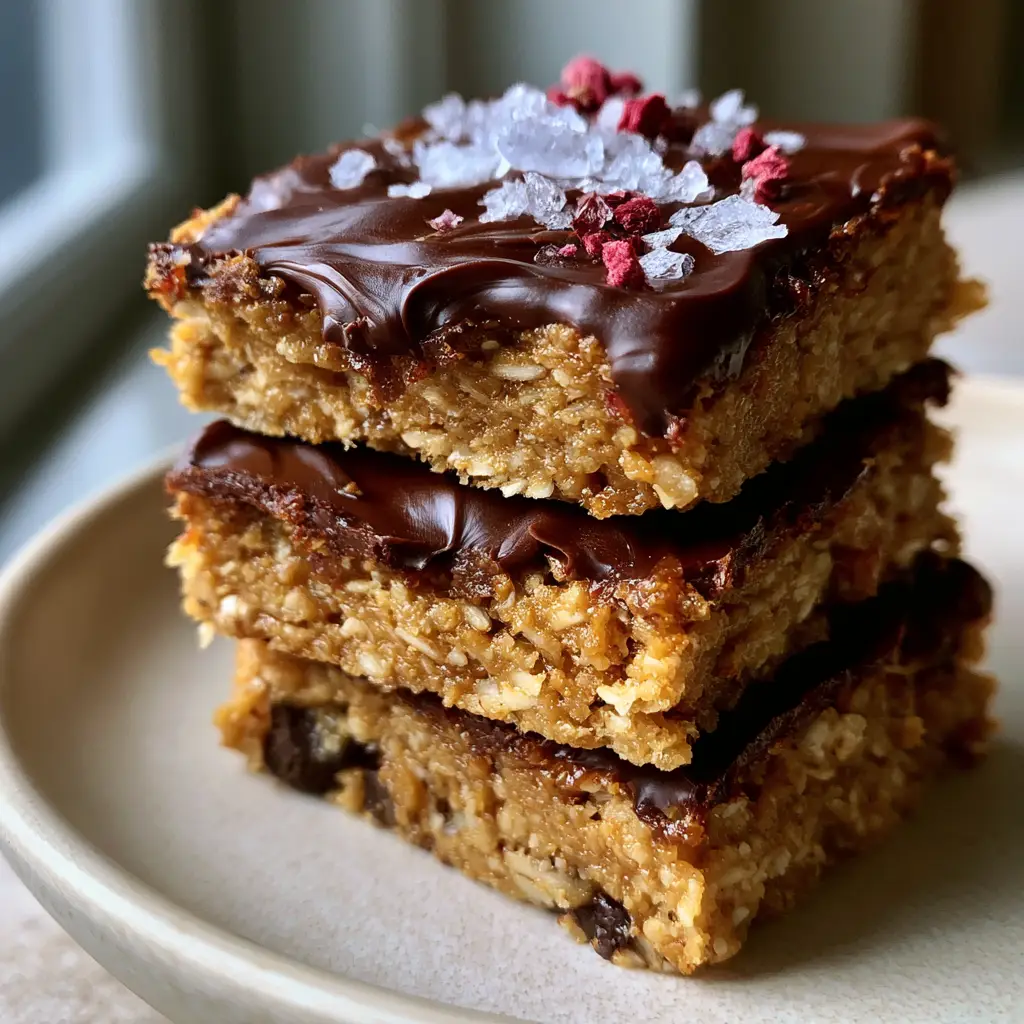
The inspiration for this recipe comes from the desire to bridge the gap between a decadent dessert and a functional energy booster. By combining toasted rolled oats with creamy golden almond butter, we create a foundation that is both structurally sound and incredibly moist. The addition of mini dark chocolate chips within the base ensures that every bite delivers a double dose of cocoa goodness.
Visual appeal is paramount in high-end snack preparation. We finish these bars with a precise sprinkle of translucent flaky sea salt and vibrant fragments of crushed freeze-dried raspberries. This contrast of deep brown chocolate, sparkling salt, and neon-pink fruit makes these bars a centerpiece for any table, whether you are serving them as a mid-afternoon treat or adding them to your collection of easy homemade snacks.
Why These Are the Ultimate Homemade Snack Recipes
- Unmatched Texture: A thick, square profile that provides a satisfying, substantial bite compared to thin, crumbly store-bought alternatives.
- Glossy Chocolate Finish: A thick, uneven pour of melted dark chocolate with visible swirls that creates a professional, artisanal look.
- Balanced Flavor Profile: The bitterness of the dark chocolate is perfectly countered by the creaminess of the almond butter and the sharp, bright acidity of freeze-dried raspberries.
- Visual Precision: Large, translucent salt flakes provide a gourmet aesthetic that signals a high-quality, “adult” snack.
The Anatomy of a Perfect Energy Bar: Essential Ingredients
The Foundation: Toasted Rolled Oats
You will need 3 cups (270g) of old-fashioned rolled oats. Toasting the oats is a non-negotiable step; it transforms the raw, cereal-like flavor into a deep, nutty aroma that defines the base of the bar. This process also ensures the grains remain visible and distinct in the side profile of the final cut.
The Binder: Creamy Golden Almond Butter
Use 1 cup (250g) of high-quality, creamy almond butter. This acts as our primary fat source and emulsifier, creating a dense, chewy mixture that holds its square shape without becoming overly hard. Look for a brand that is drippy and well-stirred to ensure a smooth “golden” appearance.
The Sweetener: Pure Maple Syrup
1/2 cup (120ml) of Grade A maple syrup provides the necessary moisture and sweetness. Unlike granulated sugar, maple syrup integrates seamlessly into the almond butter, contributing to the “moist, textured interior” described in our visual blueprint.
The Chocolate Elements: Chips and Coating
We use a dual-layer chocolate approach: 1/2 cup (90g) of mini dark chocolate chips folded into the batter for texture, and 1.5 cups (255g) of high-quality dark chocolate chunks for the top layer. The mini chips are essential for creating that “visible chocolate chip” side profile without compromising the structural integrity of the oat grains.
The Finishing Touches: Salt and Raspberries
1 tbsp (5g) of flaky sea salt (such as Maldon) and 2 tbsp (4g) of crushed freeze-dried raspberries are the “jewelry” of this dish. The salt enhances the cocoa notes, while the raspberries provide a tart pop of flavor and a stunning visual contrast against the dark chocolate swirls.
Invisible Foundations
Do not forget 1 tsp (5ml) of pure vanilla extract and 1/2 tsp (3g) of fine sea salt for the batter. Additionally, 1 tbsp (15g) of coconut oil added to the melting chocolate is the secret to achieving that “glossy, uneven pour” that stays slightly soft enough to bite through without shattering.
Tools for Artisanal Snack Construction
To achieve the “thick, square” look, an 8×8 inch (20x20cm) square baking pan is required. Lining this with parchment paper with an overhang is crucial for lifting the chilled block out cleanly before slicing. A heavy-bottomed saucepan is best for toasting the oats, and a offset spatula will help you create those signature “visible swirls” in the melted chocolate layer.
Step-by-Step Instructions for Professional Results
Phase 1: Developing the Nutty Oat Base
Begin by placing your 3 cups (270g) of rolled oats in a large skillet over medium heat. Stir frequently for 5-7 minutes until the oats smell toasted and turn a light golden brown. This “toasting” phase is what separates amateur crunchy snack recipes from elite ones.
In a large mixing bowl, combine the warm toasted oats with 1 cup (250g) of creamy almond butter, 1/2 cup (120ml) maple syrup, vanilla, and the fine sea salt. Use a sturdy spatula to fold the ingredients together. The mixture should be thick, heavy, and slightly tacky to the touch.
Phase 2: Folding and Pressing
Once the mixture has cooled slightly (so you don’t melt the inclusions), fold in the 1/2 cup (90g) of mini dark chocolate chips. You want these to remain whole so they are visible in the side profile later.
Transfer the mixture to your prepared 8×8 inch pan. Press down with significant force using the bottom of a flat measuring cup. To achieve the “thick, square” aesthetic, the base must be compacted tightly. If the base is loose, the bars will crumble when cut.
Phase 3: The Glossy Chocolate Pour
Melt the 1.5 cups (255g) of dark chocolate chunks with 1 tbsp (15g) of coconut oil using a double boiler or in 30-second bursts in the microwave. Stir until the chocolate is completely smooth and reflects light with a high-gloss finish.
Pour the chocolate over the oat base. Instead of smoothing it perfectly flat, use the back of a spoon to create “uneven pours” and “visible swirls.” This gives the bars their handheld, realistic texture. Immediately sprinkle the flaky sea salt and the tiny fragments of crushed freeze-dried raspberries over the wet chocolate so they adhere as it hardens.
Phase 4: The Set and the Slice
Place the pan in the refrigerator for at least 2 hours. Once the chocolate has “slightly hardened” but isn’t brittle, lift the parchment paper out. Using a sharp, warm chef’s knife, cut the block into 9 large, thick squares. This reveals the “moist, textured interior” and the “visible oat grains” along the edges.
Expert Tips for Success
- Temperature Control: If your almond butter is cold from the fridge, warm it slightly before mixing. This ensures the oats are evenly coated without clumping.
- The “Clean Cut” Trick: Wipe your knife blade clean with a warm, damp cloth between every single cut. This prevents chocolate smearing and keeps the “side profile” of the oats and chips perfectly clear.
- Raspberry Prep: Crush the freeze-dried raspberries in the bag before opening. This creates a mix of “tiny fragments” and dust, providing varied texture on top.
- Salt Timing: Don’t wait too long to add the flaky salt. If the chocolate sets too much, the large translucent crystals won’t stick and will fall off during consumption.
How to Store and Preserve Freshness
These bars thrive in a cool environment. Store them in an airtight container with parchment paper between layers to prevent the chocolate swirls from marring. They will stay “moist and chewy” for up to 7 days in the refrigerator. For longer storage, wrap individual squares in plastic wrap and freeze for up to 3 months. If you enjoy salty snack recipes (coming soon), you’ll find the salt flavor deepens slightly after a day of storage.
What to Pair With These Energy Bars
These bars are quite rich, making them a perfect companion to a bitter espresso or a cold glass of oat milk. If you are building a full snack spread, consider balancing the sweetness with savory Cacio e Pepe crackers or a selection of high-protein cottage cheese crackers.
For a larger gathering, these bars look stunning on a dessert board next to mini lemon cheesecake tarts. The acidity of the lemon cuts through the density of the almond butter beautifully.
Frequently Asked Questions
These bars are naturally gluten-free if you use certified gluten-free rolled oats. Always check your dark chocolate and almond butter labels for potential cross-contamination.
Yes, you can substitute peanut butter 1:1, but ensure it is a creamy, natural variety to maintain the ‘moist, textured interior’ without adding unnecessary palm oils.
To achieve a professional look, focus on the garnish. Using high-quality glossy chocolate, large translucent salt flakes, and vibrant freeze-dried fruit provides a high-end visual contrast.
Stored in an airtight container in the refrigerator, these bars stay fresh, moist, and chewy for up to 7 days. They can also be frozen for up to 3 months.
Chocolate cracks if it becomes too cold and brittle. Adding a small amount of coconut oil to the melted chocolate keeps it slightly softer, and using a warm knife helps glide through without shattering.
The Ultimate Thick Almond Butter & Dark Chocolate Oat Bars
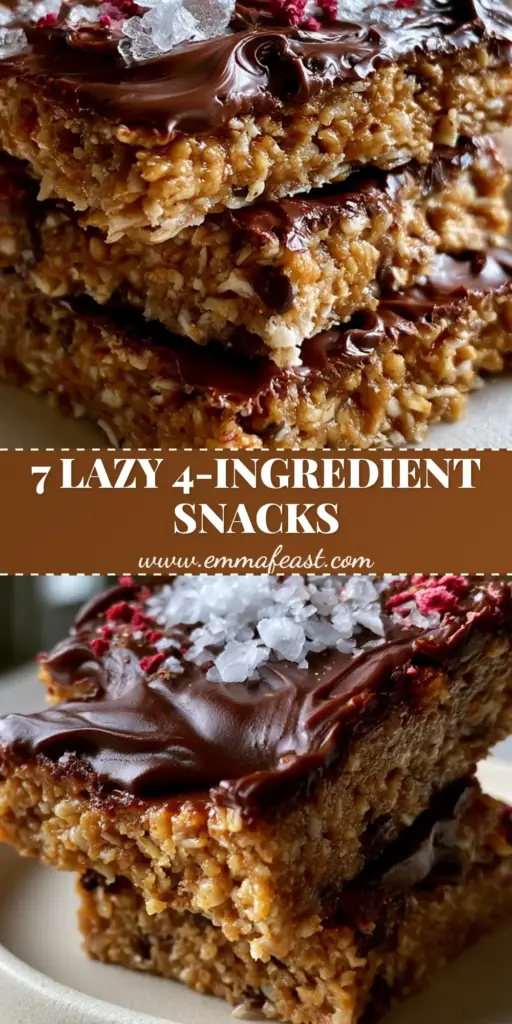
Homemade Snack Recipes: Thick Almond Butter and Dark Chocolate Oat Bars
Ingredients
Equipment
Method
- Toast rolled oats in a skillet over medium heat for 5-7 minutes until fragrant and golden.
- Combine toasted oats, almond butter, maple syrup, vanilla, and fine salt in a bowl. Fold in mini chocolate chips.
- Firmly press the mixture into a lined 8x8 inch pan to create a thick, even layer.
- Melt dark chocolate chunks with coconut oil until glossy. Pour over the oat base and create swirls.
- Sprinkle with flaky sea salt and crushed freeze-dried raspberries while the chocolate is wet.
- Refrigerate for 2 hours. Lift from pan and cut into 9 thick squares using a warm knife.
Notes
Use a warm knife for clean slices through the chocolate layer.
Join the Emma Feast Community!
I hope these thick, chewy squares become a staple in your rotation of homemade snack recipes. There is nothing quite like the satisfaction of a “handheld smartphone photo” worthy snack that actually tastes better than it looks. If you make these, please leave a comment below and tell me how your chocolate swirls turned out!
Don’t forget to share your creations and follow me on Pinterest for more culinary inspiration. Pin this recipe to your “Healthy Snacks” or “Dessert Bars” board so you never lose it!