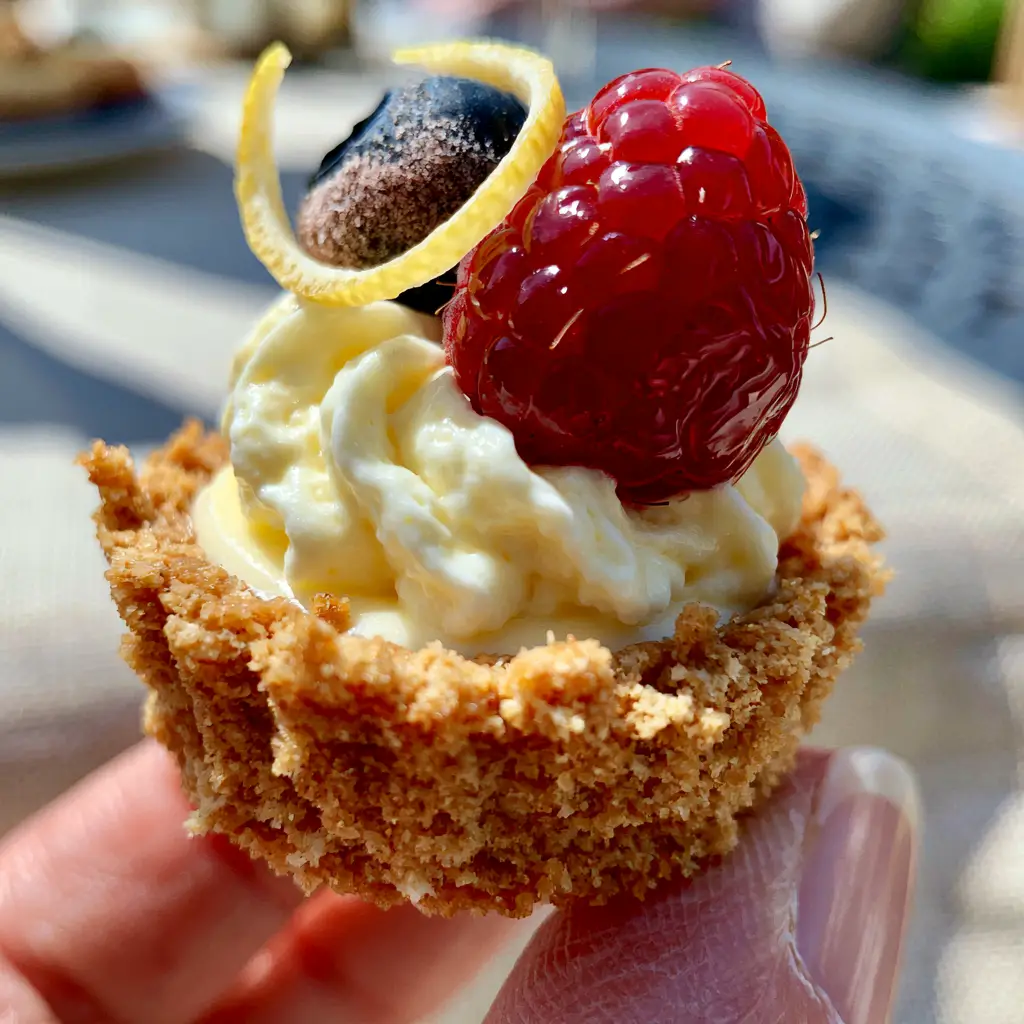
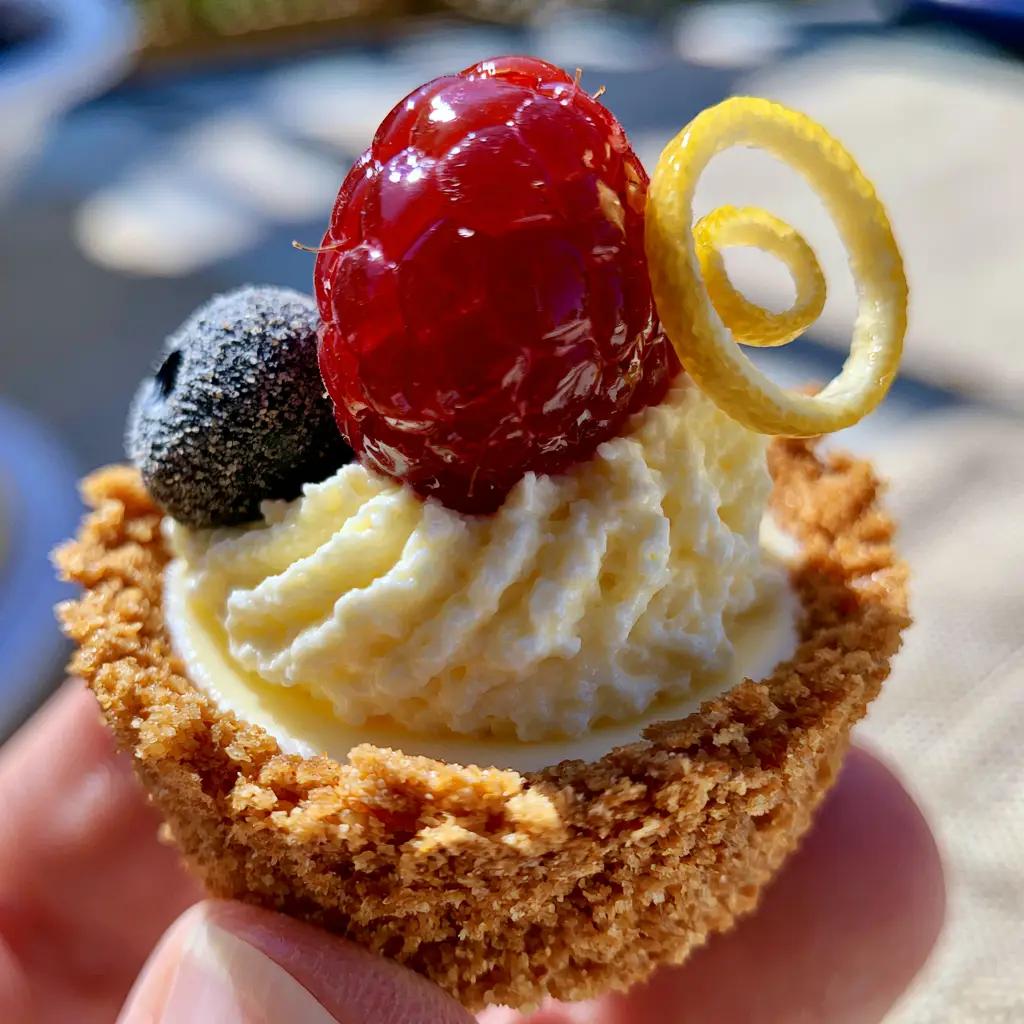
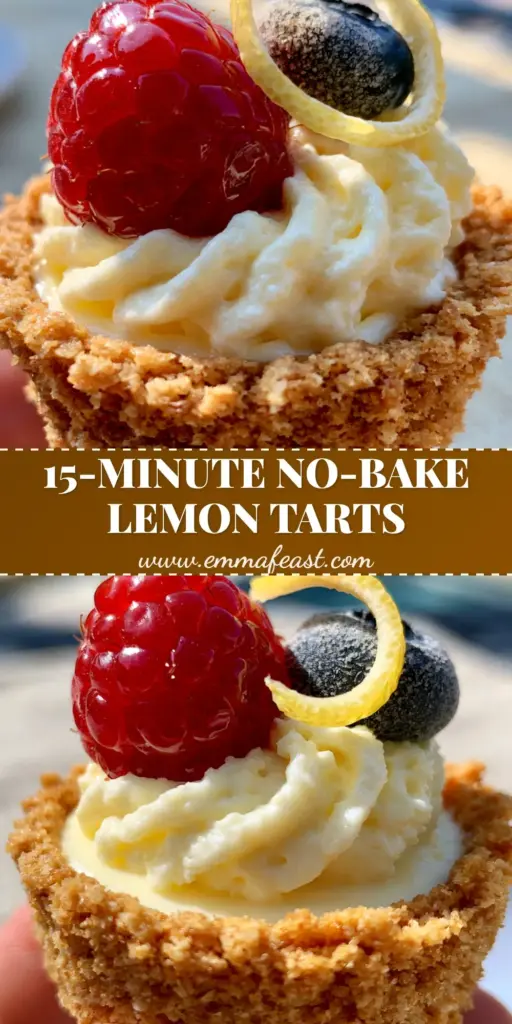
There is something undeniably magical about the first bite of these no-bake lemon cheesecake tarts. Imagine a thick, golden-brown buttery graham cracker crust that shatters with a satisfying crunch, giving way to a tall, velvety, whipped pale-yellow lemon cream cheese mousse. It is the ultimate summer dessert—bright, airy, and stunningly beautiful.
When you hold one of these mini tarts between your fingers, you can feel the artisanal quality of the coarse crust. The visual contrast between the glistening ripe red raspberry, the dusty dark blueberry, and that single elegant, thin spiral of fresh lemon zest makes these tarts look like they stepped straight out of a high-end patisserie window. Whether you are basking in the natural sunlight of an outdoor garden party or enjoying a quiet afternoon treat on a light linen napkin, these tarts are designed to impress.
Creating these no-bake lemon cheesecake tarts is a study in texture and temperature. Unlike traditional cheesecakes that require a water bath and hours of baking, this recipe relies on the mechanical aeration of heavy cream and the structural integrity of high-fat cream cheese to achieve that iconic “tall” look. It is a foolproof way to get professional results in your own kitchen without ever turning on the oven.
Why These Handheld Lemon Delights are the Ultimate Summer Treat
- The Perfect Contrast: The coarse, crunchy graham cracker base provides a robust foundation for the cloud-like, whipped lemon mousse.
- Vibrant Citrus Profile: We use both fresh lemon juice and zest to ensure a bright, authentic tang that cuts through the richness of the cream cheese.
- No-Bake Simplicity: Achieve a velvety, “tall” cheesecake aesthetic without the risk of cracks or the heat of the oven.
- Stunning Visual Appeal: Each tart is crowned with a fresh raspberry and blueberry, mimicking the sophisticated look of gourmet desserts.
The Essential Components for Your Zesty Tart Base and Filling
Graham Cracker Sheets: You will need about 1.5 cups (150g) of coarse crumbs. Instead of a fine powder, aim for a “sandy” texture with small visible chunks to ensure that signature golden-brown buttery graham cracker crust crunch.
Unsalted Butter: 6 tbsp (85g) of melted butter acts as the “glue” for your crust. It provides that rich, toasted flavor that complements the tart lemon filling perfectly.
Full-Fat Cream Cheese: 16 oz (450g) of softened cream cheese is the backbone of the mousse. Ensure it is at room temperature to avoid any lumps, resulting in a velvety pale-yellow finish.
Heavy Whipping Cream: 1 cup (240ml) of cold heavy cream is whipped to stiff peaks and folded in. This is what creates the “airy and soft” texture described in our visual blueprint.
Powdered Sugar: 1 cup (120g) provides sweetness and stability. It dissolves instantly into the cream cheese, maintaining the smooth, whipped consistency.
Fresh Lemons: You will need 1/4 cup (60ml) of juice and 1 tbsp (6g) of zest. The zest is crucial for those tiny yellow flecks in the filling, while a separate thin spiral of lemon peel serves as the elegant garnish.
Fresh Berries: One large, glistening ripe red raspberry and one dusty dark blueberry per tart. These add a pop of color and a fresh, tart juice that balances the creamy mousse.
The Professional Tool Kit for Mini Tart Success
To achieve the “handheld” perfection shown in our smartphone photography, you will need a 12-count muffin tin or individual mini tart pans. A tamper or the back of a small measuring cup is essential for pressing the coarse crumbs firmly into the bottom and sides to create a thick, stable wall.
For the filling, a stand mixer or electric hand mixer is non-negotiable. You need high speed to aerate the heavy cream and to beat the cream cheese into a supple, cloud-like state. Finally, a vegetable peeler or a channel knife will help you create that single elegant, thin spiral of fresh lemon zest that tops each masterpiece.
Mastering the Golden-Brown Buttery Graham Cracker Crust
Creating the Coarse Texture
Place your graham crackers in a large zip-top bag and crush them with a rolling pin. Do not over-process in a food processor; we want a coarse, crunchy texture, not a fine dust. The goal is to see small, golden pieces that will provide a rustic, artisanal mouthfeel.
Binding and Pressing
In a medium bowl, combine the coarse crumbs with 2 tbsp (25g) of granulated sugar and the melted butter. Stir until the mixture looks like wet, dark sand. Spoon the mixture into your tart molds, pressing down firmly with a flat-bottomed tool. This pressure is what ensures your no-bake lemon cheesecake tarts can be held between your fingers without crumbling.
The Initial Chill
Place the crusts in the freezer for at least 15 minutes while you prepare the filling. This “sets” the butter, creating a rigid structure that will hold the tall, velvety whipped pale-yellow lemon cream cheese mousse later on.
Whisking the Tall, Velvety Lemon Mousse Filling
Aerating the Cream Cheese
In a large bowl, beat the softened cream cheese with the powdered sugar until it is completely smooth and looks like a thick frosting. Add the lemon juice and the 1 tbsp (6g) of zest. At this stage, the mixture should be a beautiful, pale-yellow color with aromatic citrus notes filling the room.
The “Cloud” Factor: Folding in the Cream
In a separate chilled bowl, whip the heavy cream (240ml) until stiff peaks form. You’ll know it’s ready when you lift the whisk and the cream stands straight up without drooping. Gently fold this into the cream cheese mixture using a spatula. Do not stir vigorously! We want to keep all those air bubbles to ensure the mousse stays airy and soft.
Piping for Height
To get that “tall” look from the visual prompt, use a piping bag with a large open tip. Pipe the mousse into the chilled crusts, swirling upward to create height. If you don’t have a piping bag, use a spoon to dollop the mixture, then use a small offset spatula to create a smooth, velvety dome.
Final Flourishes: Berries and Zest Spirals
Once the tarts have chilled for at least 4 hours (or overnight), it is time for the garnish. Place one large, glistening raspberry and one dusty blueberry on the center of the mousse. The “dust” on the blueberry is actually the natural bloom of the fruit, which signifies freshness. Finish with a thin spiral of lemon zest, letting it drape elegantly over the side of the berries.
If you love the combination of citrus and berries, you might also enjoy our lemon blueberry cheesecake cookies or these decadent blueberry cheesecake swirl cookies. For those who prefer a more traditional bite, our mini lemon cheesecakes are a fantastic baked alternative.
Expert Tips for the Perfect Handheld Tart
- Room Temp vs. Cold: Always use room temperature cream cheese to avoid lumps, but keep your heavy cream ice-cold to ensure it whips to maximum volume.
- The “Snap” Test: If your crust feels too soft, you may need to add a few more crushed crackers. It should hold its shape when pressed against the side of a bowl.
- Zesting Secrets: Only zest the yellow part of the lemon. The white pith underneath is bitter and will ruin the delicate flavor of your mousse.
- Serving Temperature: Keep these tarts refrigerated until the very moment of serving. Because they are no-bake, the mousse is softest at room temperature and best enjoyed chilled.
Storage and Make-Ahead Advice
These no-bake lemon cheesecake tarts are the perfect make-ahead dessert. You can prepare the crust and the filling up to 48 hours in advance. However, I recommend waiting to add the fresh berries and lemon spiral until just before serving to prevent the fruit juices from bleeding into the pale-yellow mousse.
Store any leftovers in an airtight container in the refrigerator for up to 4 days. While you can freeze the crusts, I do not recommend freezing the assembled tarts, as the fresh berries will lose their texture and the mousse may lose its airy, velvety consistency upon thawing.
What to Pair With Lemon Cheesecake Tarts
These tarts are quite rich, so they pair beautifully with a light, sparkling beverage or a crisp salad. If you are serving these at a brunch, consider following a savory course like our cream cheese stuffed mini peppers or even a unique marry me melting cabbage for a sophisticated vegetable side.
For a full dessert spread, these tarts look stunning next to a tray of lemon snickerdoodles or even some salty-sweet rice krispie cheddar crackers for those who love a flavor contrast.
Frequently Asked Questions
Yes, you can prepare the tarts up to 48 hours in advance. For the best visual appeal, add the fresh raspberry, blueberry, and lemon spiral just before serving.
While possible, fresh lemon juice and zest provide a much brighter, superior flavor that is characteristic of high-quality lemon tarts.
For no-bake recipes, full-fat cream cheese is essential. Low-fat versions have a higher water content and won’t provide the same velvety, stable structure.
The crust needs to be pressed very firmly into the mold. If it’s still crumbling, you may need a touch more melted butter to act as a binder.
This usually happens if the heavy cream wasn’t whipped to stiff peaks or if it was folded too vigorously into the cream cheese, deflating the air bubbles.
No-Bake Lemon Cheesecake Tarts Recipe Card
No-Bake Lemon Cheesecake Tarts with Coarse Graham Cracker Crust
Ingredients
Equipment
Method
- Combine coarse graham cracker crumbs, sugar, and melted butter in a bowl until it resembles wet sand.
- Press the mixture firmly into a muffin tin or tart pans and freeze for 15 minutes to set the structure.
- Beat softened cream cheese with powdered sugar, lemon juice, and zest until velvety and smooth.
- In a separate bowl, whip heavy cream to stiff peaks. Gently fold into the cream cheese mixture to maintain the airy mousse texture.
- Pipe the mousse into the crusts. Top with one raspberry, one blueberry, and a thin lemon spiral. Chill for 4 hours before serving.
Notes
Ensure the heavy cream is very cold before whipping for maximum volume.
Closing & Call to Action
Mastering the art of the no-bake lemon cheesecake tarts is a rewarding experience for any home cook. The combination of the coarse, buttery crust and the ethereal lemon mousse creates a sensory experience that is hard to beat. Whether you’re hosting a summer garden party or just want a bright treat to lift your spirits, this recipe delivers high-end results with minimal effort.
If you enjoyed this recipe, please leave a comment below and tell me how your tarts turned out! Don’t forget to share your creations on Pinterest and tag us so we can see those beautiful berry garnishes. For more kitchen inspiration, sign up for our newsletter to get elite recipes delivered straight to your inbox.