There is nothing quite like the sound of a perfectly baked cracker snapping between your teeth. These Rice Krispie Cheddar Crackers take that sensory experience to a whole new level, combining the sharp, tangy bite of aged cheddar with the iconic, airy crispness of toasted rice cereal. If you have been searching for a snack that bridges the gap between a classic cheese coin and a modern artisanal cracker, you have found it.
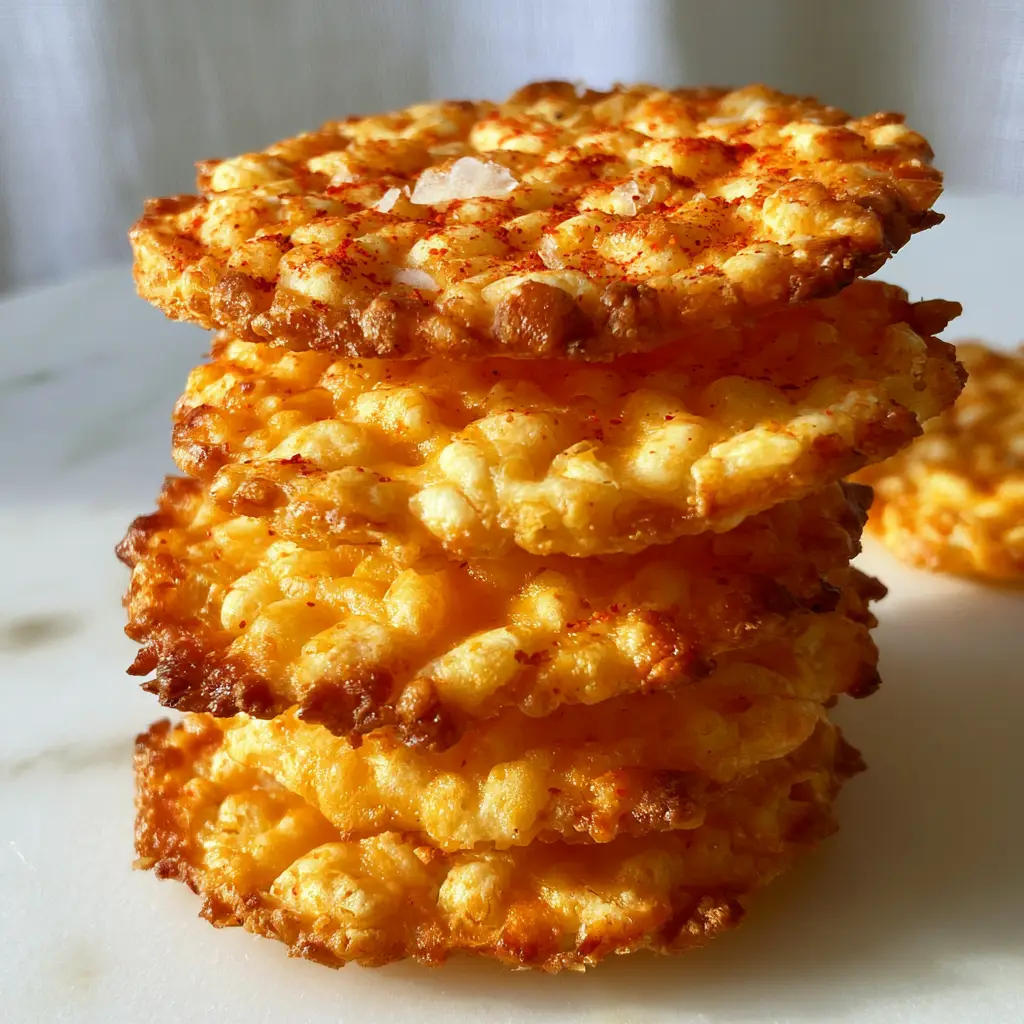
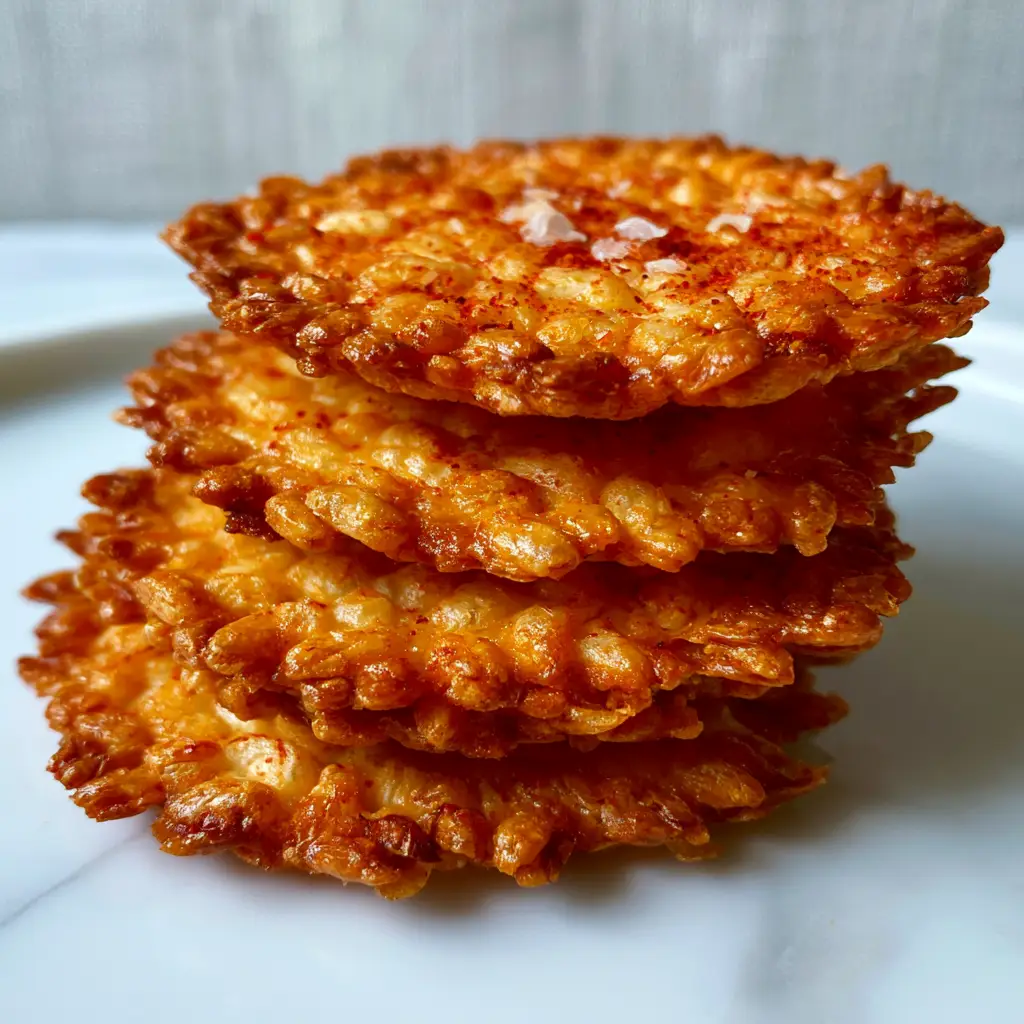
The visual appeal of these crackers is undeniable. Imagine thick, rustic golden-orange coins with a rough, irregular surface that features protruding toasted rice cereal pieces, creating a distinct cratered texture. As they bake, the edges become deeply golden and crispy, while a light dusting of fine red cayenne pepper and flaky Maldon sea salt provides a professional, high-end finish. This is the ultimate addition to your next charcuterie board or a standalone treat for a quiet afternoon.
Why These Savory Cheese Coins Are a Total Game Changer
- Unrivaled Cratered Texture: The addition of toasted rice cereal creates “shatter-crunch” ridges that you simply cannot get with flour alone.
- Deeply Golden Crispy Edges: High-fat European-style butter ensures the edges caramelize into a rich, nutty brown crust.
- Forensic Flavor Balance: The sharp cheddar base is elevated by the slow-burn of cayenne and the bright pop of flaky sea salt.
- Rustic Visual Appeal: These are not factory-perfect circles; their thick, hand-sliced coin shape screams “high-end artisanal bakery.”
The Anatomy of a Perfect Rice Krispie Cheddar Cracker
To achieve the specific visual and structural results seen in our professional photography, every ingredient serves a dual purpose: flavor and architecture. Here is what you will need for these Rice Krispie Cheddar Crackers.
Extra Sharp Cheddar Cheese: Use a block of high-quality aged cheddar and grate it yourself. Pre-shredded cheese is coated in cellulose, which prevents the crackers from achieving that signature golden-orange melt.
Unsalted Butter (Cold): 1/2 cup (113g) of cold, cubed butter provides the lamination needed for a flaky, buttery cracker dough. It must be cold to ensure the fat creates tiny steam pockets during the baking process.
All-Purpose Flour: 1 1/2 cups (188g) provides the structural foundation. This ratio ensures the cracker is sturdy enough to hold the rice cereal without becoming dense or bread-like.
Toasted Rice Cereal: 1 1/2 cups (45g) of Rice Krispies (or a similar toasted rice cereal) provides the “cratered” texture. These are folded in at the very end to keep them whole and crunchy.
Fine Cayenne Pepper: A 1/4 tsp (0.5g) dusting adds a subtle heat that cuts through the richness of the cheese. It also provides those beautiful red flecks visible on the surface of the top cracker.
Flaky Sea Salt: A generous pinch of Maldon salt is essential for the final visual flourish. The large flakes catch the light and provide a burst of salinity that enhances the cheddar.
Ice Water: 1-2 tbsp (15-30ml) of ice-cold water is the “invisible ingredient” that binds the dough without melting the butter, ensuring the crackers don’t spread too much in the oven.
Essential Tools for Artisanal Crackers
Achieving the thick, rustic coin shape requires a few specific kitchen tools. A food processor is highly recommended to quickly cut the cold butter into the flour and cheese without the heat of your hands melting the fats.
You will also need a sharp chef’s knife to slice the chilled dough logs. A sharp blade ensures clean cuts through the rice cereal pieces, creating that “rough, irregular surface” described in our visual blueprint. Finally, a heavy-gauge baking sheet lined with parchment paper will prevent the bottoms from burning before the edges reach their peak golden-brown color.
Mastering the Shatter-Crunch: Step-by-Step Instructions
Creating the Cheesy Dough Foundation
In the bowl of a food processor, combine 1 1/2 cups (188g) all-purpose flour, 1/2 tsp (3g) kosher salt, and a pinch of cayenne. Pulse briefly to aerate the dry ingredients. Add 1/2 cup (113g) of cold, cubed butter and pulse until the mixture resembles coarse crumbs with some pea-sized pieces of butter remaining.
Add 2 cups (226g) of freshly grated extra-sharp cheddar cheese. Pulse 5-6 times until the cheese is evenly distributed. Drizzle in 1 tbsp (15ml) of ice water and pulse until the dough just begins to clump together. If it feels too dry, add the second tablespoon of water one teaspoon at a time.
The Folding of the Rice Cereal
Transfer the dough to a large mixing bowl. Gently fold in 1 1/2 cups (45g) of toasted rice cereal by hand using a spatula. You want to be careful not to crush the cereal, as these pieces need to protrude from the surface to create that signature cratered texture. The dough will feel slightly shaggy, but it should hold together when pressed.
Chilling for the Perfect Rustic Coin
Turn the dough out onto a piece of plastic wrap and form it into a log approximately 2 inches (5cm) in diameter. Wrap it tightly, rolling it on the counter to smooth out the shape, though a few irregularities contribute to the rustic look. Chill the dough in the refrigerator for at least one hour. Chilling is non-negotiable; it prevents the crackers from spreading and ensures a clean slice.
Slicing and Baking for Maximum Texture
Preheat your oven to 350°F (175°C). Use a sharp knife to slice the chilled log into coins that are about 1/4 inch (6mm) thick. Place them on a parchment-lined baking sheet, leaving an inch of space between each cracker. You will see the rice cereal pieces creating a rough, uneven surface on each coin.
Bake for 14-16 minutes. Watch for the visual cues: the edges should be a deep golden brown, and the centers should appear set and matte, not shiny. The smell of toasted cheese and butter will fill your kitchen when they are ready.
The Final Flourish
Immediately upon removing the crackers from the oven, give them a light dusting of fine cayenne pepper. While they are still hot, sprinkle a few flakes of Maldon sea salt over the top. The residual heat will help the salt and pepper adhere to the surface. Allow them to cool completely on the pan to reach maximum “shatter-crunch.”
Pro Tips for the Ultimate Rice Krispie Cheddar Crackers
- Don’t Overwork the Dough: The more you handle the dough, the tougher the crackers will be. Handle it just enough to form the log.
- Texture Check: If your rice cereal seems stale, toast it in a dry pan for 2 minutes before adding it to the dough to ensure a loud crunch.
- Slicing Technique: If the dough starts to crumble while slicing, let it sit at room temperature for 5 minutes. If it’s too soft, pop it back in the freezer for 10 minutes.
- Internal Link Inspiration: If you love these textures, you must try our cacio e pepe crackers or even our cottage cheese crackers for a high-protein alternative.
Smart Storage and Make-Ahead Advice
These crackers are at their absolute best the day they are baked. However, you can store them in an airtight container at room temperature for up to 5 days. If they lose their crunch due to humidity, simply pop them back into a 300°F (150°C) oven for 3-5 minutes to crisp them back up.
You can also freeze the raw dough log for up to 3 months. When the craving strikes, just slice and bake directly from the freezer, adding 2 minutes to the total baking time. This makes them one of our favorite homemade snacks to keep on hand for unexpected guests.
What to Serve with Your Cheesy Snack
These Rice Krispie Cheddar Crackers are bold enough to stand alone, but they also pair beautifully with other small bites. Serve them alongside cream cheese stuffed mini peppers or cold stuffed mini peppers for a colorful appetizer spread. If you are serving a heavier meal like Korean pot roast or creamy pork medallions, these crackers make a great light starter to whet the appetite.
Commonly Asked Questions
Yes, you can substitute the all-purpose flour for a high-quality 1:1 gluten-free flour blend. Ensure your rice cereal is also certified gluten-free, as some brands contain malt flavoring.
It is not recommended. Pre-shredded cheese is coated in potato starch or cellulose to prevent clumping, which interferes with the melting and browning process of the cracker.
The keys to crispiness are using cold butter, chilling the dough log thoroughly, and baking until the edges are a deep golden brown. If they aren’t crispy enough, bake them for 2-3 minutes longer.
In an airtight container at room temperature, they will stay fresh and crunchy for up to 5 days. You can refresh them in a 300°F (150°C) oven for a few minutes if needed.
Rice cereal provides a unique ‘cratered’ texture and an airy, shatter-like crunch that flour alone cannot achieve. It adds structural interest without making the cracker heavy.
Rice Krispie Cheddar Crackers Recipe
Rice Krispie Cheddar Crackers: The Ultimate Shatter-Crunch Snack
Ingredients
Equipment
Method
- Pulse flour, salt, and a pinch of cayenne in a food processor to aerate.
- Add cold cubed butter and pulse until coarse crumbs form with pea-sized butter pieces.
- Pulse in the grated cheddar, then drizzle ice water until the dough begins to clump.
- Transfer dough to a bowl and fold in the rice cereal by hand to maintain texture.
- Form into a 2-inch diameter log, wrap in plastic, and chill for 1 hour.
- Slice log into 1/4 inch thick coins and place on a parchment-lined sheet.
- Bake at 350°F (175°C) for 14-16 minutes until edges are deeply golden brown.
- Dust with cayenne and flaky sea salt immediately while hot.
Notes
Always grate your own cheese to avoid anti-caking agents that ruin the texture.

Bring the Shatter-Crunch to Your Kitchen
These Rice Krispie Cheddar Crackers are a masterclass in texture and flavor. From the rustic, cratered surface to the hit of cayenne and salt, they offer a sophisticated twist on a nostalgic favorite. Whether you’re filling a bowl for game day or curating an elegant cheese board, these will be the first thing to disappear. We would love to see your creations—leave a comment below or share your photos on Pinterest!