There is something undeniably satisfying about the first bite of a perfectly toasted wrap. These chicken avocado ranch burritos are a masterclass in texture, combining a shatteringly crisp exterior with a molten, creamy interior. If you have ever stared at a rotisserie chicken and wondered how to transform it into a gourmet experience, this is the answer you have been searching for.
Inspired by the vibrant, handheld street food culture, these burritos focus on high-quality ratios. We are not just stuffing a tortilla; we are engineering a flavor profile that balances the richness of ripe avocado with the zesty, herb-forward punch of ranch. The result is a handheld smartphone-worthy meal that looks as good as it tastes, featuring those iconic dark sear marks and a “pale-green” sauce that is pure silk.
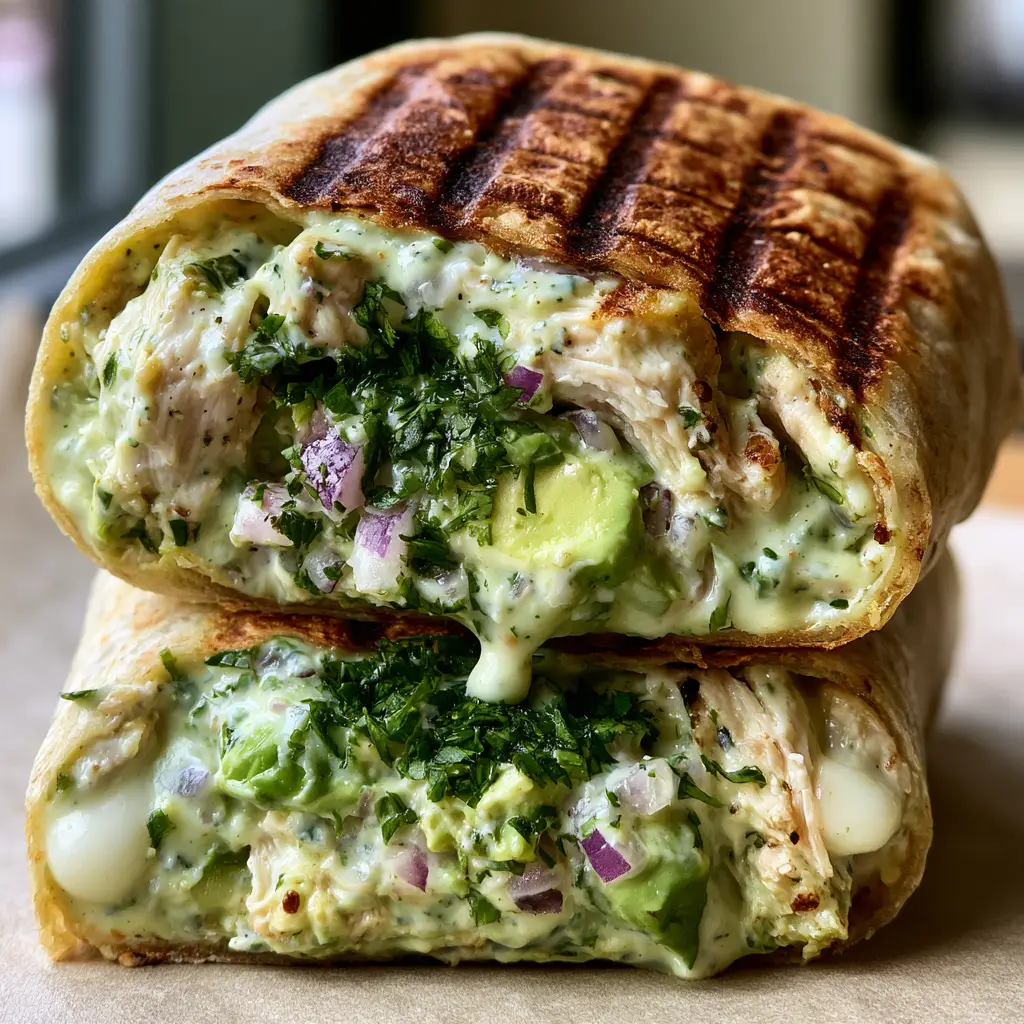
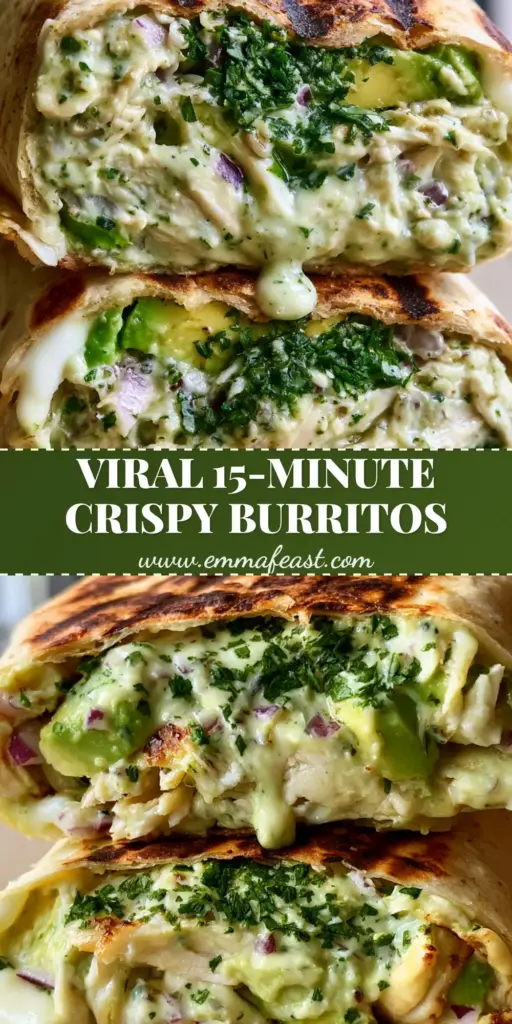
When you slice these in half, the visual reveal is breathtaking. You see the juicy, shredded chicken coated in sauce, the bright green chunks of avocado, and the sharp contrast of finely diced red onion. A slight drip of that zesty sauce captured mid-fall is the hallmark of a burrito made with love and precision.
Why You Will Crave These Crispy Shredded Chicken Wraps
- The Perfect Texture Contrast: The flour tortillas are toasted to a golden-brown finish with distinct dark brown grill sear marks that provide a satisfying crunch against the soft filling.
- A Zesty Flavor Explosion: By combining thick, creamy avocado ranch sauce with fresh minced cilantro and red onion, every bite is bright and balanced.
- Effortless Efficiency: Using shredded rotisserie chicken makes this a high-speed dinner without sacrificing the “slow-cooked” quality of juicy, tender poultry.
- Gooey Melt Factor: Small pockets of melted white Monterey Jack cheese bubble at the edges, acting as the “culinary glue” that holds the cubed avocado and chicken together.
The Star Players: Essential Ingredients for Creamy Burritos
To achieve the specific visual and flavor profile of our chicken avocado ranch burritos, we need a mix of fresh produce and pantry staples. Each ingredient serves a structural and sensory purpose.
Large Flour Tortillas: You need 10-inch (25cm) flour tortillas that are flexible enough to fold but sturdy enough to withstand a high-heat sear. Look for “burrito size” to ensure you can fit all the fillings without a structural failure.
Shredded Rotisserie Chicken: 3 cups (450g) of chicken provides the protein backbone. It is naturally seasoned and stays incredibly moist when tossed in our signature sauce, unlike overcooked chicken breast.
Monterey Jack Cheese: 1.5 cups (170g) of shredded Monterey Jack is crucial for that “bubbling white” appearance. Its low melting point creates those gooey pockets seen in the cross-section of the burrito.
Ripe Avocados: 2 large avocados are needed. Half will be mashed into the ranch sauce to create that “pale-green” hue, while the other half is cubed for a chunky, buttery texture in every bite.
The Avocado Ranch Base: A mixture of 1/2 cup (120ml) sour cream, 1/4 cup (60ml) mayonnaise, and 1 tbsp (15g) of ranch seasoning. This creates the “thick, creamy” consistency required to coat the chicken without making the tortilla soggy.
Aromatic Brightness: 1/2 cup (25g) of minced fresh cilantro and 1/4 cup (40g) of finely diced red onion. These provide the visual “flecking” and a sharp, acidic bite to cut through the heavy fats of the cheese and avocado.
Foundational Searing Fat: 2 tbsp (30ml) of neutral oil or unsalted butter. This is the “invisible” ingredient that allows the tortilla to develop those dark, professional-looking sear marks on the grill pan.
Must-Have Tools for the Professional Home Cook
To replicate the visual result of a “perfectly toasted” wrap, your equipment choice matters. A heavy-bottomed cast iron skillet or a ridged grill pan is the best tool for the job. The ridges are what create those distinct, dark brown grill marks that make the burrito look like it came from a high-end bistro.
You will also want a sharp chef’s knife for dicing the red onion and cilantro into fine pieces. A high-quality spatula is essential for pressing the burritos down during the toasting phase, ensuring maximum surface contact with the heat source for an even golden-brown finish.
The Art of the Build: Step-by-Step Instructions
Step 1: Engineering the Pale-Green Avocado Ranch Sauce
In a medium mixing bowl, combine your sour cream, mayonnaise, and ranch seasoning. Take half of one avocado and mash it into the mixture until it turns a beautiful, pale-green color. Whisk vigorously until the sauce is thick and zesty; this sauce is the moisture barrier that keeps the chicken succulent.
Fold in 2 cups of the shredded rotisserie chicken into this sauce. Ensure every strand of meat is coated. This is a great time to check out our easy chicken dinner ideas if you find yourself with extra rotisserie leftovers.
Step 2: Prepping the Fresh Fillings
Dice your remaining avocados into 1/2-inch (1.25cm) cubes. Finely mince the cilantro and red onion. Keeping these components separate until the assembly phase prevents the avocado from oxidizing and turning the entire filling into a homogenous mush.
If you love the combination of creamy textures and fresh toppings, you might also enjoy these creative avocado toast ideas for your next brunch session.
Step 3: The Master Assembly
Lay a flour tortilla flat. Place a generous layer of shredded Monterey Jack cheese in the center, followed by a scoop of the saucy chicken. Top with the cubed avocado, a sprinkle of red onion, and a heavy hand of fresh cilantro.
Fold the sides of the tortilla inward, then roll tightly from the bottom up. Ensure the seam is tucked neatly. A tight roll is the secret to a burrito that doesn’t fall apart when sliced for that smartphone-perfect cross-section.
Step 4: Achieving the Perfect Sear
Heat your grill pan over medium-high heat and add a light coating of oil. Place the burritos seam-side down first. This “seals” the wrap so it won’t open during flipping.
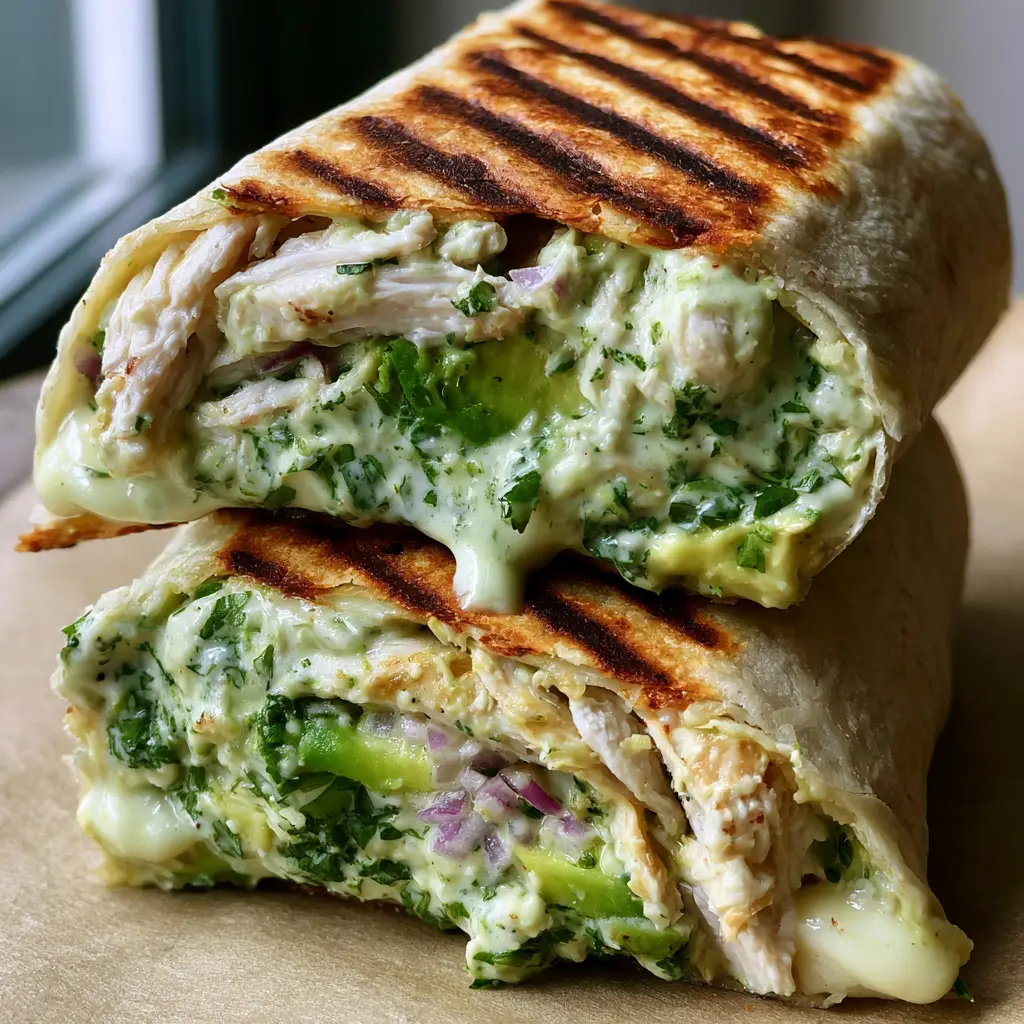
Use a spatula to press down firmly for about 2-3 minutes. You are looking for those distinct dark brown grill sear marks. Flip and repeat on the other side until the cheese inside is bubbling and the tortilla is golden-brown and crisp to the touch.
Expert Tips for the Ultimate Handheld Burrito
- Avoid the Sog: Always place the cheese as the first layer on the tortilla. It acts as a waterproof barrier between the moist chicken sauce and the flour wrap.
- Room Temp Ingredients: Try to let your rotisserie chicken come to room temperature before assembly. This ensures the center is hot by the time the exterior is perfectly toasted.
- The Cross-Section Slice: Use a very sharp serrated knife to cut the burritos. Slice at a slight diagonal to showcase the layers of chicken, avocado, and melted Monterey Jack.
- Visual Cues: Watch for the cheese to start “beading” or bubbling at the open ends of the burrito—this is the sign that the interior is fully heated through.
Storage, Reheating, and Make-Ahead Advice
These burritos are best enjoyed immediately while the tortilla is at its peak crispness. However, if you have leftovers, wrap them tightly in aluminum foil and store them in the refrigerator for up to 2 days. The avocado may brown slightly, but the flavor remains delicious.
To reheat, avoid the microwave as it will turn the tortilla gummy. Instead, place the burrito in a dry skillet over medium heat for 4-5 minutes per side, or use an air fryer at 350°F (175°C) for 6 minutes to regain that crunch. For those who love prepping ahead, consider our freezer-friendly breakfast burritos for busy mornings.
What to Serve with Your Grilled Burritos
These chicken avocado ranch burritos are a full meal on their own, but they pair beautifully with a light side. A crisp citrus slaw or a side of Mexican street corn (elote) complements the creamy ranch flavors perfectly.
If you’re looking for a more substantial feast, you could serve these alongside some baked cream cheese chicken taquitos for a “taco night” spread. If you prefer something sweeter to balance the savory, a side of spicy honey chicken tenders provides a great flavor contrast.
Frequently Asked Questions
Yes, you can assemble the burritos ahead of time, but wait to grill them until you are ready to eat. This ensures the tortilla stays crisp and the avocado doesn’t become too mushy.
Absolutely. You can use grilled chicken breast, leftover turkey, or even crispy chicken tenders for a different texture profile.
While a grill pan creates those beautiful dark sear marks, a regular flat cast-iron skillet or non-stick pan works perfectly for achieving a solid golden-brown crust.
The secret is mashing half of a ripe avocado directly into the ranch dressing base (sour cream and mayo). This creates that thick, creamy, and vibrant green hue.
Toss the avocado cubes in a teaspoon of lime juice before adding them to the burrito. The acidity slows down oxidation, keeping the chunks bright green.
The Official Chicken Avocado Ranch Burritos Recipe
Chicken Avocado Ranch Burritos: The Ultimate Crispy Grilled Wrap
Ingredients
Equipment
Method
- In a bowl, mix sour cream, mayo, ranch seasoning, and half a mashed avocado until a thick, pale-green sauce forms.
- Toss the shredded rotisserie chicken in the avocado ranch sauce until completely coated.
- On each tortilla, layer cheese, saucy chicken, cubed avocado, red onion, and cilantro. Roll tightly, tucking in the sides.
- Heat oil in a grill pan over medium-high heat. Place burritos seam-side down. Press with a spatula and sear for 2-3 minutes until dark grill marks appear. Flip and repeat.
Notes
Add a squeeze of lime juice to the avocado cubes to keep them bright green for longer.
Closing & Call to Action
These chicken avocado ranch burritos are more than just a quick meal; they are a sensory experience. From the sound of the crunch as you bite into the toasted tortilla to the sight of the pale-green sauce dripping from the center, they are guaranteed to become a household favorite. The combination of Monterey Jack and ripe avocado creates a decadence that is hard to beat.
Did you make these? I would love to see your results! Leave a comment below or tag me in your photos. Don’t forget to follow me on Pinterest and pin this recipe to your “Easy Dinners” board so you never lose it!