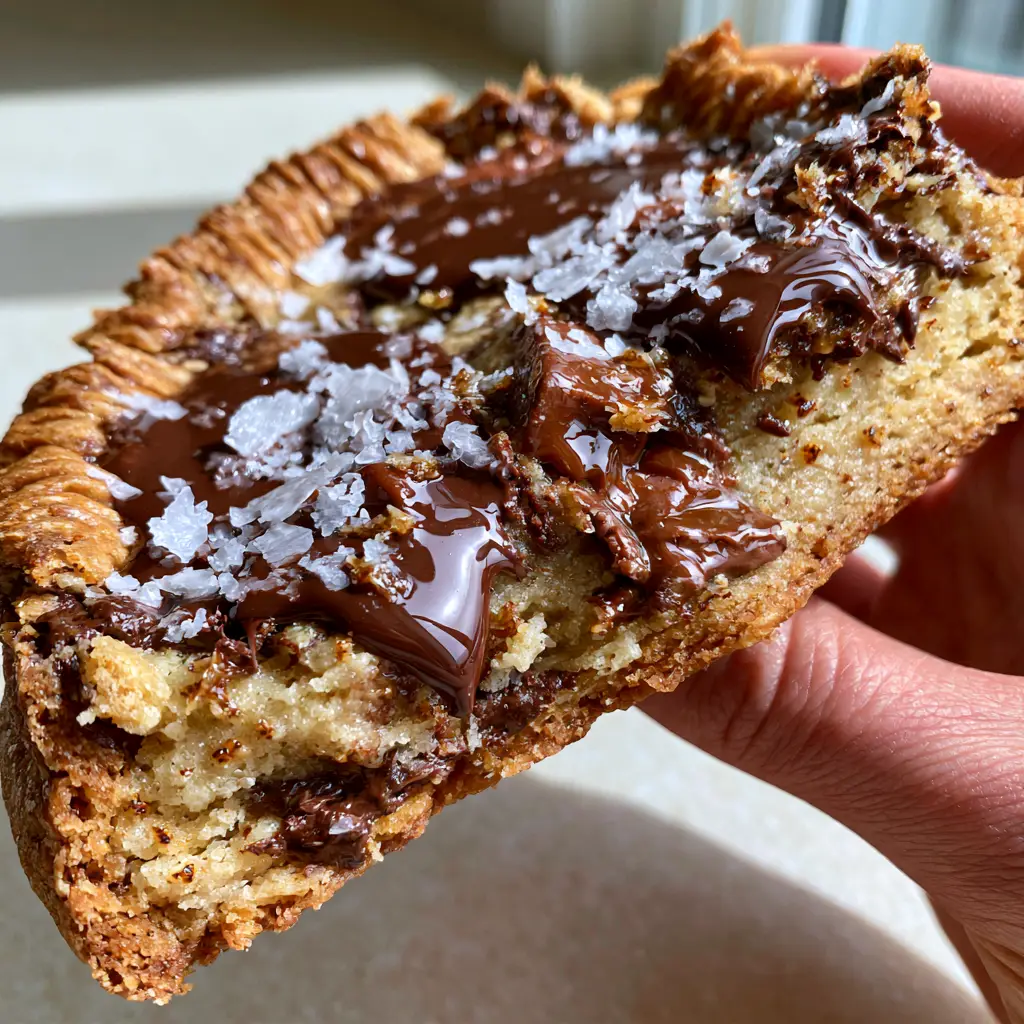
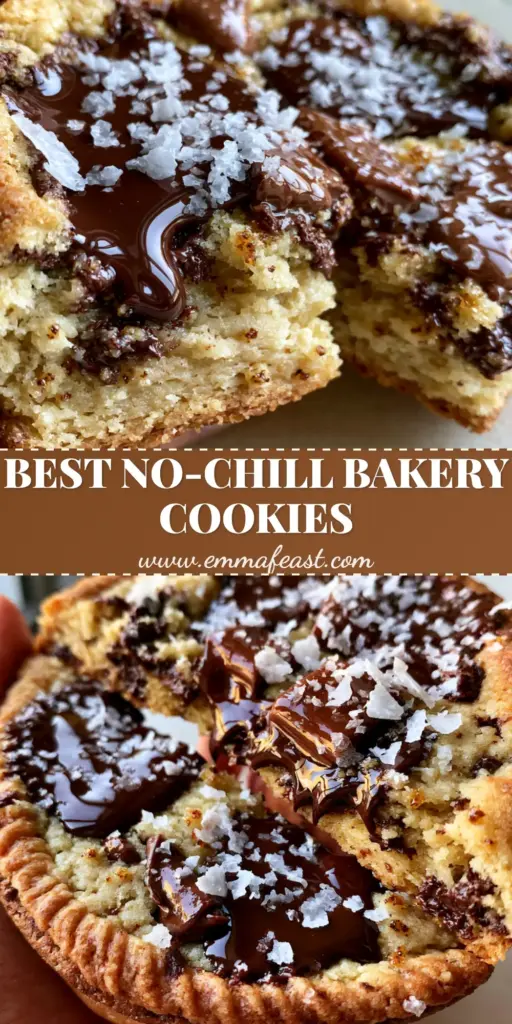
There is nothing quite like the first bite of crispy chewy chocolate chip cookies that have been perfected with shatter-crisp golden brown rippled edges and a thick, fudgy underbaked dough center. If you have been searching for that elusive bakery-style texture that balances a crunchy perimeter with a molten, gooey heart, this recipe is your final destination.
We are going beyond the standard dough ball. By using toasted brown butter and a specific “pan-banging” technique, we create deep ridges and molten dark chocolate pools that look just as incredible as they taste. This is the ultimate cookie for those who refuse to choose between crunchy and soft.
Whether you are a seasoned baker or just looking to level up your weekend treats, these cookies deliver a professional result every single time. Let’s dive into the science of the ripple and the magic of brown butter.
Why These Are the Best crispy chewy chocolate chip cookies
- The Texture Contrast: You get a shatter-crisp exterior that yields to a pale, dense, and fudgy center.
- Toasted Brown Butter: We cook the butter until golden to infuse the dough with nutty, toasted brown butter bits.
- Rippled Edges: The “pan-banging” method creates gorgeous, caramelized ridges that maximize surface area for crunch.
- Premium Chocolate: A blend of semi-sweet chocolate chunks and large pools of molten dark chocolate ensures every bite is decadent.
- The Finishing Touch: A generous dusting of oversized Maldon flaky sea salt balances the sweetness perfectly.
If you love the combination of sweet and salty, you should also check out my recipe for salted caramel cookies.
Essential Ingredients for Gourmet Cookies
Unsalted Butter: 1 cup (226g). We will brown this butter to create a rich, nutty foundation. This removes water content, leading to a more concentrated flavor and a fudgier crumb.
Granulated White Sugar: 1 cup (200g). Essential for achieving those shatter-crisp golden brown rippled edges. White sugar aerates the butter and encourages browning.
Dark Brown Sugar: ¾ cup (150g), packed. This provides the moisture and molasses notes required for the thick fudgy underbaked dough center.
All-Purpose Flour: 2 cups (250g). Provides the structural integrity. We measure carefully to ensure the cookies don’t become cakey.
Baking Soda: 1 teaspoon. This helps the cookies spread and react with the brown sugar for optimal browning.
Dark Chocolate Bar: 6 oz (170g), roughly chopped. Chopping a bar creates those iconic molten dark chocolate pools rather than uniform chips.
Semi-Sweet Chocolate Chunks: ½ cup (90g). These hold their shape slightly better than the chopped bar, providing a variety of textures.
Large Egg & Egg York: 1 large egg plus 1 yolk at room temperature. The extra yolk adds fat and protein, contributing to a denser, chewier interior.
Vanilla Bean Paste or Extract: 1 tablespoon. Use high-quality vanilla to complement the toasted butter notes.
Flaky Sea Salt: 1 tablespoon (for topping). Oversized flaky sea salt crystals are non-negotiable for that professional finish.
Step 1: The Art of Toasting Brown Butter
Start by placing your 1 cup (226g) of unsalted butter in a light-colored skillet over medium heat. Light-colored pans allow you to see the color change clearly.
Melt the butter, whisking occasionally. It will begin to foam and pop as the water evaporates. This is normal.
Watch for the tiny toasted brown butter specks to form at the bottom of the pan. The aroma will turn deeply nutty, similar to toasted hazelnuts.
Immediately remove from heat and pour into a heat-proof bowl, making sure to scrape all those toasted bits out. Let it cool for 15-20 minutes until it is no longer hot but still liquid.
If you enjoy these rich flavors, you might also like my chewy chocolate chip cookies which use a different creaming method.
Step 2: Mixing the Perfect Dough
In a large bowl or stand mixer, combine the cooled brown butter with the 1 cup (200g) white sugar and ¾ cup (150g) brown sugar.
Beat on medium-high for 2-3 minutes. You want the mixture to look like wet sand—slightly lightened but still heavy with moisture.
Add the egg, the extra yolk, and the vanilla. Beat for another minute until the mixture is glossy and smooth.
In a separate bowl, whisk together the 2 cups (250g) flour, 1 teaspoon baking soda, and ½ teaspoon fine sea salt.
Fold the dry ingredients into the wet ingredients using a spatula. Stop when just a few streaks of flour remain. Do not overmix, or the cookies will become tough.
Step 3: Folding in the Chocolate Layers
Gently fold in your semi-sweet chocolate chunks and half of the chopped dark chocolate bar. Save the rest of the dark chocolate for the tops.
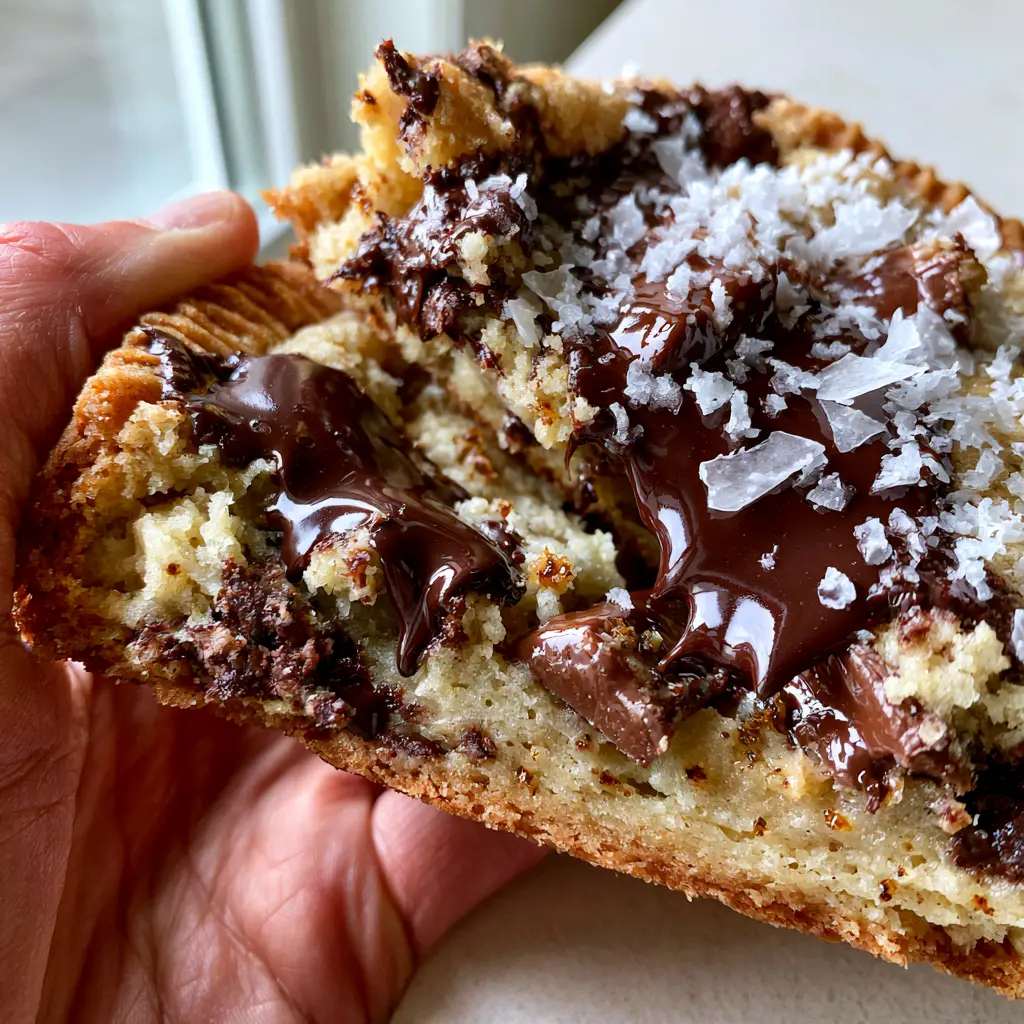
The dough should be thick and studded with warm cookie crumbs and chocolate. It might feel a bit greasy due to the brown butter; this is expected.
For the best results, chill the dough for at least 30 minutes. This helps the flour hydrate and prevents the cookies from spreading too thin, ensuring that thick fudgy center.
Step 4: The Pan-Banging Technique for Ripples
Preheat your oven to 350°F (175°C). Line two large baking sheets with parchment paper or silicone mats.
Scoop large mounds of dough (about 3 tablespoons per cookie) and place them 3 inches apart. These will spread significantly.
Press the remaining dark chocolate chunks into the tops of the dough balls. This ensures the molten dark chocolate pools are visible on the surface.
Bake for 8 minutes. Open the oven, lift the side of the baking sheet about 4 inches, and let it drop against the oven rack. Bang!
This causes the inflated cookie to collapse, pushing the dough to the edges and creating the first ripple. Repeat this every 2 minutes until the cookies are done (about 12-14 minutes total).
Step 5: Visual Cues for Perfection
You are looking for the edges to be shatter-crisp and golden brown. The centers should still look slightly pale and “underdone.”
As they cool on the hot pan, the residual heat will finish cooking the center just enough to keep it fudgy without being raw.
While the cookies are still hot and the chocolate is glistening, sprinkle each one with oversized Maldon flaky sea salt crystals. The salt will stick to the melting chocolate pools.
Let them rest on the pan for at least 10 minutes before moving. This is crucial for the structure to set.
Expert Tips for Success
- Use Room Temperature Eggs: Cold eggs can cause the brown butter to seize, resulting in an uneven dough.
- Quality Chocolate Matters: Avoid cheap chips with stabilizers. Chopping a high-quality dark chocolate bar (at least 60% cacao) creates those beautiful pools.
- The Pan Bang: Don’t be afraid to be aggressive. The force is what creates the rippled edges.
- Measure by Weight: If possible, use a kitchen scale for the flour. Even a little extra flour can ruin the fudgy center.
Looking for a savory follow-up to these sweets? Try my honey garlic butter steak and rice skillet for a perfect dinner.
Storage, Reheating & Freezing
Storage: Keep these crispy chewy chocolate chip cookies in an airtight container at room temperature for up to 4 days. They will lose some of the “shatter-crisp” texture over time but remain delicious.
Freezing Dough: You can scoop the dough into balls and freeze them. Bake directly from frozen, adding 2-3 minutes to the cook time. You can still use the pan-banging technique!
Freezing Baked Cookies: Store in a freezer-safe bag for up to 3 months. Thaw at room temperature or warm in a 300°F (150°C) oven for 5 minutes to restore the crispness.
What to Serve With This
These cookies are incredibly rich, so they pair best with something that cuts through the fat and sugar.
A cold glass of whole milk is the classic choice. For a sophisticated dessert spread, serve these alongside a hot espresso or a bitter dark roast coffee.
If you’re hosting a party, these make a great follow-up to a savory meal like chicken shawarma or steak rice bowls.
Frequently Asked Questions
You can, but chocolate bars lack stabilizers found in chips, allowing them to melt into those iconic molten dark chocolate pools seen in bakery cookies.
While not strictly required, chilling for 30 minutes prevents excessive spreading and helps the flavors of the brown butter and vanilla penetrate the flour.
Do not overbake. Pull the cookies out when the edges are deep golden brown but the centers still look slightly pale and soft; they will firm up perfectly as they cool.
Ripples are created by the pan-banging technique. You must wait until the cookie has puffed up in the oven (usually around 8 minutes) before banging the pan to make it collapse into ridges.
Brown butter removes water and toasts the milk solids, creating ‘toasted brown butter bits’ that add a nutty, caramel-like depth of flavor that regular butter cannot match.
The Ultimate crispy chewy chocolate chip cookies Recipe
crispy chewy chocolate chip cookies: The Ultimate Pan-Banged Bakery Style
Ingredients
Equipment
Method
- Melt butter in a skillet over medium heat. Whisk until foam subsides and brown butter specks form. Pour into a bowl to cool.
- Combine cooled liquid brown butter with white and brown sugars. Beat for 2-3 minutes until texture resembles wet sand.
- Add egg, egg yolk, and vanilla. Beat until the mixture is glossy.
- Fold in flour, baking soda, and salt until just combined. Fold in chocolate chunks and half of the chopped bar.
- Scoop 3-tbsp balls onto sheets. Bake at 350°F (175°C). At 8 mins, lift and drop the pan to create ripples. Repeat every 2 mins.
- Top with remaining dark chocolate pools and flaky sea salt while hot. Cool on the pan for 10 mins.
Notes
The pan-banging technique is essential for the ripple texture.
Save This Recipe to Pinterest!
Don’t lose this recipe! Click the “Pin” button to save these crispy chewy chocolate chip cookies to your Favorite Desserts board on Pinterest. Following @emma_feast_official for more bakery-style secrets and daily food inspiration!
If you make these, I would love to see your results. Take a photo of your molten dark chocolate pools and rippled edges, and share it in the comments below. Please leave a 5-star rating if you enjoyed the recipe!