There is nothing quite like the sizzle of a rustic cast iron skillet as a thick-cut pork tenderloin medallion hits the hot surface. The aroma of garlic mingling with sweet, caramelized onions creates an immediate sense of home and comfort that few dishes can match.
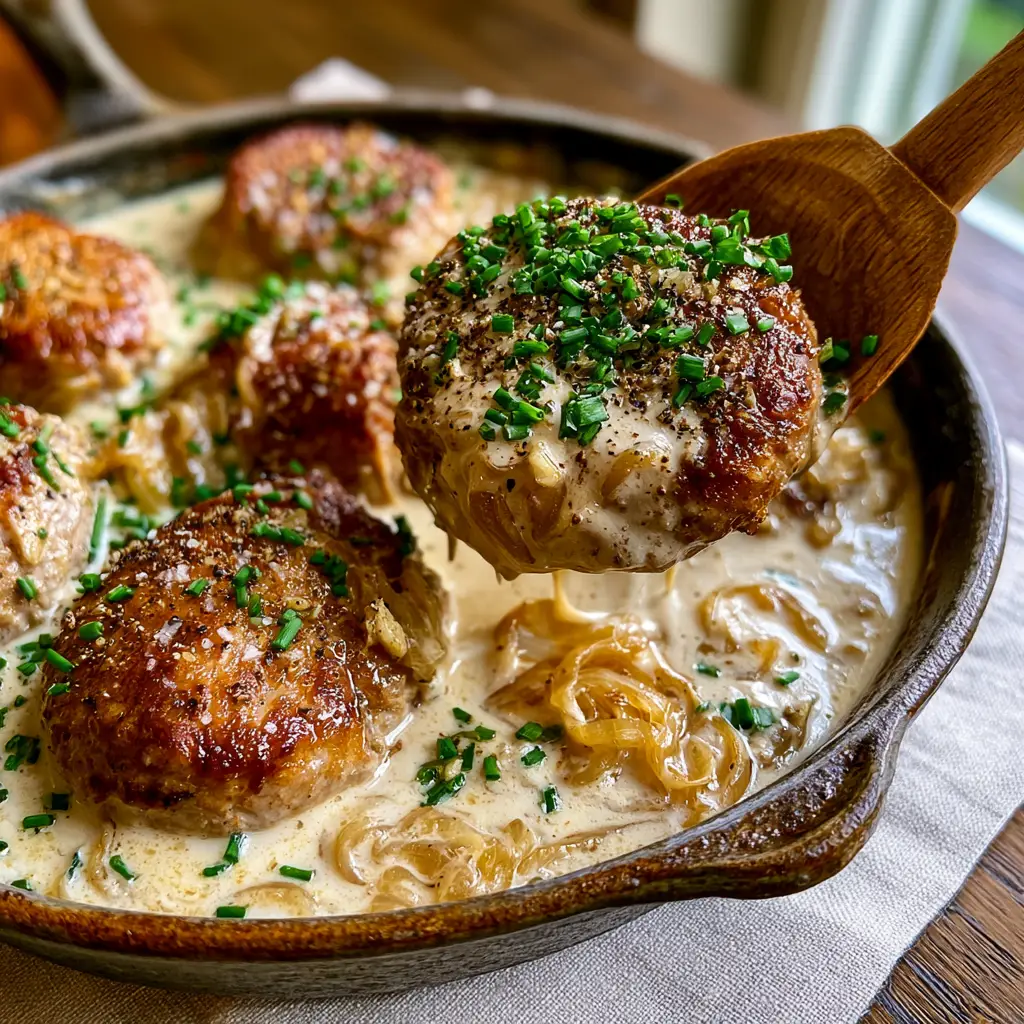
This recipe for pork medallions in onion gravy is designed for those who appreciate the finer details of home cooking, from the deep golden-brown sear on the meat to the velvety, glossy sheen of a perfectly emulsified cream sauce. Every bite offers a contrast between the tender, juicy pork and the savory crunch of freshly cracked black pepper.
By following this guide, you will master the art of the Maillard reaction and learn how to transform simple aromatics into a restaurant-quality ivory sauce that clings to every morsel. Let’s dive into the techniques that make this dish a visual and culinary masterpiece.
Why These Pan-Seared Medallions Define Comfort Food Excellence
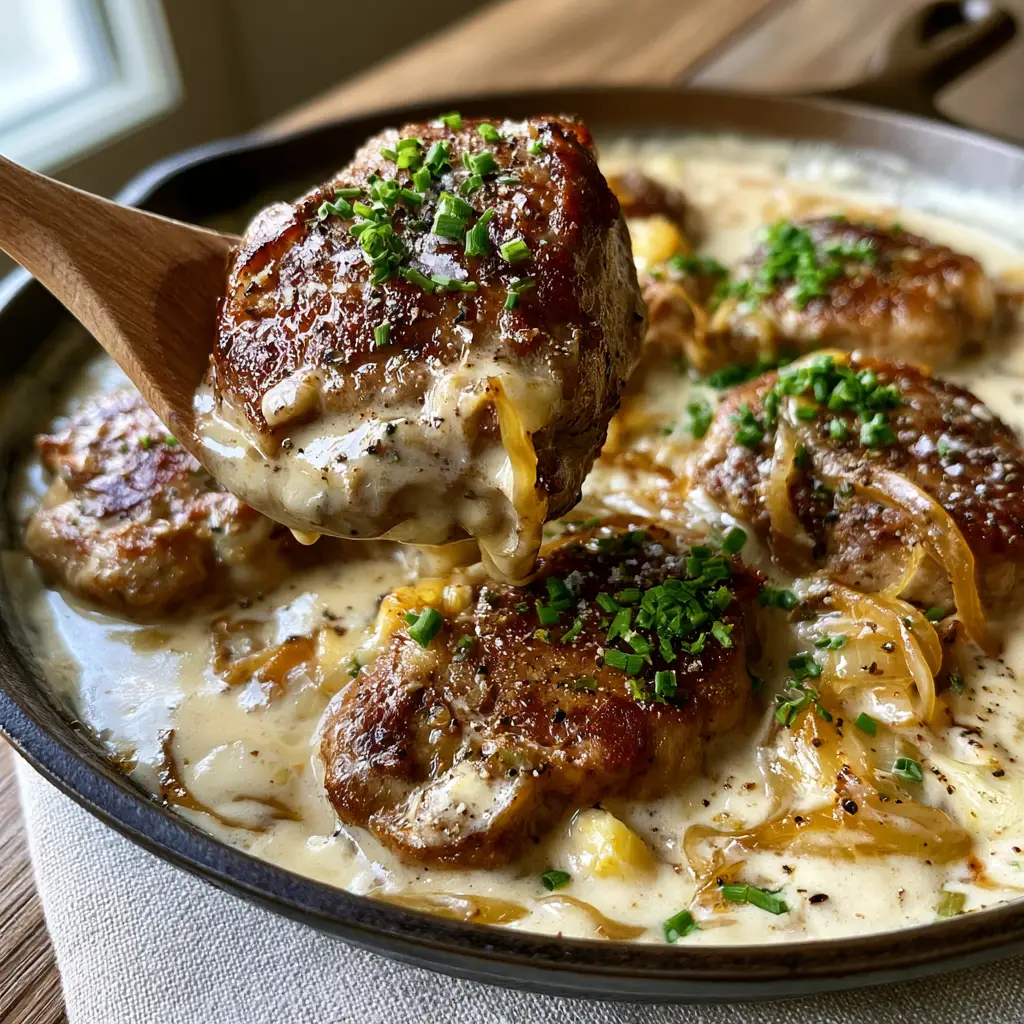
- The Perfect Crust: Achieving a deep golden-brown crust isn’t just about color; it’s about the concentrated flavor developed through high-heat searing.
- Translucent Caramelized Onions: We slow-cook the onion slivers until they are soft and golden, providing a natural sweetness that balances the savory garlic.
- Ivory Cream Sauce Texture: The gravy is engineered to be thick and velvety, ensuring it coats the pork without being overly heavy.
- Visual Contrast: The bright green finely chopped chives and coarse black pepper provide a vibrant finish that makes the dish pop against the rustic cast iron.
Essential Components for Your Gourmet Pork Dinner
To achieve the specific visual and flavor profile of these pork medallions in onion gravy, we must select high-quality ingredients that perform under heat. Each element serves a structural and sensory purpose in the final presentation.
The Protein Foundation
2 lbs (900g) Pork Tenderloin: This lean, tender cut is the star of the show; when sliced into thick medallions, it cooks quickly while remaining incredibly juicy. Look for meat that is rosy-pink with minimal silver skin for the best texture in your tender pork recipe.
1 tsp (6g) Coarse Sea Salt: Large salt flakes are essential for that visible sparkle on the seared crust, drawing out moisture for a better sear and seasoning the meat deeply.
1 tsp (2g) Freshly Cracked Black Pepper: We use a coarse grind to ensure the pepper is visible on the final dish, providing a sharp, woody heat that cuts through the cream.
The Aromatics and Gravy Base
2 large (approx. 400g) Yellow Onions: Sliced into thin slivers, these onions will break down into a translucent, golden jam that forms the heart of our gravy. If you enjoy this flavor profile, you might also like our pork recipes featuring savory fruit or onion bases.
6 cloves (18g) Fresh Garlic: We use minced garlic bits rather than a paste to ensure they are visible in the sauce, adding tiny pops of intense flavor and texture.
2 tbsp (30g) Unsalted Butter: This provides the fat needed for the sauce’s glossy sheen and adds a rich, nutty undertone to the ivory cream base.
1 cup (240ml) Heavy Cream: The secret to the thick, velvety ivory color described in our visual blueprint; it creates a luxurious mouthfeel that water-based gravies lack.
1/2 cup (120ml) Chicken or Vegetable Stock: Used for deglazing the cast iron skillet, this liquid lifts the flavorful browned bits (fond) from the bottom of the pan.
The Finishing Flourishes
1/4 cup (10g) Fresh Chives: Finely chopped, these provide the “bright green” sprinkle that contrasts beautifully with the warm tones of the pork and gravy. For more herbaceous inspiration, check out our herb pork tenderloin.
1 tbsp (15ml) High-Smoke Point Oil: Avocado or grapeseed oil is necessary to achieve that deep sear without the oil burning or smoking out your kitchen.
Must-Have Tools for the Perfect Sear
The equipment you use is just as important as the ingredients when making pork medallions in onion gravy. To replicate the rustic, high-detail look, specific tools are required.
12-inch Cast Iron Skillet: The heavy bottom and superior heat retention of cast iron are non-negotiable for achieving the golden-brown crust. It also provides the “rustic” aesthetic seen in our smartphone-style photography.
Wooden Spoon: Essential for stirring the delicate onion slivers and scraping the fond during the deglazing process. As seen in the prompt, a wooden spoon is also the perfect prop for serving the dripping sauce.
Sharp Chef’s Knife: You will need this to create uniform medallions and to finely mince the garlic and chives for the garnishing stage.
Mastering the Technique: Step-by-Step Instructions
Phase 1: Preparing the Medallions
Start by trimming any excess fat or silver skin from the tenderloin. Slice the meat into 1.5-inch (4cm) thick medallions, ensuring they are uniform so they cook at the same rate.
Pat the pork dry with paper towels; moisture is the enemy of a good sear. Season both sides generously with the coarse sea salt and a portion of the cracked black pepper.
Phase 2: The High-Heat Sear
Place your cast iron skillet over medium-high heat and add the oil. Once the oil is shimmering and just beginning to wisps of smoke, carefully place the medallions in the pan.
Do not crowd the pan; cook in batches if necessary. Sear the pork for 3-4 minutes per side. You are looking for a deep, golden-brown crust to form—a visual cue that the Maillard reaction has occurred. Remove the pork from the pan while it is still slightly undercooked in the center, as it will finish in the sauce.
Phase 3: Caramelizing the Onion Slivers
Lower the heat to medium and add the butter to the remaining oil and pork fat. Toss in the onion slivers. Sauté them, stirring occasionally, for about 8-10 minutes.
The onions should become translucent and take on a golden, honey-like hue. Avoid burning them; you want soft, sweet slivers. Once the onions are ready, add the minced garlic bits and cook for just 60 seconds until fragrant but not browned.
Phase 4: Building the Ivory Cream Sauce
Pour in the stock to deglaze the pan. Use your wooden spoon to scrape up every bit of the brown crust stuck to the bottom. This is where the flavor lives!
Reduce the heat to low and pour in the heavy cream. Stir constantly as the sauce begins to bubble gently. The liquid will transform into a thick, velvety ivory gravy. Season with more black pepper to taste.
Phase 5: The Final Simmer and Garnish
Place the seared pork medallions back into the skillet, nestled into the gravy. Allow them to simmer for 2-3 minutes, just until the sauce reaches a glossy sheen and the pork is cooked through to a safe 145°F (63°C).
Turn off the heat. Use your wooden spoon to baste the medallions with the sauce. Finish the dish by showering it with the finely chopped green chives and an extra crack of black pepper for that high-detail finish.
Expert Tips for a Professional Result
- Room Temperature Meat: Take the pork out of the fridge 20 minutes before cooking to ensure it sears evenly and doesn’t drop the pan temperature.
- Emulsification is Key: If the sauce looks like it’s separating, add a teaspoon of water and whisk vigorously to bring the fat and liquid back together.
- Rest the Meat: Even when submerged in gravy, the meat benefits from a few minutes of resting before serving to keep the juices locked inside.
- Control the Heat: If the garlic starts to smell bitter or looks dark brown, the heat is too high. Lower it immediately before adding the cream.
The Best Accompaniments for Pork in Cream Sauce
To round out this meal, you want sides that can soak up that incredible onion gravy. A pile of garlic mashed potatoes or a crusty piece of sourdough bread is ideal for capturing every drop of the ivory sauce.
For a lighter pairing, consider a crisp green salad or roasted root vegetables. If you are looking for more dinner inspiration, our summer dinner ideas offer a variety of fresh pairings that work well with heavier proteins. Alternatively, if you have leftover pork, it can be repurposed into something like pork bites with creamy bell pepper sauce for a different flavor profile the next day.
Frequently Asked Questions
You can, but pork loin is larger and leaner. You will need to slice it thinner and be even more careful not to overcook it, as it can become dry more quickly than tenderloin.
The key is to avoid overcooking. Sear the pork over high heat to get a crust, but remove it from the pan while the internal temperature is around 135°F. It will finish cooking to the safe 145°F during the final simmer in the gravy.
The ivory color comes from using heavy cream combined with a light-colored stock. If you use beef stock or cook the onions until they are dark brown, the sauce will be darker. Stick to chicken stock and golden-honey caramelized onions for that light ivory look.
If your gravy is too thin, allow it to simmer for an extra 2-3 minutes to reduce the liquid. The heavy cream and the natural starches from the onions will eventually emulsify into a thick, velvety sauce.
The Ultimate Pork Medallions in Onion Gravy Recipe
Pork Medallions in Onion Gravy with Creamy Garlic Butter
Ingredients
Equipment
Method
- Pat the pork medallions dry and season with salt and half the pepper.
- Heat oil in the cast iron skillet over medium-high heat. Sear medallions for 3-4 minutes per side until a deep golden-brown crust forms. Remove and set aside.
- Lower heat to medium, add butter and onions. Sauté until onions are translucent and golden, about 8-10 minutes.
- Add minced garlic bits and cook for 60 seconds until fragrant.
- Pour in stock and scrape the bottom of the pan to lift the fond.
- Stir in the heavy cream and simmer until the sauce is velvety and ivory-colored.
- Return pork to the skillet and simmer for 2 minutes to glaze with the sauce.
- Top with remaining black pepper and finely chopped green chives before serving.
Notes
Ensure the cream is at room temperature to prevent curdling when added to the pan.

Bring the Rustic Kitchen to Your Table
This dish of pork medallions in onion gravy is more than just a meal; it is a sensory experience. From the visual appeal of the glossy gravy to the comforting aroma of garlic and onions, it is sure to become a staple in your home cooking repertoire. The combination of professional techniques and simple, fresh ingredients results in a plate that looks as good as it tastes.
We invite you to share your results and tag us in your photos! If you enjoyed this recipe, please consider signing up for our newsletter for more culinary deep dives and follow us on Pinterest for daily inspiration. Happy cooking!