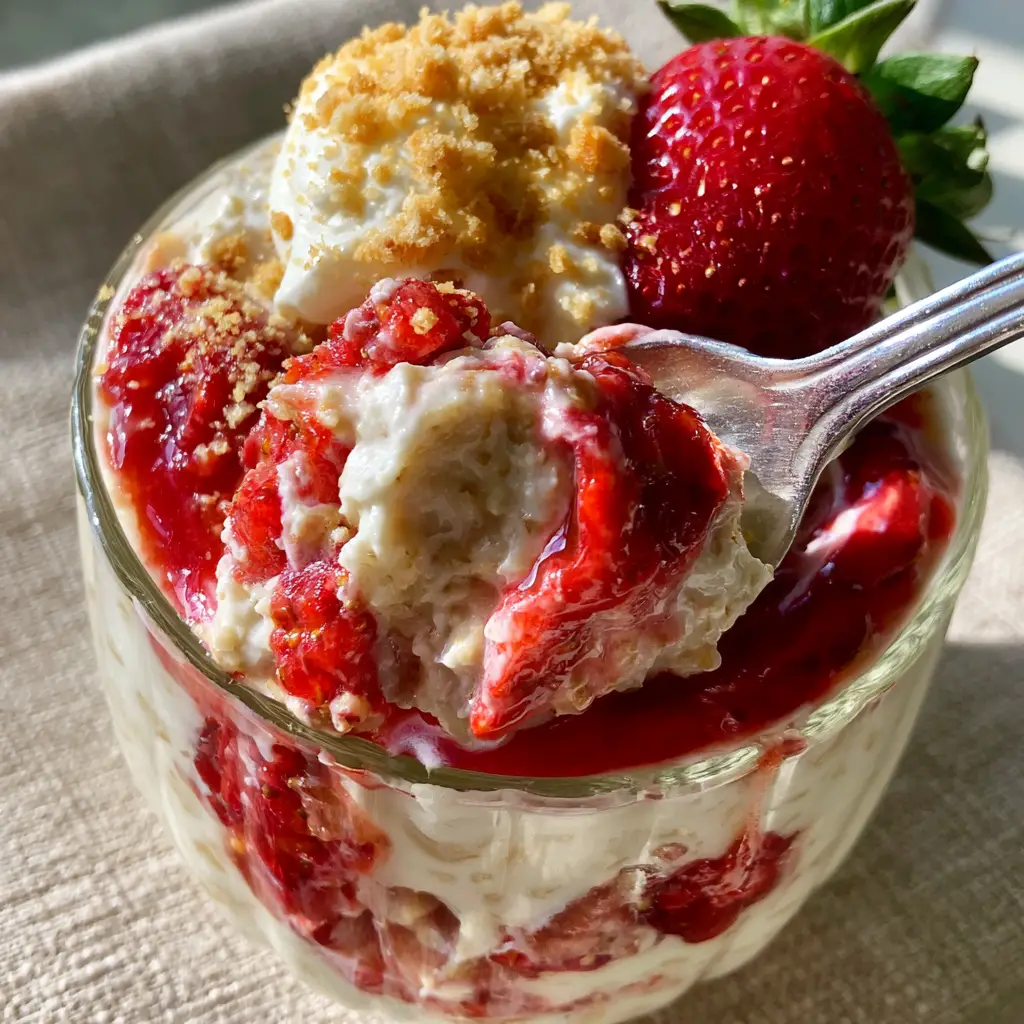
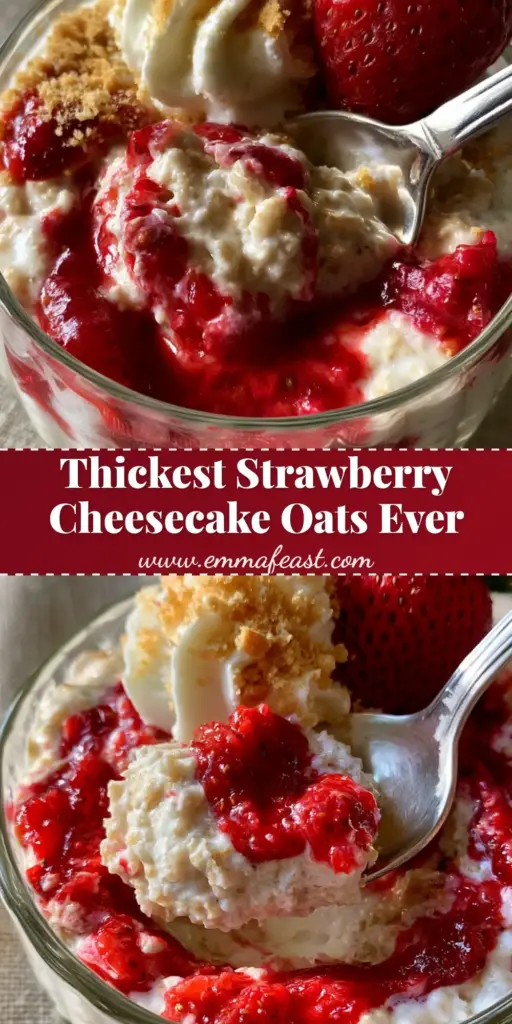
Imagine plunging a silver spoon into a heavy fluted glass jar and lifting a thick, velvety scoop that holds its shape perfectly. This isn’t just breakfast; it is a culinary experience that blurs the line between a healthy morning start and a gourmet dessert. These Strawberry Cheesecake Overnight Oats are designed for those who demand more from their meal prep—more texture, more flavor, and more visual satisfaction.
The secret lies in the architecture of the jar. We are moving away from the thin, soupy oats of the past and embracing a dense, pale cream-colored base of rolled oats and Greek yogurt. By layering vibrant, macerated bright red strawberry chunks with a thick, glossy strawberry coulis and a dollop of whipped cream cheese frosting, we create a breakfast that looks like it belongs on a professional food stylist’s set.
Why You Will Obsess Over This Strawberry Cheesecake Overnight Oats Recipe
- Structural Integrity: Unlike runny oat recipes, this version is thick and decadent, specifically formulated to provide that “heavy, textured scoop” seen in professional food photography.
- Triple-Layer Strawberry Profile: We utilize fresh whole strawberries, macerated strawberry chunks, and a glossy strawberry coulis to ensure every bite is bursting with berry intensity.
- Authentic Cheesecake Tang: The addition of a whipped cream cheese dollop and golden graham cracker crumbs provides the unmistakable salty-sweet finish of a classic New York cheesecake.
- Visual Masterpiece: With vibrant red swirls against a pale cream base, this recipe is as beautiful as it is delicious, making it the star of any brunch spread.
The Anatomy of a Decadent Jar: Essential Ingredients
Every ingredient in these Strawberry Cheesecake Overnight Oats serves a specific purpose, from providing structural density to balancing the acidic tang of the yogurt.
Thick Rolled Oats: Use 1/2 cup (45g) of old-fashioned rolled oats. Avoid instant oats, as they lack the necessary fiber and structure to achieve that non-runny, textured scoop we are looking for.
Dense Greek Yogurt: 1/2 cup (120g) of plain, full-fat Greek yogurt is the “glue” of this recipe. It provides the pale cream color and the thick, protein-rich body that makes the oats feel like a cheesecake filling.
Milk of Choice: 1/3 cup (80ml) of whole milk or unsweetened almond milk. This amount is precisely calibrated to hydrate the oats without turning the mixture into a liquid mess.
Fresh Strawberries: You will need 1 cup (150g) of strawberries, divided. Some will be macerated in sugar to create juicy chunks, while others are simmered into a glossy coulis.
Cream Cheese: 2 tbsp (30g) of softened cream cheese. This is whipped with a touch of maple syrup to create the iconic cheesecake dollop that sits atop the jar.
Graham Cracker Crumbs: 2 tbsp (15g) of crushed graham crackers. These provide a buttery, golden crunch that mimics a traditional cheesecake crust.
Pure Maple Syrup: 1 tbsp (15ml) added to the oat base. It provides a natural sweetness that complements the tartness of the macerated fruit and yogurt.
Vanilla Bean Paste or Extract: 1 tsp (5ml). This adds those tiny black flecks and a deep, aromatic warmth that elevates the “dessert” profile of the dish.
Essential Kitchen Tools for Jar Perfection
To achieve the visual result of a heavy, fluted glass jar filled with layers, you will need a few specific tools. A wide-mouth 12oz (350ml) glass jar is ideal for layering and allows for that dramatic silver spoon scoop.
A small saucepan is necessary for reducing the strawberries into a glossy coulis. You will also want a small whisk or an electric hand mixer to ensure the cream cheese dollop is light, airy, and “whipped” rather than dense and clumpy.
For the maceration process, a simple glass bowl and a fork will suffice to toss the strawberries with sugar and lemon juice. This process draws out the natural juices, creating those vibrant red chunks that swirl through the oats.
Building Your Masterpiece: Step-by-Step Instructions
Step 1: Hydrate the Oat Base
In your heavy glass jar, combine the 1/2 cup (45g) rolled oats, 1/2 cup (120g) Greek yogurt, 1/3 cup (80ml) milk, maple syrup, and vanilla. Stir vigorously until the mixture is uniform and the yogurt is fully integrated into the oats.
Seal the jar and refrigerate for at least 6 hours, though overnight is preferred. You are looking for a sensory cue where the mixture has thickened so much that a spoon can stand upright in the center without falling.
Step 2: Prepare the Macerated Strawberries and Glossy Coulis
While the oats soak, take half of your strawberries and dice them into 1/2-inch (1cm) chunks. Toss them with a teaspoon of sugar and a squeeze of lemon juice; let them sit for 20 minutes until they become glossy and surrounded by a thin red syrup.
Take the remaining strawberries and place them in a small saucepan over medium heat with a splash of water. Simmer for 5-7 minutes, mashing with a fork, until the liquid reduces into a thick, glossy strawberry coulis. Let this cool completely before layering.
Step 3: Whip the Cheesecake Topping
In a small bowl, beat the 2 tbsp (30g) of softened cream cheese with a teaspoon of milk and a drizzle of maple syrup. Whisk until it is light and fluffy, resembling a thick frosting.
This “dollop” is the crowning glory of the Strawberry Cheesecake Overnight Oats and provides the essential fat content that balances the acidity of the berries.
Step 4: The Final Assembly and Garnish
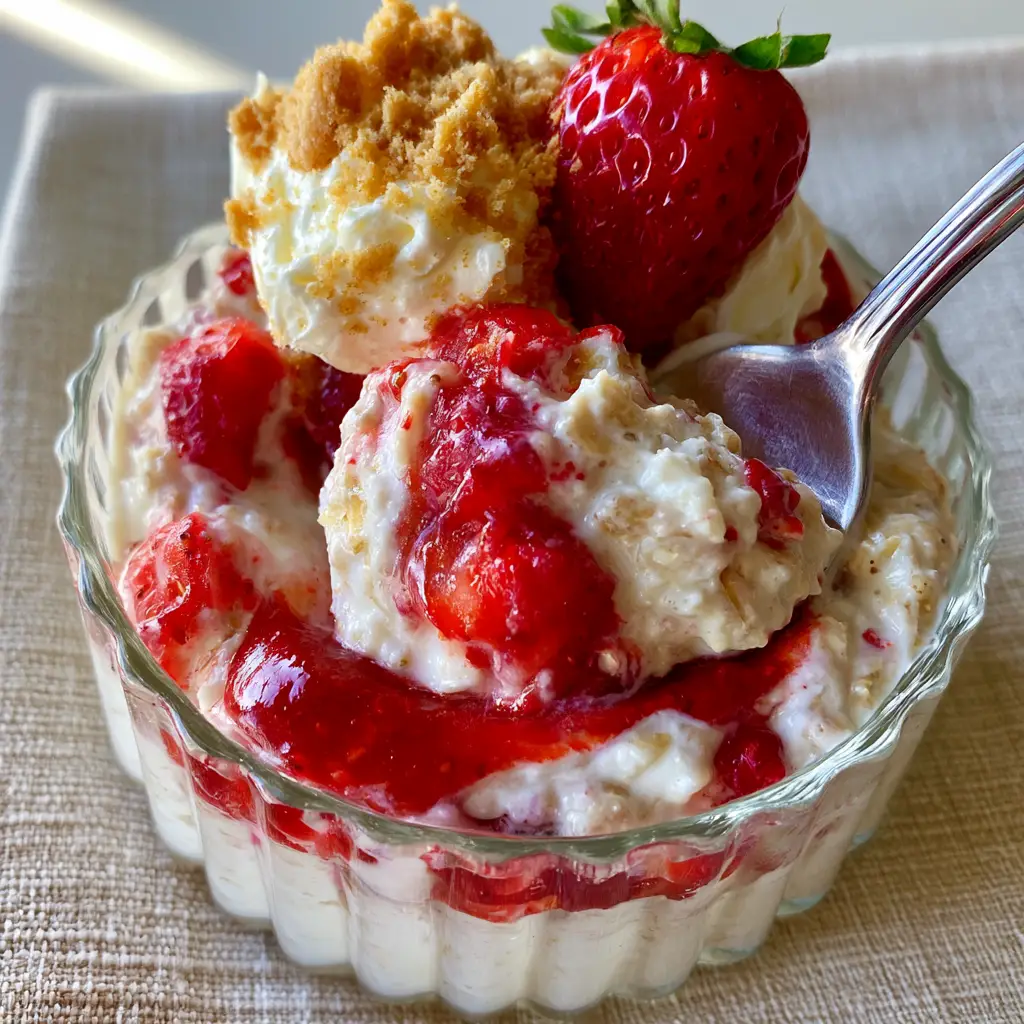
Open your chilled oat jar and use a spoon to create “wells” in the mixture. Swirl in the thick strawberry coulis and the macerated chunks, ensuring you can see the vibrant red contrast against the pale cream oats.
Top the mixture with the whipped cream cheese dollop, a heavy dusting of 2 tbsp (15g) golden graham cracker crumbs, and one perfectly whole fresh strawberry with the green leaves intact for a pop of color. Press a silver spoon into the side to see that heavy, textured scoop.
Pro Secrets for the Perfect “Cheesecake” Texture
- Temperature Matters: Ensure your cream cheese is at true room temperature before whipping. If it is too cold, the topping will be lumpy rather than a smooth, glossy dollop.
- The “No-Runny” Rule: If your oats look too thin after soaking, stir in an extra tablespoon of Greek yogurt. The goal is a dense, “spoonable” consistency that mimics a thick custard.
- Maceration Magic: Don’t skip the lemon juice when macerating the strawberries. The acid helps preserve the “vibrant bright red” color and prevents the fruit from turning a muddy brown.
- Crumble Timing: Add the graham cracker crumbs right before serving. This ensures they remain “buttery and golden” rather than absorbing moisture from the oats and becoming soggy.
Making Ahead: Storage and Freshness
These Strawberry Cheesecake Overnight Oats are a meal prepper’s dream. When stored in an airtight glass jar, the base oats will stay fresh for up to 4 days in the refrigerator. The texture actually improves after the first 24 hours as the oats fully soften into the yogurt.
However, for the best visual appeal and flavor, store the graham cracker crumbs separately in a dry container. The whipped cream cheese dollop is best added the morning you plan to eat the oats to maintain its airy, “frosting-like” peak.
If you find the oats have become too thick after several days, you can stir in 1 tbsp (15ml) of milk to loosen the texture slightly, though many prefer the ultra-dense, cheesecake-like consistency that develops over time.
How to Serve and Pair for a Complete Breakfast
While these oats are a complete meal on their own, they also fit perfectly into a larger brunch spread. If you are hosting a morning gathering, consider pairing these jars with some savory freezer breakfast burritos to balance the sweetness of the cheesecake.
For those who love a high-protein start to the day, you might also enjoy exploring my high-protein cheesecake jars which use similar flavors in a different format. If you’re looking for something warm and savory to contrast the cold oats, these avocado toast ideas provide the perfect crunchy accompaniment.
Finally, if you find yourself with extra berries, don’t let them go to waste. You can use them to top some cornmeal pancakes or even bake them into blueberry lemon pie bars for a weekend treat.
Frequently Asked Breakfast Questions
Yes! Frozen strawberries work perfectly for the glossy coulis. However, for the macerated chunks and the whole strawberry garnish, fresh berries provide the best texture and visual appeal.
The secret to the ‘golden buttery’ crunch is timing. Store the crushed crackers in a separate container and sprinkle them over the whipped cream cheese dollop just before you eat.
For the best ‘cheesecake’ consistency, a minimum of 6 hours is required. Overnight (8-10 hours) is ideal for the oats to fully absorb the liquid and reach their maximum density.
Absolutely. By using 1/2 cup of dense Greek yogurt and rolled oats, this recipe provides approximately 18g of protein per jar, making it a satisfying and filling breakfast.
Runny oats are usually the result of too much liquid or using low-fat yogurt. To achieve our signature ‘heavy scoop,’ ensure you use dense Greek yogurt and stick to the 1/3 cup milk ratio.
The Full Strawberry Cheesecake Overnight Oats Recipe Card
Strawberry Cheesecake Overnight Oats: The Ultimate Decadent Meal Prep Guide
Ingredients
Equipment
Method
- In a heavy fluted glass jar, stir together oats, Greek yogurt, milk, maple syrup, and vanilla until thick and pale cream-colored. Refrigerate for at least 6 hours.
- Dice half the strawberries and toss with sugar and lemon juice. Let sit for 20 minutes until glossy and juicy.
- Simmer the remaining berries in a saucepan with a splash of water for 5 minutes until it forms a thick, glossy strawberry coulis. Cool completely.
- Swirl the coulis and macerated chunks into the oats. Top with a dollop of whipped cream cheese, graham cracker crumbs, and a whole strawberry.
Notes
Add graham cracker crumbs just before eating to maintain their golden, buttery crunch.
Final Thoughts and Community Love
Mastering the Strawberry Cheesecake Overnight Oats is a game-changer for your morning routine. It proves that eating a nutritious, fiber-filled breakfast doesn’t mean sacrificing the luxury of a decadent dessert. With its thick, non-runny texture and vibrant berry layers, this is a recipe you’ll want to make on repeat.
If you made this recipe, I would love to see your jars! Share your photos and tag me, and don’t forget to follow my latest culinary creations on Pinterest. Happy prepping!