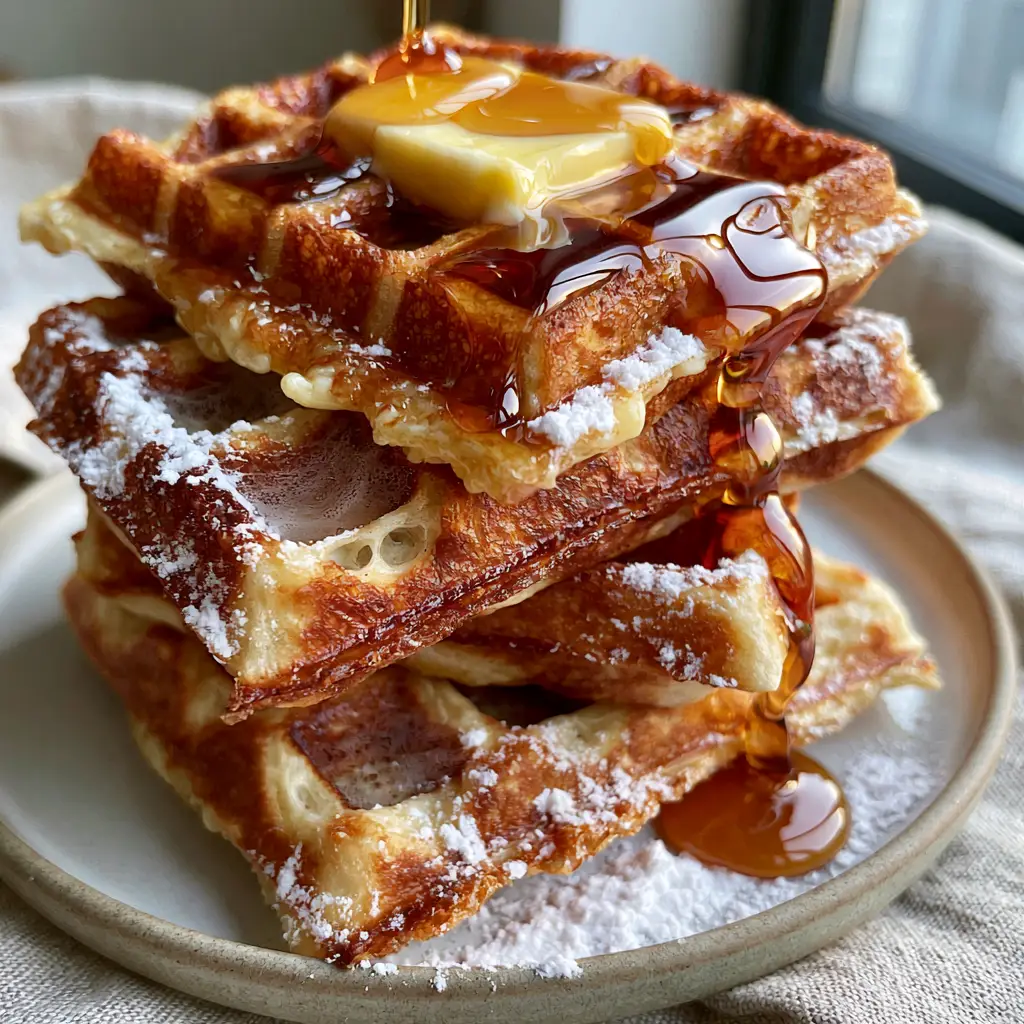
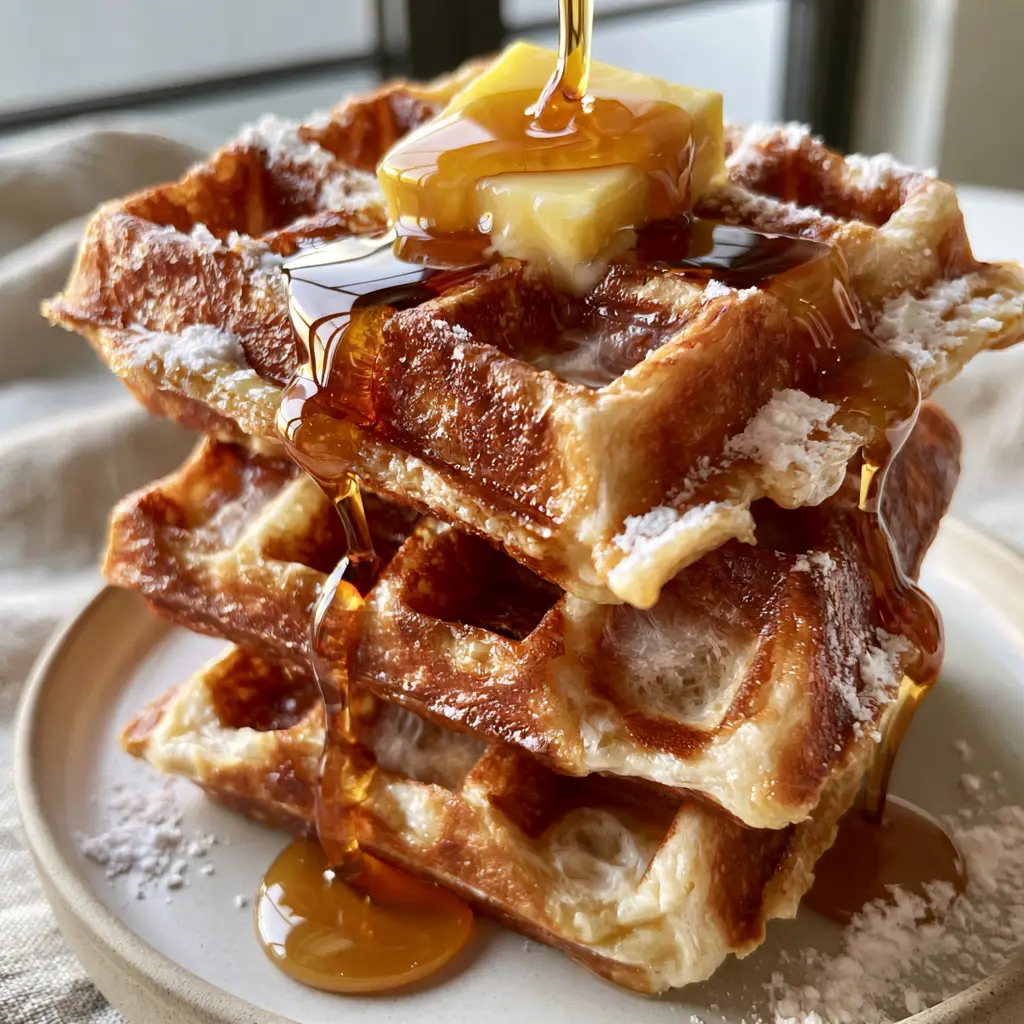
There is a specific, nostalgic magic in a plate of fluffy waffles that are served exactly as they appear in a gourmet café: a tall stack of three thick Belgian rounds, boasting deep, well-defined square pockets and a perfectly toasted, golden-brown crispy exterior. When you pull them from the iron, you should see those delicate steam wisps rising from the ridges, promising a center that is as light as a cloud.
To achieve the visual perfection of a rich, viscous amber maple syrup pour glistening over the peaks and a generous square of melting salted butter softening into the ridges, you need more than just a basic batter. You need a recipe engineered for structural integrity and sensory delight. This guide will walk you through the culinary science required to create that delicate, uneven dusting of fine powdered sugar over a crust that shatters with every forkful.
Whether you are looking for a weekend indulgence or a way to elevate your brunch game, mastering fluffy waffles is a rite of passage for any home cook. By focusing on the Maillard reaction for that golden hue and the aeration of proteins for that interior lift, we can bridge the gap between a simple breakfast and a visual masterpiece.
The Science of the Perfect Belgian Texture
- Shatter-Crisp Exterior: A combination of cornstarch and melted butter ensures a toasted, golden-brown crust that stays crunchy even under a heavy pour of syrup.
- Steam-Filled Airy Centers: By separating the eggs and whipping the whites to stiff peaks, we fold in millions of tiny air bubbles that expand during cooking.
- Deep-Pocket Definition: A high-fat, high-moisture batter allows the waffles to rise fully into the deep squares of your Belgian iron, creating those iconic reservoirs for butter and syrup.
- Visual Golden Glow: The precise balance of sugar and buttermilk promotes caramelization, resulting in the warm, natural tones seen in professional food photography.
Pantry Staples for the Fluffiest Result
All-Purpose Flour (250g / 2 cups): This provides the necessary gluten structure to hold those deep square pockets without becoming tough or chewy.
Cornstarch (30g / 1/4 cup): The secret weapon for a “toasted golden-brown crust,” cornstarch inhibits excessive gluten development, resulting in a crispier finish.
Granulated Sugar (25g / 2 tbsp): Beyond sweetness, sugar is essential for the Maillard reaction, giving the waffles their characteristic amber hue and crispy edges.
Baking Powder (10g / 2 tsp) and Baking Soda (2g / 1/2 tsp): This dual-leavening approach ensures an immediate rise when the batter hits the heat and a light, airy center.
Buttermilk (480ml / 2 cups): The acidity in buttermilk reacts with the baking soda to create carbon dioxide, while the thickness keeps the batter from running out of the iron.
Unsalted Butter, Melted (115g / 1/2 cup): High-quality fat provides the “premium yellow butter” flavor and ensures the exterior fries against the iron plates.
Large Eggs (2 units): Separating the eggs is vital; the yolks add richness and color, while the whites provide the “airy steam-filled centers.”
Pure Vanilla Extract (5ml / 1 tsp) and Salt (3g / 1/2 tsp): These “foundational invisible ingredients” enhance the aromatics and balance the richness of the maple syrup pour.
Essential Tools for Waffle Success
To recreate the “matte white ceramic plate” aesthetic and the perfect cook, you will need a deep-pocket Belgian waffle iron. A standard iron won’t provide the thick, substantial stack required for this visual recipe. Additionally, an electric hand mixer is crucial for whipping the egg whites to the stiff peaks that create those internal steam wisps. A fine-mesh sieve is also recommended for that “delicate, uneven dusting of fine powdered sugar” at the very end.
If you enjoy this texture profile, you might also want to try our crispy classic waffles or explore how different flours change the crumb with our oat flour waffles. For those who love a bit of spice, our cinnamon waffles are an excellent alternative.
Engineering the Batter: Step-by-Step Instructions
Phase 1: Preparing the Foundation
In a large mixing bowl, whisk together the flour, cornstarch, sugar, baking powder, baking soda, and salt. Ensure there are no clumps, as cornstarch tends to settle; a uniform dry mix is the key to a consistent golden-brown crust across the entire surface of the waffle.
Phase 2: The Wet Emulsion
In a separate medium bowl, whisk the buttermilk, melted (and slightly cooled) butter, vanilla extract, and the two egg yolks. You want this mixture to be fully emulsified before it touches the dry ingredients to prevent over-mixing, which leads to rubbery waffles rather than fluffy waffles.
Phase 3: The Secret to Airy Centers
In a clean glass or metal bowl, beat the egg whites on high speed until they form stiff, glossy peaks. This is the most important step for achieving that “visible airy, steam-filled center.” The whites should stand straight up when the beaters are lifted, indicating they are ready to provide structural lift.
Phase 4: Folding and Resting
Gently pour the wet ingredients into the dry ingredients and stir until just combined—a few lumps are perfectly fine. Then, using a silicone spatula, gently fold the whipped egg whites into the batter. Do not over-mix; you should still see small white streaks, which will translate into steam-filled pockets during the bake.
The Art of the Golden-Brown Bake
Preheat your Belgian waffle iron to a medium-high setting. Once the indicator light signals it is ready, lightly grease the plates with a neutral oil spray. Pour approximately 3/4 cup (180ml) of batter into the center, allowing it to spread slightly toward the edges.
Close the lid and wait. The most important sensory cue here is the steam; when the steam wisps stop billowing out of the sides of the iron, the waffle is usually done. Aim for a deep golden-brown exterior. Carefully remove the waffle and place it on a wire rack for 30 seconds—this allows the crust to set and become truly crispy before hitting the plate.
Expert Tips for the Ultimate Stack
- The Flour Factor: For an even crispier result, substitute 1/4 cup of the flour with rice flour. It creates a shatter-like texture that pairs perfectly with “rich, viscous amber maple syrup.”
- Avoid the Sog: Never stack hot waffles directly on top of each other until you are ready to serve. If they sit on a plate for too long, the steam trapped between them will soften that toasted crust.
- Temperature Control: If your first waffle is too dark on the outside but raw in the middle, lower the temperature of your iron. Fluffy waffles need enough time to rise internally before the exterior caramelizes too far.
- The “Rest” Trick: Letting your batter rest for 5-10 minutes (before adding the egg whites) allows the flour to hydrate fully, leading to a more tender crumb.
Creative Pairings and Serving Suggestions
While these waffles are a masterpiece on their own with “thick amber maple syrup” and “melted salted butter,” they also make a fantastic base for savory dishes. Try serving them alongside our spicy honey chicken tenders for a classic soul food pairing. If you’re looking for a lighter start, they pair beautifully with a side of strawberry cheesecake overnight oats for a diverse brunch spread.
For more breakfast inspiration, don’t miss our cornmeal pancakes or the convenient freezer breakfast burritos for busy weekday mornings.
Safe Storage and Reheating Techniques
Fluffy waffles are best enjoyed fresh, but they freeze exceptionally well. To store, let the waffles cool completely on a wire rack. Place them in a single layer on a baking sheet and freeze for one hour, then transfer them to a freezer-safe bag. They will stay fresh for up to 3 months.
To reheat and restore that toasted golden-brown crust, skip the microwave. Instead, pop them into a toaster or a 350°F (175°C) oven for 5-8 minutes. This dry heat evaporates any ice crystals and recrisps the exterior pockets perfectly.
Your Questions About Waffle Perfection
You can whisk the dry and wet ingredients separately the night before, but do not combine them or whip the egg whites until you are ready to bake. The leavening agents lose their potency quickly once activated.
Buttermilk is highly recommended because its acidity reacts with baking soda to create a superior rise and tender crumb. If you don’t have it, you can use whole milk with a tablespoon of lemon juice added.
You must use a Belgian waffle iron, which has a deeper grid pattern than standard irons. Ensure you use enough batter to fill the grids completely so the waffle reaches the top plate.
Place cooked waffles in a single layer on a wire rack in a 200°F (95°C) oven. This keeps them warm and allows air to circulate, preventing the steam from making the toasted crust soggy.
The most common reason for dense waffles is over-mixing the batter or failing to whip the egg whites. For truly fluffy waffles, you must fold in whipped egg whites gently to keep the air pockets intact.
The Signature Fluffy Waffle Recipe
Fluffy Waffles: The Ultimate Crispy Belgian Recipe with Airy Centers
Ingredients
Equipment
Method
- In a large bowl, whisk together flour, cornstarch, sugar, baking powder, baking soda, and salt.
- In a separate bowl, whisk buttermilk, melted butter, egg yolks, and vanilla until smooth.
- Using a hand mixer, beat egg whites in a clean bowl until stiff, glossy peaks form.
- Gently stir the wet mixture into the dry ingredients. Carefully fold in the whipped egg whites until just incorporated.
- Pour batter into a preheated Belgian waffle iron. Cook until the exterior is toasted golden-brown and steam stops escaping.
- Stack three waffles, top with a square of salted butter, a dusting of powdered sugar, and a heavy pour of amber maple syrup.
Notes
Use cornstarch for a crunchier, toasted golden-brown crust.
Join the Community & Share Your Creations
We want to see your tall stacks! If you’ve mastered the art of the perfect maple syrup pour or achieved that elusive airy center, share your photos and tag us. Leave a comment below with your favorite toppings or any questions you have about the process. For more visual inspiration and daily recipe updates, follow us on Pinterest and join our growing community of enthusiastic home cooks.